Home Appliances / Cookers & Ranges
User Manual for Bertazzoni Professional Series Free-Standing Induction Cooker
Comprehensive user guide for Bertazzoni Professional Series free-standing induction cookers. Includes installation instructions, induction hob operation, oven functions, automatic programmer settings, cleaning, and troubleshooting.
Table of contents
Manual images
Click an image to enlargeImportant Information from the Manual
This manual provides essential instructions for the installation, operation, and maintenance of Bertazzoni Professional Series free-standing induction cookers. Before using the appliance, ensure all packaging is removed and the oven is heated to 200°C for 30 minutes to burn off manufacturing residues. Always use appropriate cookware for the induction hob and follow safety guidelines regarding hot surfaces and child safety.
Installation
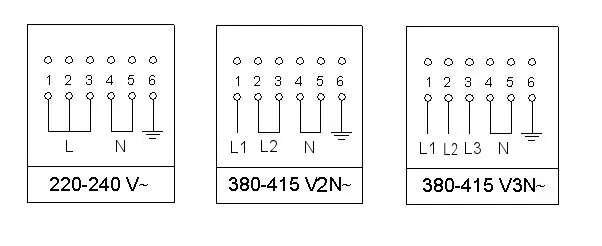
Installation must be performed by skilled personnel. Ensure the cooker is positioned in a well-lit area free from draughts. Maintain a minimum distance of 660mm above the hotplate for any combustible material. The cooker can be installed as a freestanding unit or between walls, provided specific clearance requirements are met. Ensure the electrical connection complies with local regulations and that the appliance is properly earthed.
Induction Hob Operation
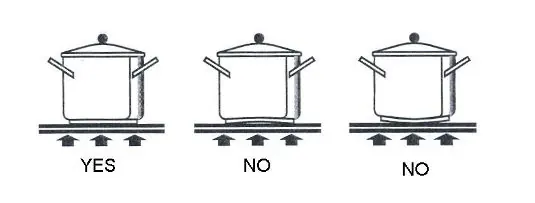
The induction hob features multiple cooking zones with power levels from 1 to 9, plus a Booster (P) and Heating Accelerator (A) function. Use the control knobs to adjust power. The hob includes a 'pan present' device and residual heat indicators. Use only induction-compatible cookware with a flat, magnetic bottom. A child lock can be activated by turning the two left knobs simultaneously to the 'A' position and holding for 3 seconds.
Oven Functions
The oven offers various cooking modes, including True Fan, Fan Assisted, and Conventional. Use the 'Fast preheat' function to quickly reach the desired temperature before switching to your chosen cooking mode. The thermostat maintains a constant temperature, indicated by an orange light. For PRO T models, an automatic programmer allows for delayed starts and timed cooking cycles.

Cleaning and Maintenance
Regular cleaning is essential. Disconnect the electricity supply before cleaning. Use a soft cloth, warm water, and washing-up liquid for most surfaces. Avoid abrasive cleaners, steam cleaners, or metal spatulas on the glass door and hob. The oven door and inner glass panes can be removed for thorough cleaning. Stay clean liners, if fitted, can be cleaned by heating the oven to maximum temperature.
Troubleshooting
If the oven does not operate, check the power supply and ensure the programmer is set to manual mode. If burners do not ignite, check for power and ensure burner components are clean and seated correctly. If food cooks too quickly, reduce the temperature by 20°C when using fan functions compared to conventional settings.
Practical help
Common problems
Oven will not operate
Check power supply and ensure the automatic programmer is set to manual mode.
Burners will not ignite
Check power supply, ensure burner rings and caps are seated firmly, and clean ignition candles.
Food cooking too quickly
If using a fan function, reduce the cooking temperature by 20°C compared to conventional cooking.
Condensation in oven
Pre-heat the oven before use to reduce condensation.
Before use
- Remove all packaging and protective films from the interior and exterior.
- Ensure the electrical system matches the requirements on the rating plate.
- Check that the cooker is level using the adjustable feet.
- Heat the oven to 200°C for 30 minutes to burn off manufacturing residues.
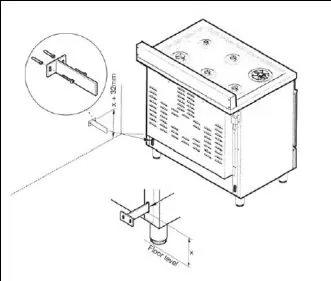
- Ensure the anti-tilt restraint is correctly installed.
Specs in practice
- Fast preheat
- A quick pre-heating function; not suitable for cooking food.
- Fan Assisted
- Uses top and bottom elements plus fan; provides more browning, suitable for roasting.
Images and diagrams
- Fig 1A/1B: Installation clearance requirements.
- Fig 11: Support leg installation.
- Fig 13: Anti-tilt bracket installation.
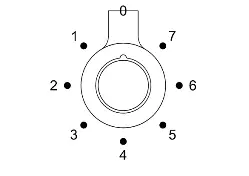
- Fig 20A/20B: Grill control knob settings.
- Fig 27A/27B: Oven function selector knob.
Model compatibility
- Induction hob requires iron or steel/iron pans.
- Do not use glass, porcelain, or pottery on the induction hob.
- Do not use steam cleaners for any part of the appliance.
- Maximum weight for the rotisserie is 3.5 kg.

Manual page author
Emily Carter
User documentation editor
Prepares concise manual descriptions and highlights the most useful setup, operation, and maintenance information for readers.