Home Appliances / Cookers & Ranges
Installation Guide for Frigidaire Rear Filler 11NBRRFLSS
Step-by-step installation instructions for the Frigidaire Rear Filler accessory. Learn how to safely attach the filler to your front control freestanding range.
Manual images
Click an image to enlargeImportant Safety Information
Before beginning the installation of the rear filler, ensure the following safety precautions are taken:
- Disconnect Power: Always disconnect the electrical power to the range before starting any installation or service work.
- Cool Surfaces: Ensure the appliance is turned off and all surfaces are cool to the touch. Attempting to service the appliance while it is hot may result in burns or other injuries.
Installation Instructions
Follow these steps to install the rear filler on your range:

- Remove Screws: Locate the three screws across the top rear of the range. Remove and keep these screws for later use.
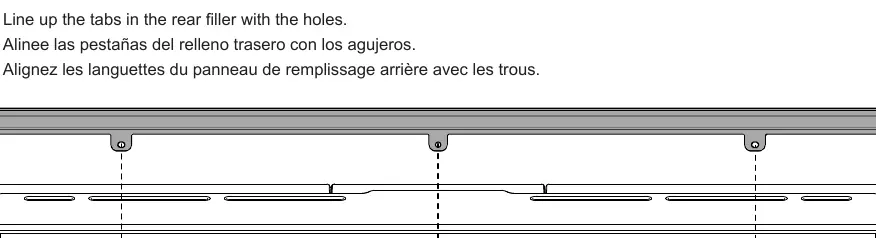
- Align Filler: Position the rear filler so that the tabs on the filler align with the holes on the back of the range.
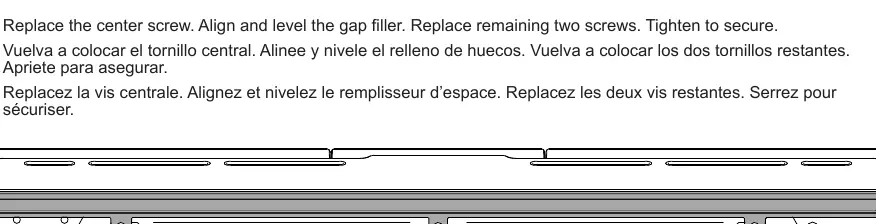
- Secure Filler: Replace the center screw first to hold the piece in place. Align and level the gap filler as needed. Once aligned, replace the remaining two screws and tighten all three to secure the filler to the range.
Manufacturer information
Frigidaire
Practical help
Common problems
Appliance is hot
Wait for the range to cool down completely before attempting installation to avoid burns.
Power is still connected
Disconnect the electrical power to the range before beginning installation.
Before use
- Ensure the range is turned off
- Disconnect electrical power
- Verify surfaces are cool to the touch
- Have a screwdriver ready for the three mounting screws
Images and diagrams
- The installation process involves removing three screws from the top rear of the range.
- The rear filler piece features tabs that must be aligned with the existing screw holes on the range chassis.
- The final step requires leveling the filler before tightening the screws to ensure a proper fit.
Model compatibility
- This accessory is designed specifically for Frigidaire Front Control Freestanding Ranges.

Manual page author
Emily Carter
User documentation editor
Prepares concise manual descriptions and highlights the most useful setup, operation, and maintenance information for readers.