Electronics / Projectors
User Manual for BOL X5 Smart Wi-Fi Projector
Quick guide for the BOL X5 Smart Wi-Fi Projector. Learn about setup, projection distance, keystone correction, wireless screen mirroring, and troubleshooting.
Table of contents
Manual images
Click an image to enlargeQuick Start Guide
Before using the projector, ensure you have purchased 2 AAA batteries for the remote control, as they are not included. Follow these steps to get started:
- Install batteries in the remote control.
- Plug the power cord into an outlet.
- Remove the lens cover.
- Rotate the adjustable foot to level the projector on a flat surface.
- Press the power button to turn on the projector.
Safety Warnings
- Do not look directly into the lens while the projector is working.
- Do not cover the vents on the side of the projector.
- Keep the projector away from damp environments to avoid electrocution.
- Unplug the power cord if the projector will not be used for a long time.
- Disassembly must only be performed by a qualified technician.
- Use a dry, soft cloth to clean the projector.
Installation and Setup
The recommended projection screen size is 100 inches at a distance of approximately 10.04ft (3.06m). The projector is best used in dark or low-light environments.
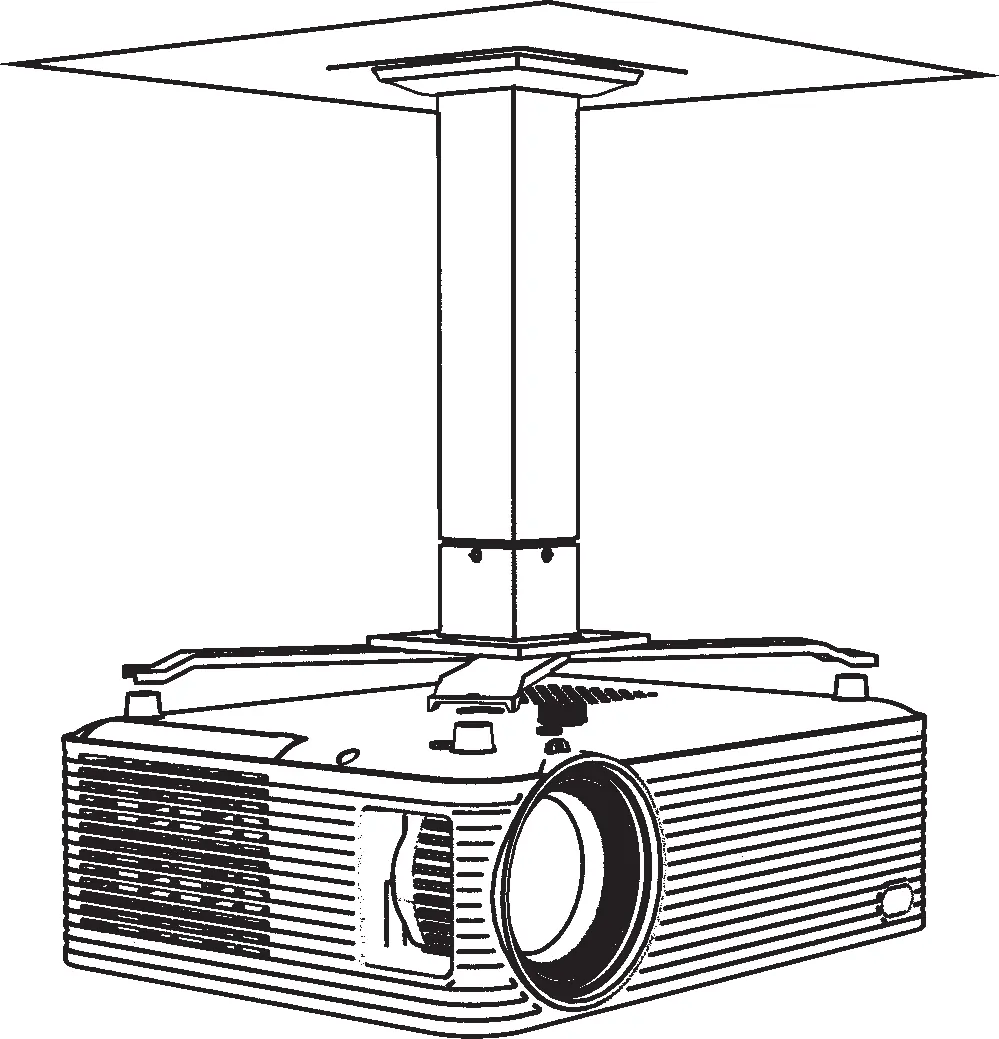
Ceiling Mount: To mount the projector on the ceiling, remove the rubber gaskets on the four corners of the bottom of the projector. After installation, go to Setting » Projection Image Setting » Projection Mode to flip the image.
Focusing: Rotate the focus knob on the projector until the picture is clear.
Keystone Correction
Press the keystone button on the remote control to enter the projection image setting interface. You can choose between two methods:
- Keystone Advanced: Select "Keystone Advanced" » "Front", then adjust "Vertical Keystone" and "Horizontal Keystone". You can also use "Digital Zoom" (50% to 100%).
- 4-Point Keystone: Adjust each of the four corners individually until the screen is rectangular.
Connectivity and Mirroring
Bluetooth: Go to Setting » Bluetooth Setting to search for and connect to external audio devices. Note that this function supports audio devices only, not phones or computers.
Wi-Fi: Go to Setting » WiFi Setting to search for and connect to your local network.
Wireless Screen Mirroring:
- iOS: Connect the projector and your iOS device to the same Wi-Fi network. Select "HummingBirdCast" on the projector, then open "Screen Mirroring" in the iOS Control Center and select "BirdCast-XXXX".
- Android: Select "MiraCast" on the projector. Turn on the wireless projection function on your Android device and select "NEWLINK-XXXX" from the list.
Maintenance and Troubleshooting
Cleaning: Open the cover on the bottom of the projector to access and clean the dust filter.

Warm Tips:
- Heat: The projector generates heat due to the built-in LED bulb; this is normal.
- Copyrighted Content: Apps like Netflix, Disney, and Amazon prohibit direct projection. Use a TV Stick to watch content from these services.
- USB Drives: If your USB flash drive exceeds 32GB, format it to NTFS.
- No Image/Sound Only: If you experience sound but no image during mirroring, this is a copyright protection issue, not a projector defect.
Practical help
Common problems
No image, only sound during screen mirroring
This is a video copyright issue (e.g., Netflix/Disney/Amazon). Use a TV Stick instead of direct mirroring.
Remote control not working
The remote does not include batteries. Purchase and install 2 AAA batteries.
USB drive not recognized
If the drive capacity exceeds 32GB, the format must be changed to NTFS.
Projector overheating
Heat generation is normal due to the built-in LED bulb.
Before use
- Purchase 2 AAA batteries for the remote control.
- Ensure the projector is placed on a flat surface or mounted securely.
- Remove the lens cover.
- Ensure the projector is in a dark or low-light environment for best results.
- Check that the projector vents are not covered.
Specs in practice
- Recommended Projection
- 100 inches at a distance of 10.04ft (3.06m).
- Digital Zoom
- Adjustable range from 50% to 100%.
Images and diagrams
- Packing List: Includes projector, power cable, HDMI cable, remote, spare dust filter, and manual.
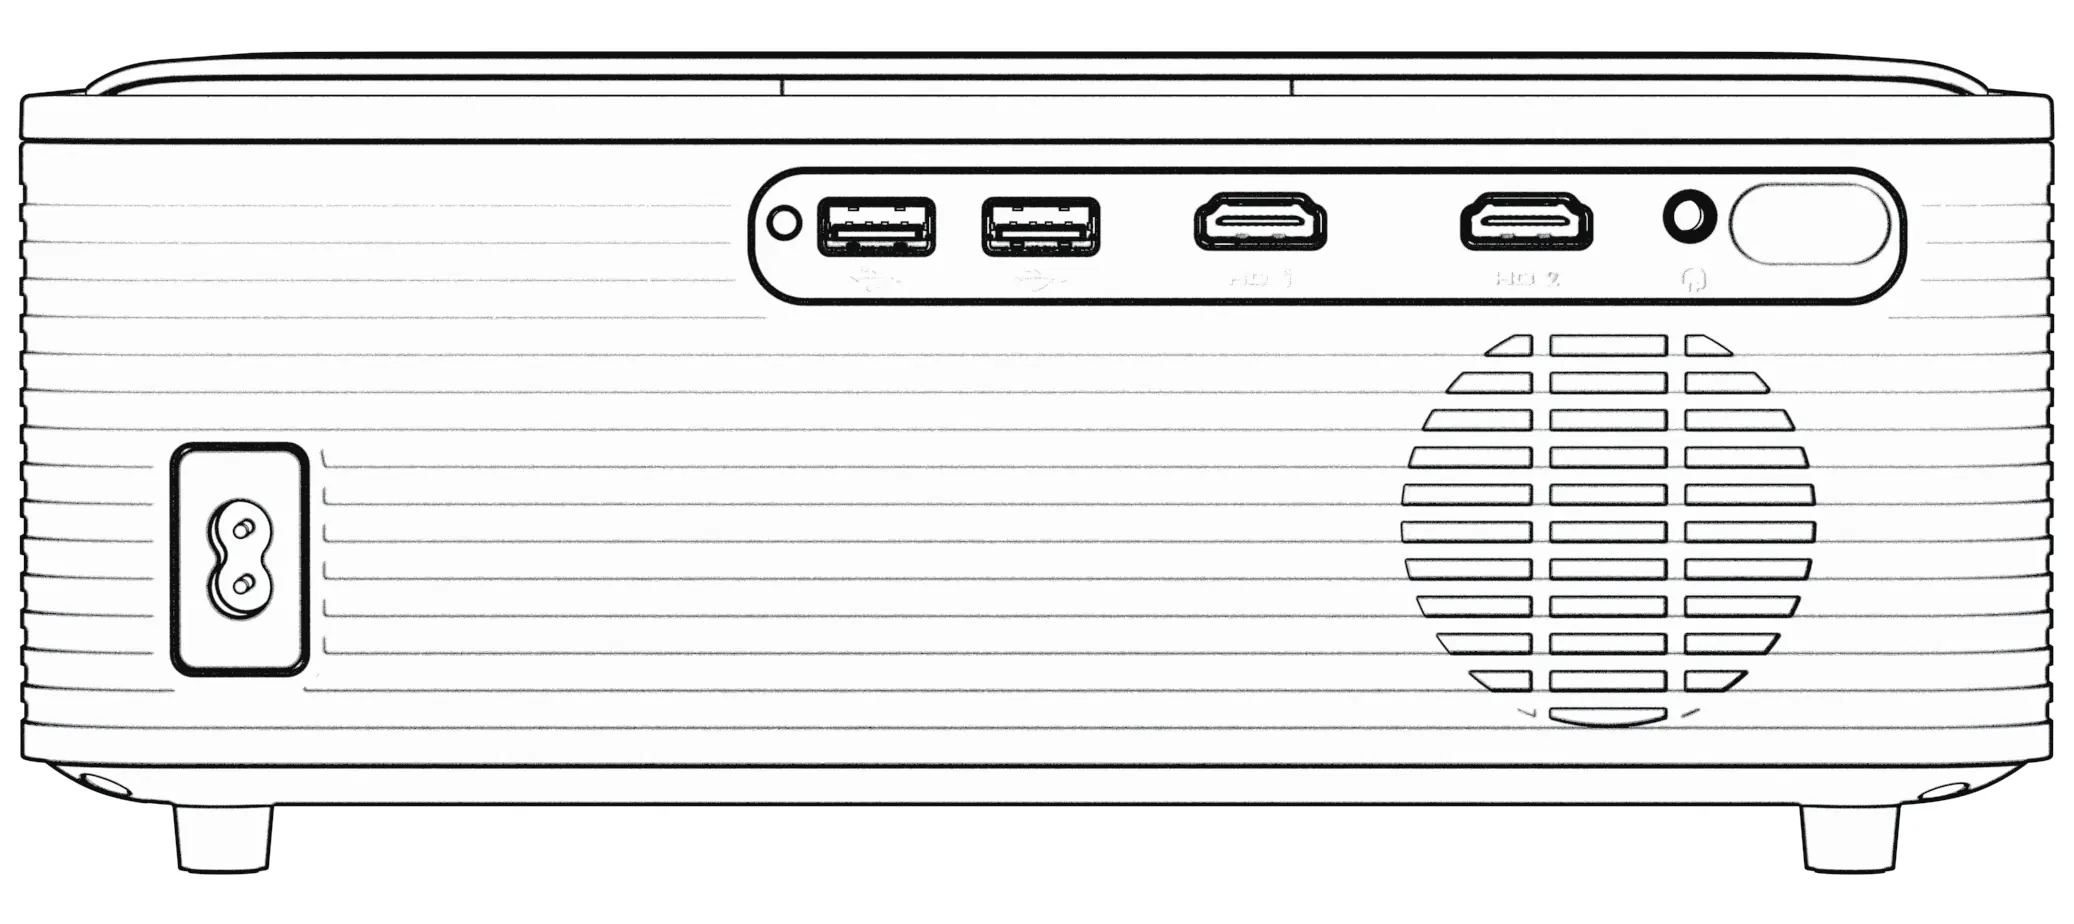
- Ports: Includes USB, HDMI, and Audio Out ports.
- Dust Filter: Located on the bottom of the projector; accessible by opening the cover.
Model compatibility
- Bluetooth: Supports audio devices only (speakers/headphones); does not support phones, tablets, or computers.
- Streaming Services: Netflix, Disney, and Amazon require a TV Stick due to copyright restrictions.

Manual page author
Emily Carter
User documentation editor
Prepares concise manual descriptions and highlights the most useful setup, operation, and maintenance information for readers.