Electronics / Projectors
User Manual for Croma 1080p Smart Projector
Quick guide for the Croma 1080p Smart Projector. Learn how to install, connect, adjust image settings, use Eshare/AirPlay, and manage network and system settings.
Table of contents
Manual images
Click an image to enlargeQuick Start Guide
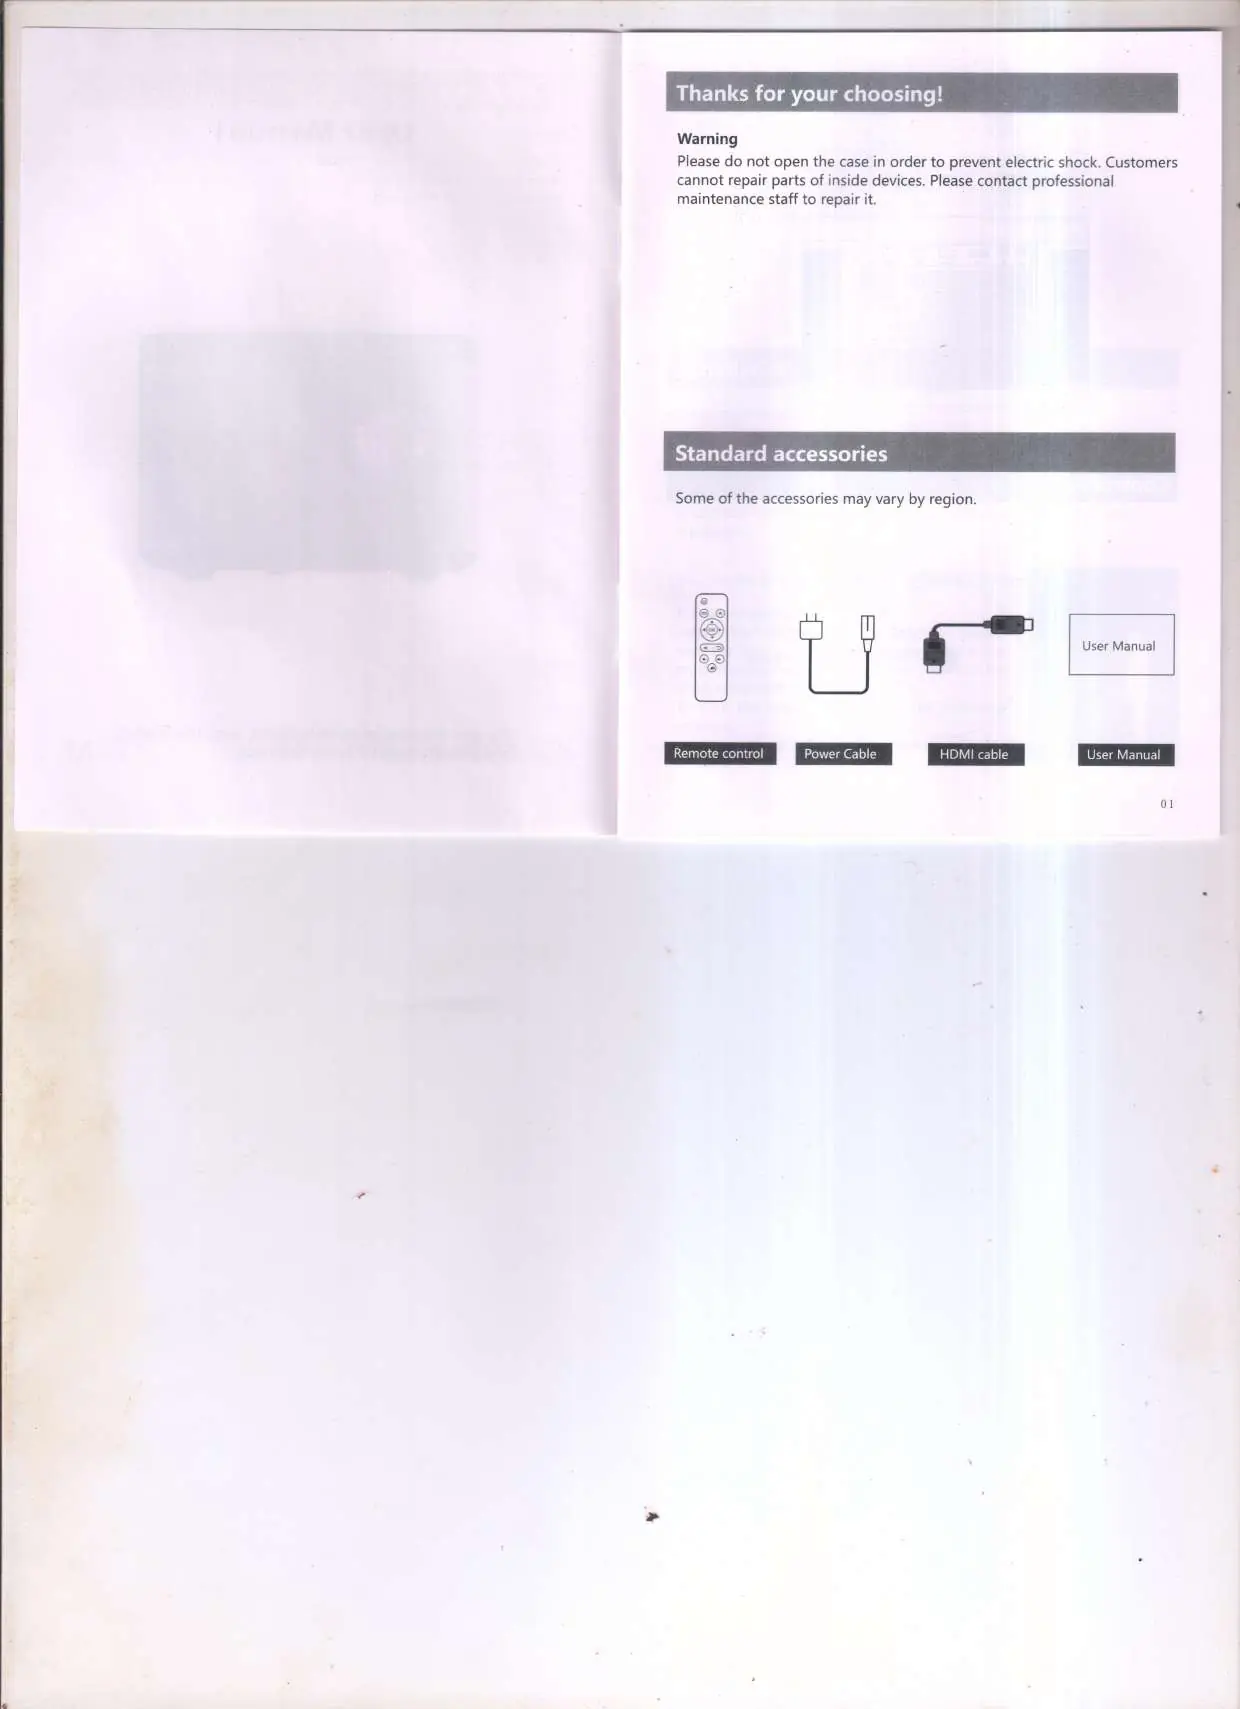
This guide provides essential information for setting up and operating your Croma 1080p Smart Projector. Before use, ensure you have all standard accessories: remote control, power cable, and HDMI cable. Place the projector in a dry, clean environment and ensure ventilation holes are not obstructed.
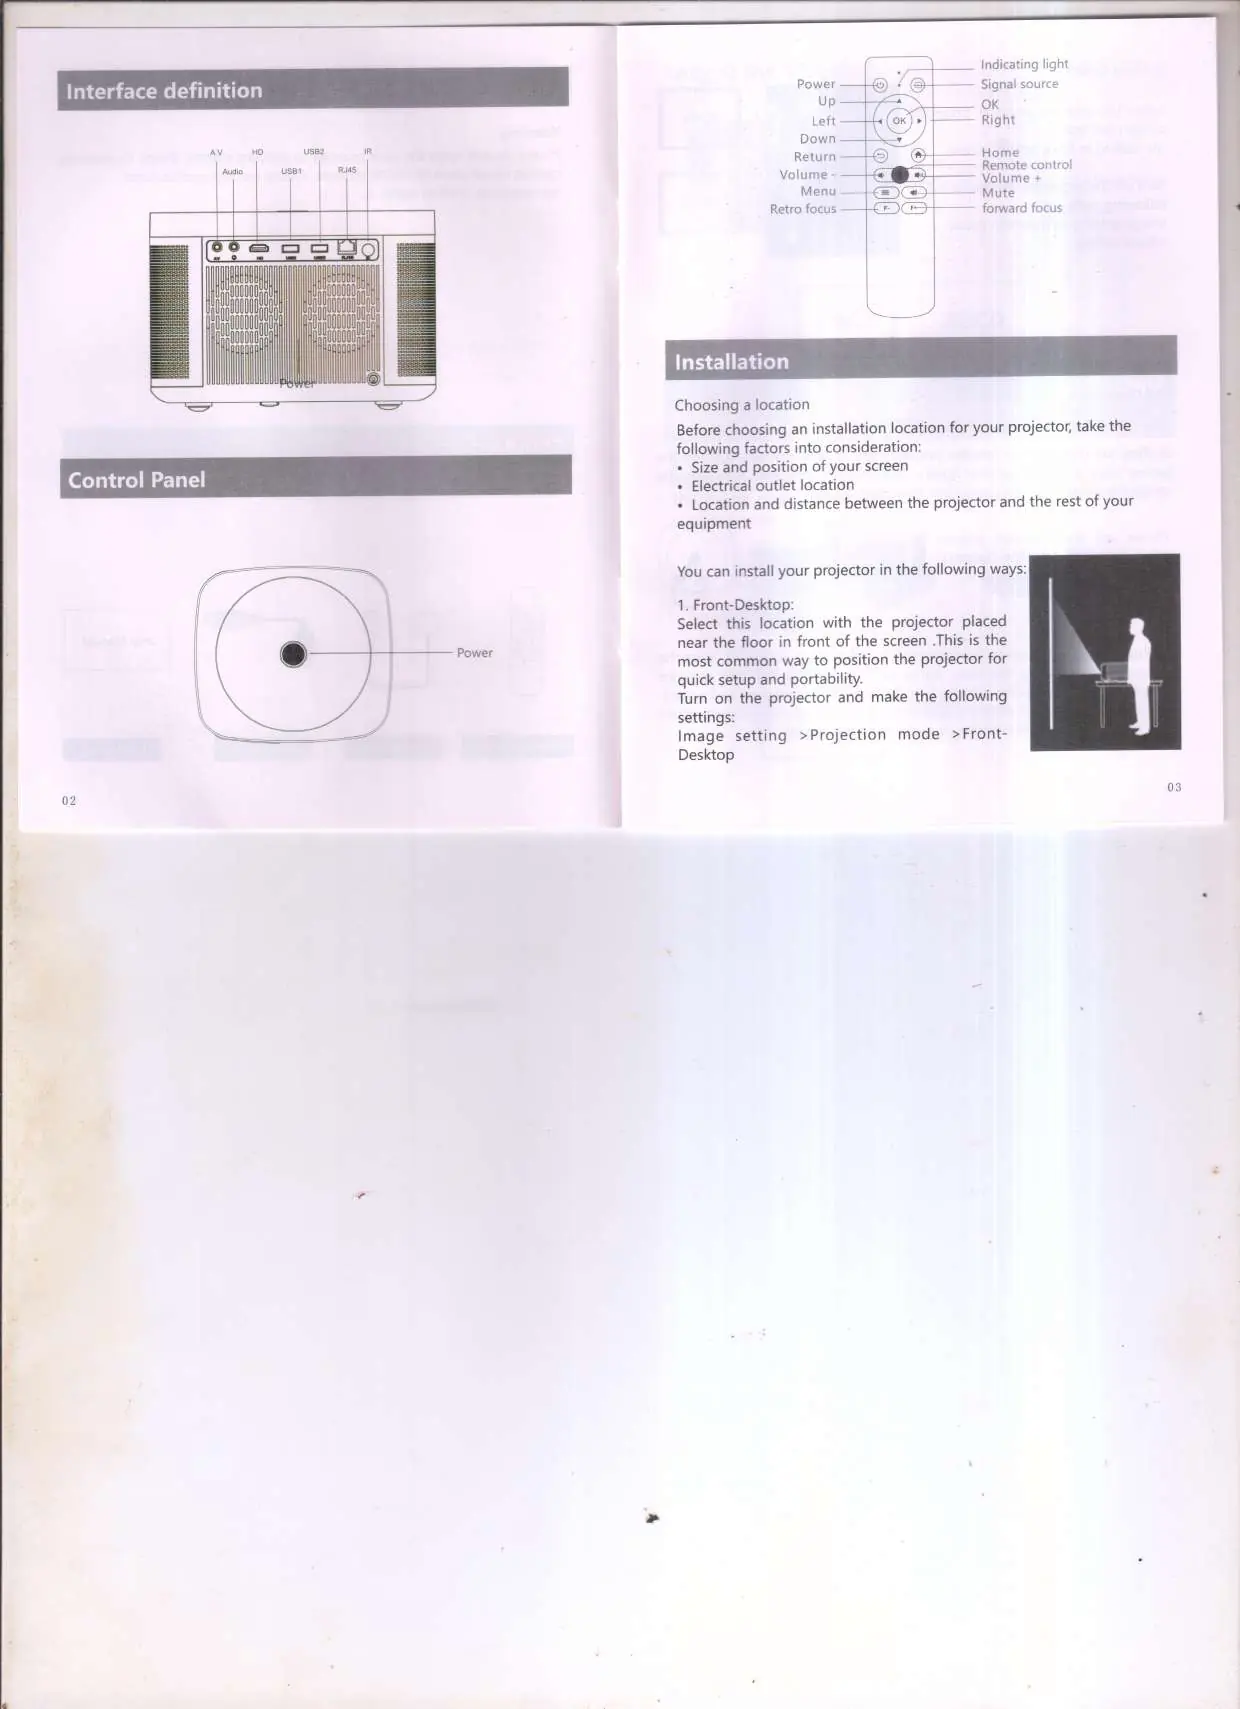
Interface and Control Panel
The projector features various input ports including AV, Audio, HD, USB1, USB2, and RJ45. The control panel on the device allows for basic navigation and power control. Use the remote control for full access to settings, volume, and menu navigation.
Installation and Setup
Before choosing an installation location, consider the screen size, position, and proximity to an electrical outlet. The projector supports multiple installation methods:
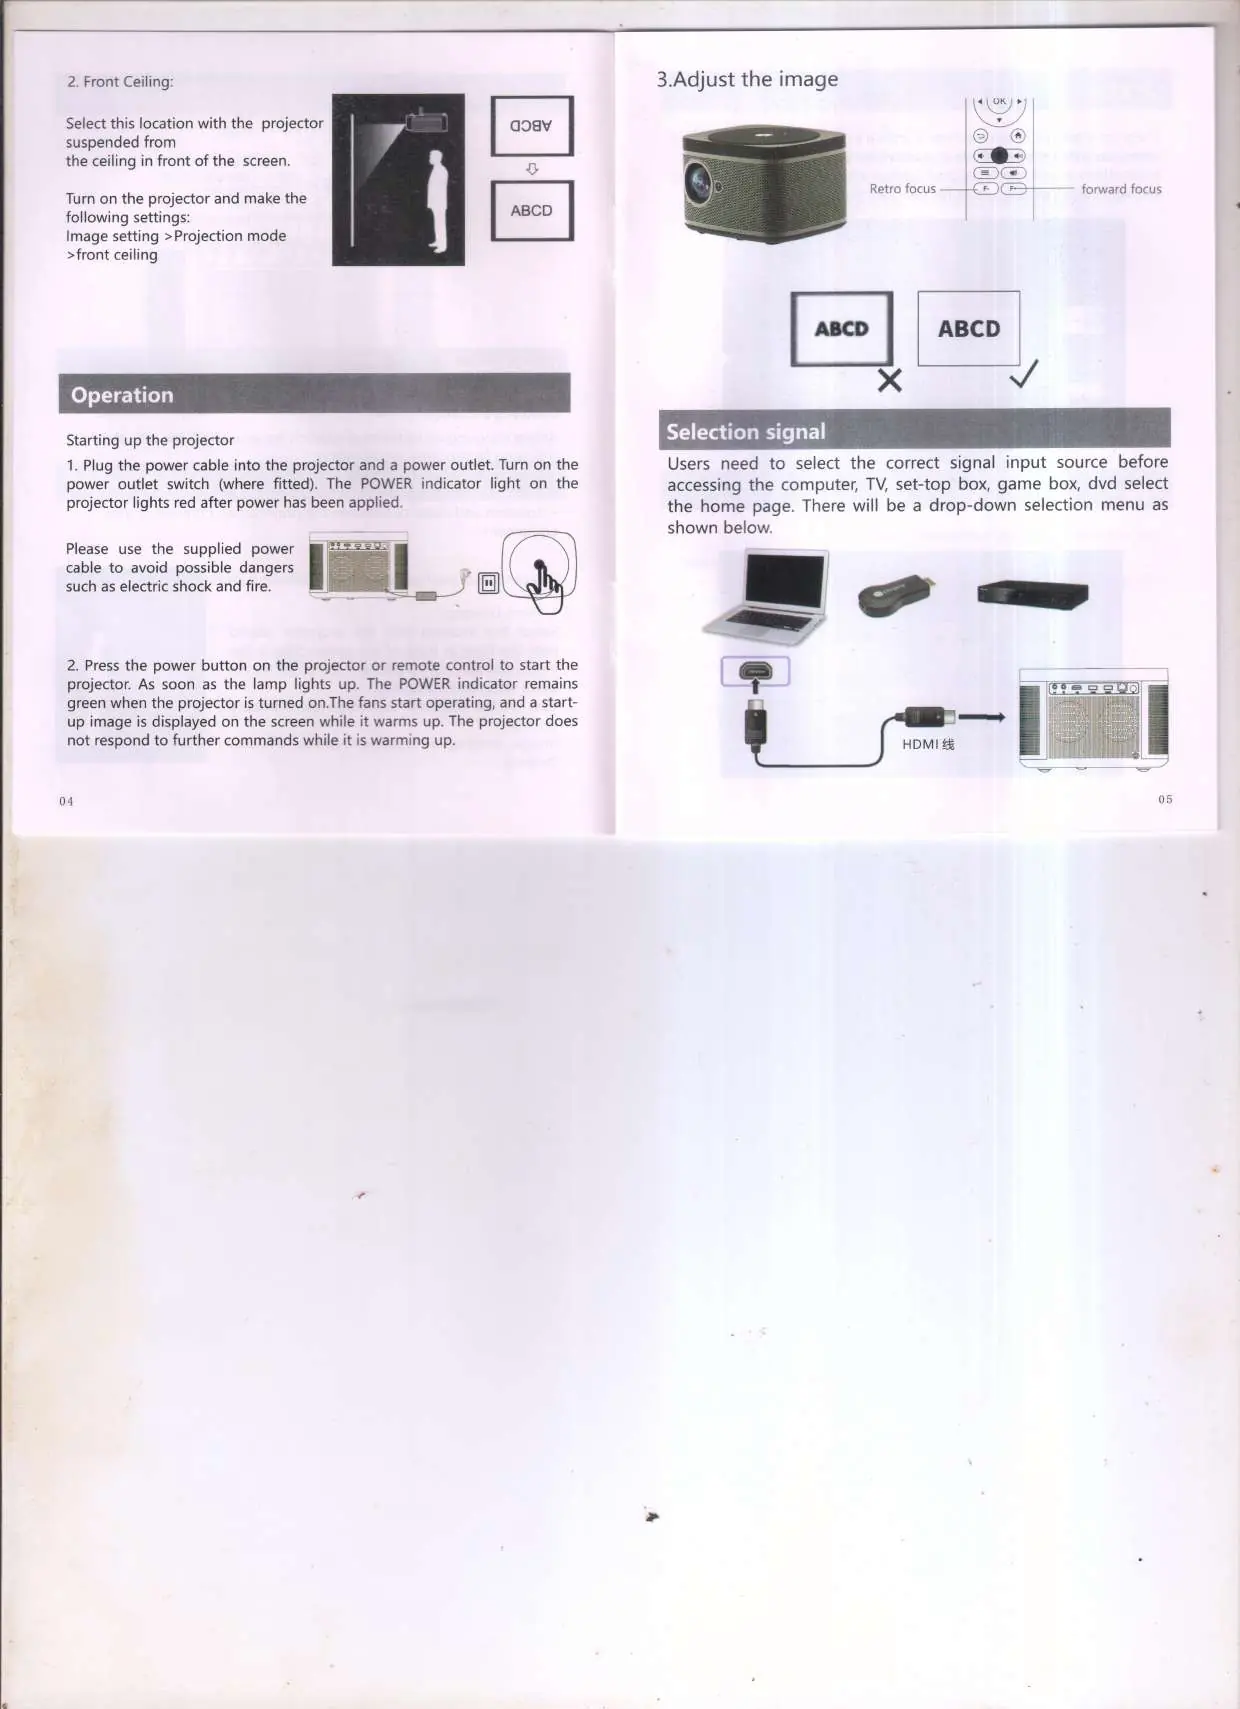
- Front-Desktop: Place the projector in front of the screen. In settings, select Image setting > Projection mode > Front-Desktop.
- Front-Ceiling: Suspend the projector from the ceiling in front of the screen. In settings, select Image setting > Projection mode > Front-Ceiling.
Operation and Signal Selection
To start the projector, plug in the power cable and press the power button. The projector will warm up; it will not respond to commands during this time. To display content from external devices like computers or game consoles, connect the device via HDMI and select the correct signal input source from the home page menu.
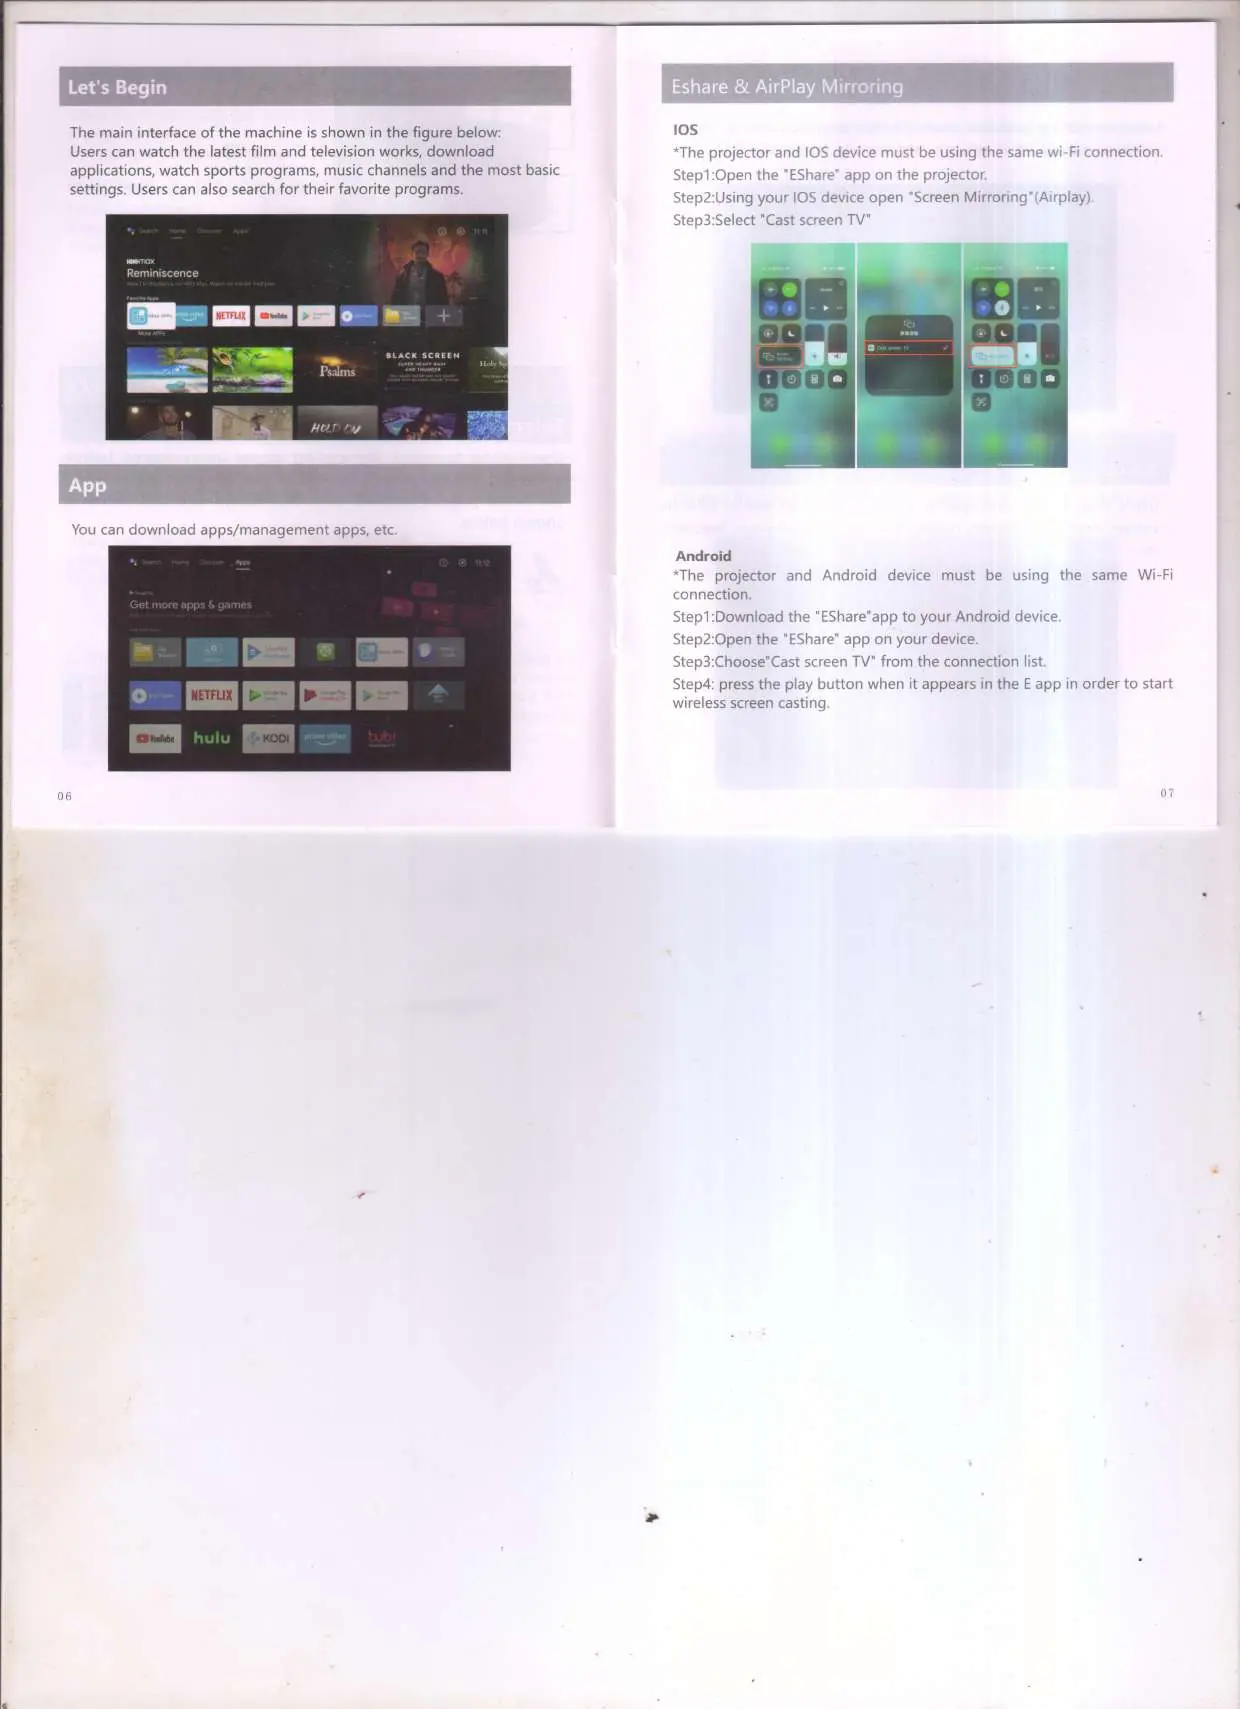
Wireless Mirroring and Connectivity
The projector supports wireless screen casting:
- iOS: Ensure the projector and iOS device are on the same Wi-Fi network. Open the Eshare app on the projector, then use Screen Mirroring (AirPlay) on your iOS device to select Cast screen TV.
- Android: Download the Eshare app on your Android device. Connect to the same Wi-Fi network, open the app, and select Cast screen TV from the connection list.
System Settings and Adjustments
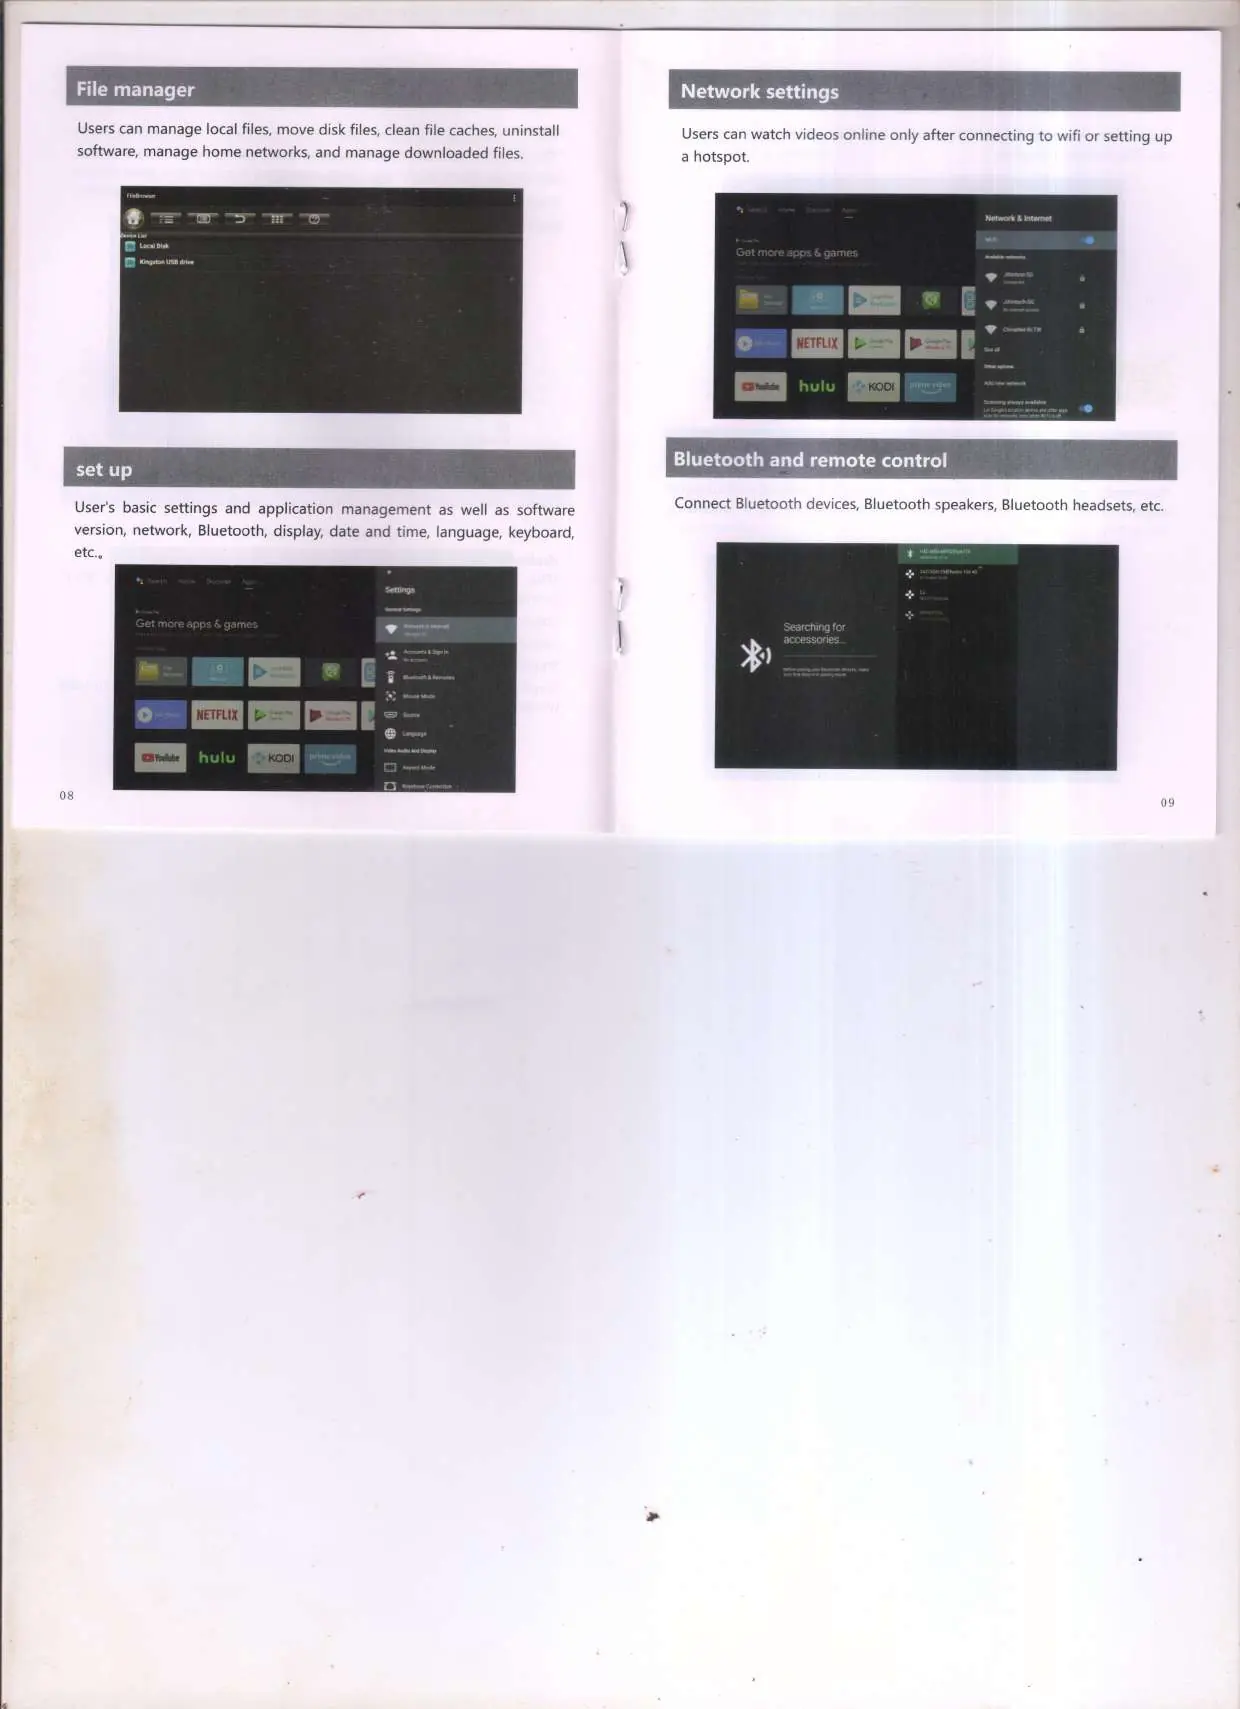
Access the settings menu to manage the following:
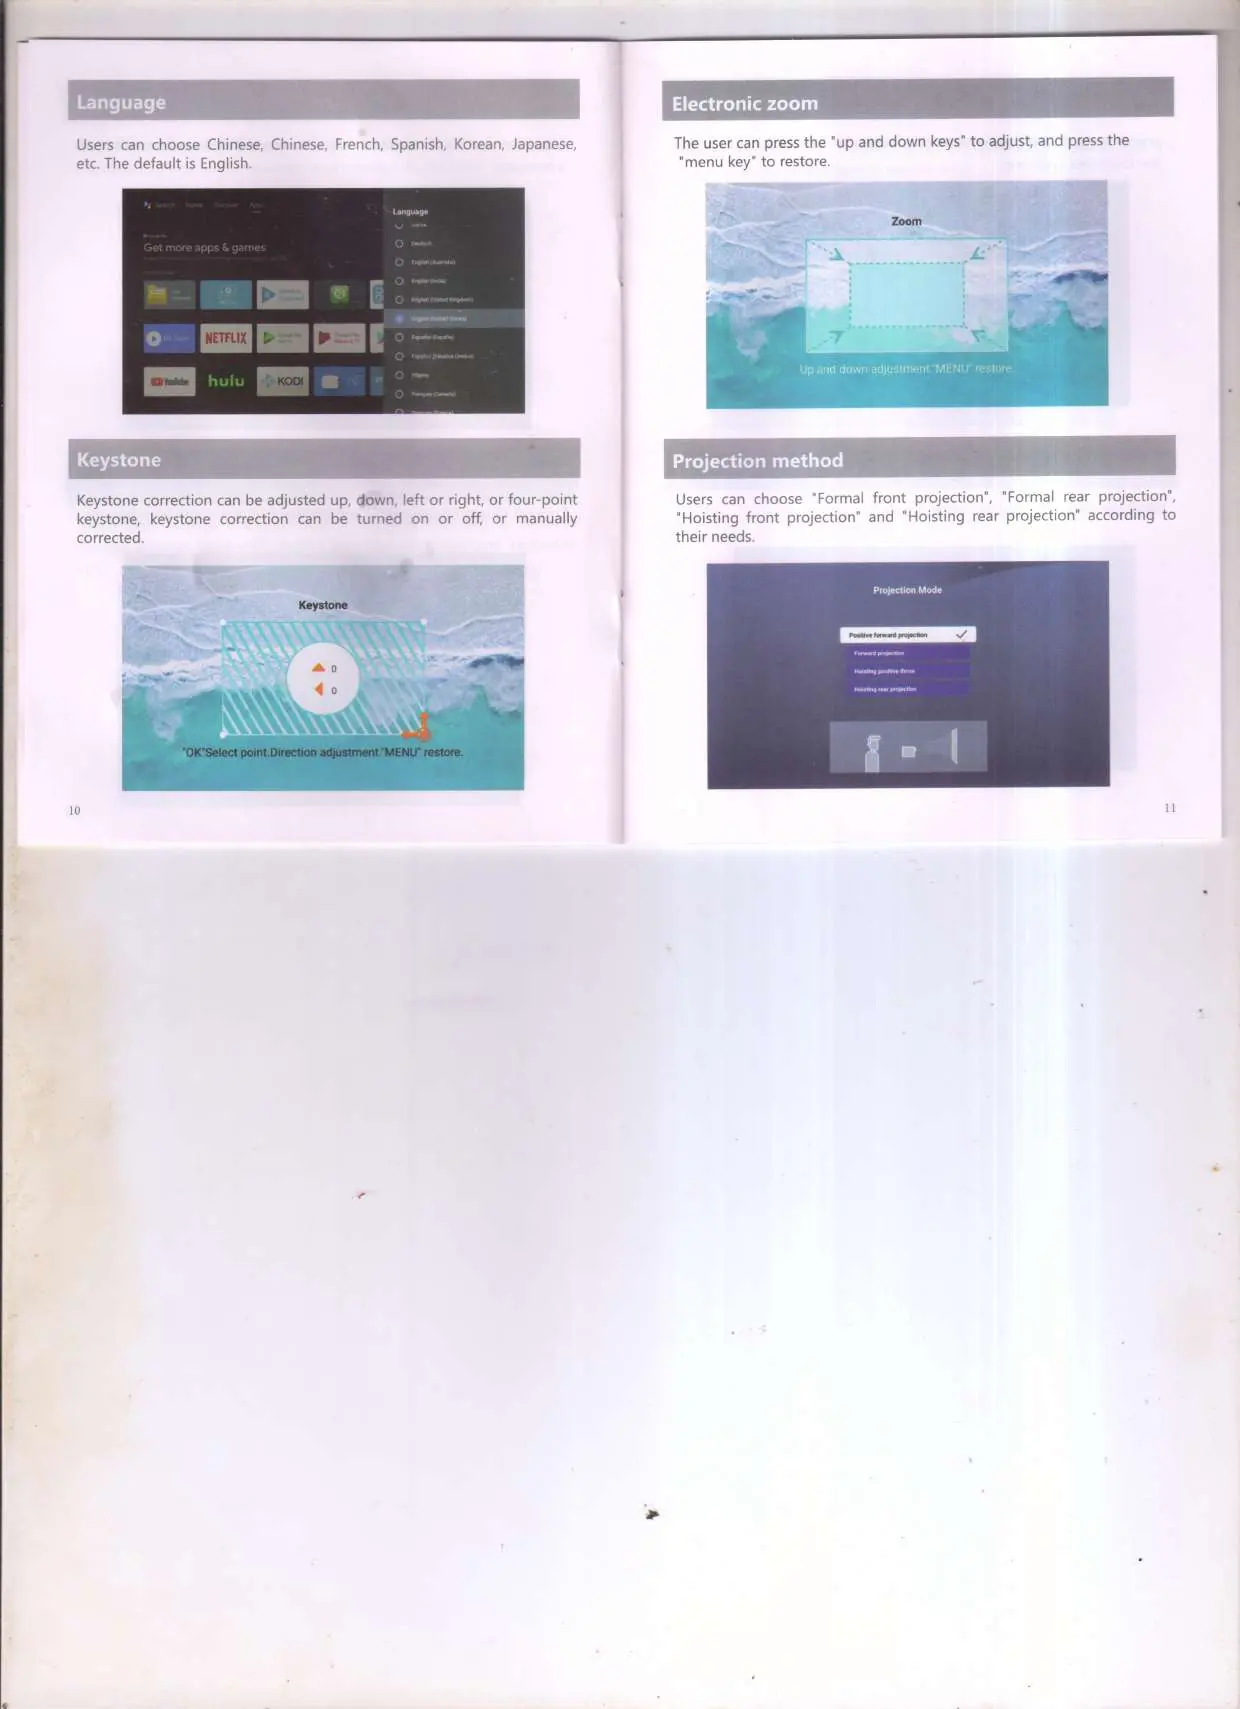
- Language: Change the system language.
- Keystone: Adjust the image shape (up, down, left, right, or four-point correction).
- Electronic Zoom: Resize the projected image using the remote control.
- Projection Method: Select between front/rear and ceiling mounting modes.
- Network: Connect to Wi-Fi or set up a hotspot.
- Bluetooth: Connect external speakers or headsets.
- Date and Time: Enable automatic retrieval for local time.
- Update: Perform online or local software updates.
Safety Warnings
- Use the product only for its intended purpose.
- Do not look directly into the lens while the projector is operating.
- Keep ventilation holes clear; do not place objects like vases or cups near the projector.
- Do not disassemble or attempt to repair the device yourself; contact professional maintenance staff.
- Turn off and disconnect the power supply if the projector will not be used for an extended period.
Practical help
Common problems
Projector does not respond while warming up
Wait for the projector to finish the startup sequence; it will not respond to commands during this phase.
Image is distorted
Use the Keystone correction feature in the settings menu to adjust the image shape.
Cannot connect to wireless display
Ensure both the projector and your mobile device are connected to the exact same Wi-Fi network.
Before use
- Verify all standard accessories are included (Remote, Power Cable, HDMI cable).
- Ensure the projector is placed in a dry and clean environment.
- Check that the power outlet is compatible.
- Remove any obstructions from the ventilation holes.
- Ensure the projector is positioned correctly for your chosen installation method (Desktop/Ceiling).
Specs in practice
- Electronic Zoom
- Allows resizing the projected image using the remote control.
- Projection Mode
- Settings to flip the image for different mounting positions (Front/Ceiling).
Images and diagrams
- Interface Definition: Shows the location of AV, Audio, HD, USB, and RJ45 ports.
- Control Panel: Illustrates the physical buttons on the projector for power and navigation.
Model compatibility
- Supports iOS and Android devices via Eshare/AirPlay.
- Supports HDMI input from computers, TV boxes, game consoles, and DVD players.

Manual page author
Emily Carter
User documentation editor
Prepares concise manual descriptions and highlights the most useful setup, operation, and maintenance information for readers.