Lighting / Lamp Accessories
User Guide for Commercial Electric 2-Light Rechargeable Puck Light 23212KIT-WH
Quick guide for the Commercial Electric 2-Light Rechargeable Puck Light (23212KIT-WH). Learn how to install, charge, and operate your puck lights, including under-cabinet mounting and magnetic work light usage.
Quick answers from the manual
Quick answer
- The Commercial Electric 2-Light Rechargeable Puck Light (23212KIT-WH) is a versatile lighting solution that can be installed under cabinets or used as a portable work light. It features magnetic mounting and is charged via a Type C connector. p. 1
Key actions
- Install under cabinet p. 1
- Use as work light p. 1
First start
- Charge the light p. 1
Problems and fixes
Light not turning on
Ensure the light is charged. Push the lens to turn ON/OFF.
p. 1Where to find it in the PDF
- Installation and Operation p. 1
Table of contents
Quick guide from the manual
This guide covers the installation and operation of the Commercial Electric 2-Light Rechargeable Puck Light (23212KIT-WH). This device is designed for indoor use and offers two primary installation methods: under-cabinet mounting or as a portable work light.
Installation
Option 1: Under-Cabinet Light
- Attach the charging base with adapter (B) to the desired surface and mark screw locations. Ensure the adapter can reach your socket.
- Pre-drill holes using a 1/16 in. (1.5mm) drill bit.
- Secure the charging base to the underside of the cabinet using the provided mounting screws (AA).
- Connect the charging base with the Type C connector and plug the adapter into a socket.
- Secure wires using the included wire fasteners (BB).
- Insert the light (A) into the charging base (insert the left side first).
Option 2: Work Light
The light can be removed from the charging base for portable use.
- Metal Surfaces: The bottom of the light is magnetic and will adhere directly to most metal surfaces.
- Non-Metal Surfaces: Install the metal mounting clips using the double-sided tape provided on the mounting metal sheet, then attach the light to the sheet.
Operation and Charging
Turning ON/OFF: Push the lens of the puck light to turn it on or off.
Charging: When the light is placed on the charging base, it charges automatically. The charging indicator light will be red while charging and turn green when fully charged.
Safety Information
- For indoor use only.
- Do not expose to water or moisture.
- Do not use if the LED source is damaged or the housing is cracked.
- Do not mount near heat sources.
Manufacturer information
Commercial Electric
Practical help
Common problems
Light not charging
Ensure the Type C connector is securely connected to the charging base and the adapter is plugged into a working socket.
Light not adhering to surface
If the surface is non-metallic, ensure the metal mounting clips are installed using the provided double-sided tape.
Before use
- Check package contents for light fixtures, charging bases, and mounting hardware.
- Ensure you have a 1/16 in. (1.5mm) drill bit for installation.
- Verify the charging base is within reach of a power socket.
Specs in practice
- Charging Indicator
- Red light indicates charging; green light indicates fully charged.
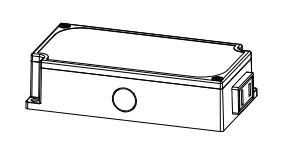
Images and diagrams
- The manual provides diagrams for under-cabinet installation using screws and wire fasteners.
- Illustrations show how to connect the charging base with the Type C connector.
Model compatibility
- Indoor use only.
- Designed for under-cabinet or portable work light applications.

Manual page author
Emily Carter
User documentation editor
Prepares concise manual descriptions and highlights the most useful setup, operation, and maintenance information for readers.