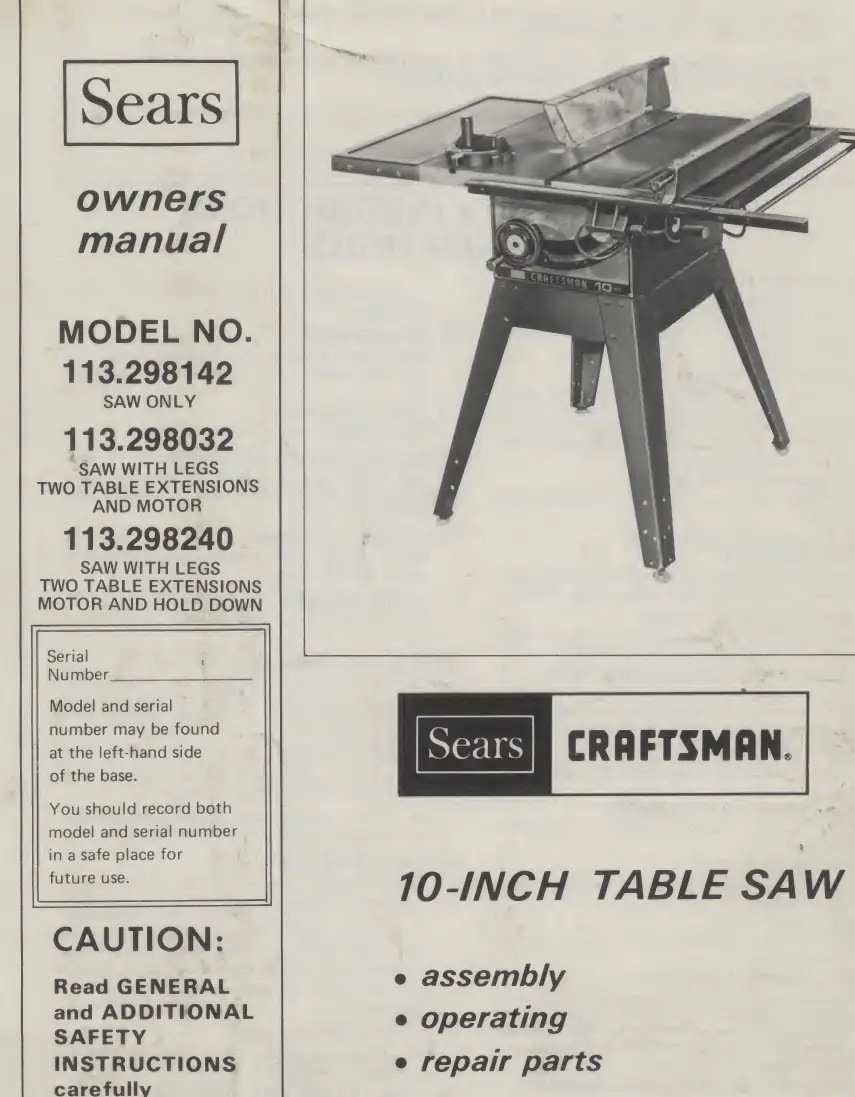
Tools / Saws
Craftsman 10-Inch Table Saw User Guide
Comprehensive user guide for the Craftsman 10-Inch Table Saw (Models 113.298142, 113.298032, 113.298240). Includes assembly, safety, operation, adjustments, and maintenance instructions.
Table of contents
Manual images
Click an image to enlargeQuick Guide
This manual covers the assembly, operation, and maintenance of the Craftsman 10-Inch Table Saw. Before operating, ensure the saw is properly assembled, the blade guard is installed, and you have read all safety instructions. The saw requires a 3450 RPM motor and must be properly grounded.
Safety Instructions
General Safety: Always wear safety goggles (ANSI Z87.1 compliant). Keep the work area clean and well-lit. Never leave the saw running unattended. Disconnect power before servicing or changing accessories.
Kickback Prevention: Kickback occurs when the workpiece is thrown back toward the operator. Avoid this by keeping the rip fence parallel to the blade, keeping the blade sharp, and using the blade guard, spreader, and antikickback pawls. Never stand in line with the blade.
Assembly
Steel Legs: Assemble the legs using the provided truss head screws, lockwashers, and hex nuts. Install leveling feet at the bottom.
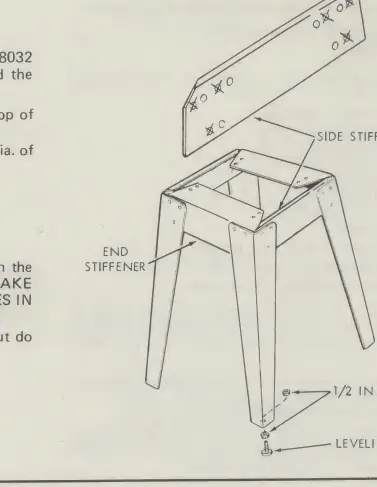
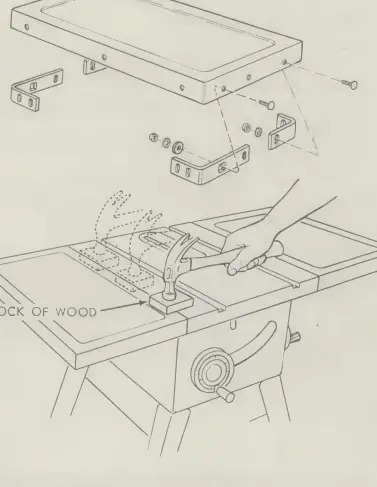
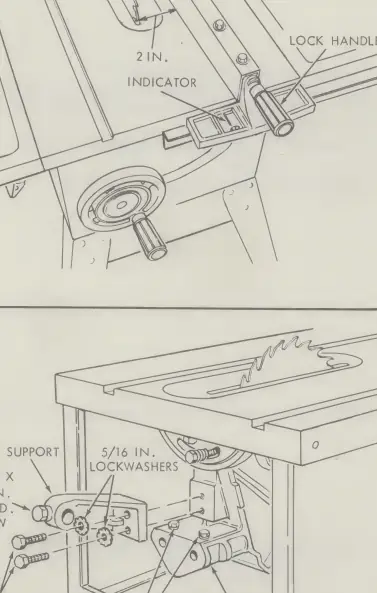
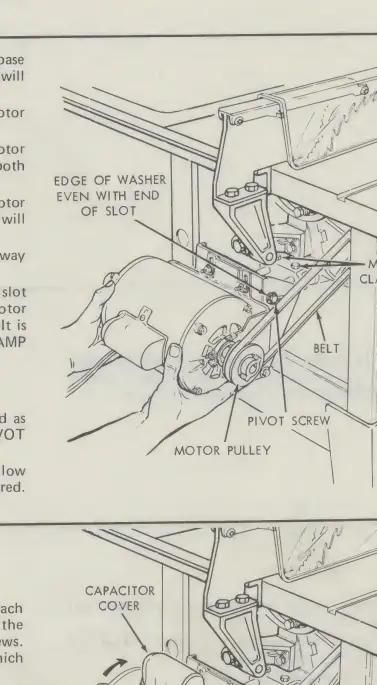
Table Extensions: Attach extensions to the main table. Ensure the front edges are aligned and the extension surface is flush with the main table using a straightedge.
Rip Fence Guide Bars: Install the front and rear guide bars. Ensure the fence slides easily and remains parallel to the blade and miter gauge grooves.
Blade Guard: Attach the guard support to the cradle. Ensure the spreader is square to the table and aligned with the blade.
Motor Mounting: Mount the motor to the base. Ensure the motor rotates clockwise when viewed from the shaft end. Install the belt and align the pulleys.
Operation
Miter Gauge: Used for crosscutting, miter cutting, and bevel crosscutting. Always lock the miter gauge securely before use.
Rip Fence: Used for ripping, bevel ripping, and resawing. Ensure the fence is locked parallel to the blade.
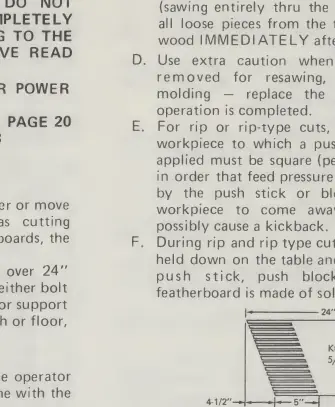
Work Helpers: Always use a push stick for ripping widths of 2 to 6 inches. For widths narrower than 2 inches, use an auxiliary fence and push block.
Adjustments
Miter Gauge: Adjust the head to be square with the bar. Use the stop pin for 45-degree settings.
Blade Parallelism: If the blade binds, it may be "heeling." Adjust the rear trunnion to ensure the blade is parallel to the miter gauge groove.
Blade Tilt: The saw can tilt for bevel cuts. Adjust the 90-degree and 45-degree stop collars to ensure accurate blade tilt.
Maintenance and Lubrication
Cleaning: Frequently blow out sawdust from the cabinet and motor to prevent overheating. Clean cutting tools with Craftsman Gum and Pitch Remover.
Lubrication: Occasionally oil the tilt screw threads, elevation screw threads, cradle bearing points, and bearing points in the guard, miter gauge, and rip fence using SAE No. 20 or No. 30 engine oil.
Troubleshooting
Excessive Vibration: Check for an unbalanced blade or damaged V-belt/pulleys.
Binding/Stalling: Ensure the blade is sharp, the fence is parallel, and the board is not warped.
Motor Overheating: Clean out sawdust to restore proper air circulation.
Manufacturer information
CRAFTSMAN
Practical help
Common problems
Excessive vibration
Check if the blade is out of balance or if the V-belt/pulleys are damaged.
Cut binds, burns, or stalls motor
Check if the blade is dull, the blade is heeling (misaligned), or the board is warped.
Motor overheats
Clean out accumulated sawdust to restore normal air circulation through the motor.
Tilt and elevating handwheels turn hard
Clean sawdust from the threads of the tilt/elevating screws and check if bearing retainers are too tight.
Before use
- Ensure the blade guard is installed and operating properly.
- Verify the blade is square (90 degrees) to the table.
- Check that the rip fence is parallel to the blade.
- Ensure the motor is properly grounded.
- Confirm the switch is in the OFF position before plugging in.
- Clear the table of all tools and scraps.
Specs in practice
- 110-120 Volts
- Standard electrical requirement for the saw.
Images and diagrams
- Wiring diagram: Shows proper grounding for the 3-prong plug.
- Assembly diagrams: Detailed views for leg, extension, and fence installation.
Model compatibility
- Motor: Use only 3450 RPM motors.
- Extensions: Requires specific support if over 24 inches wide.

Manual page author
David Miller
Documentation analyst
Organizes user manual content into clear summaries, with attention to model details, product context, and everyday usability.