Tools / Saws
User Manual for Hilti DSW 1005E Wire Saw
Quick guide for the Hilti DSW 1005E wire saw. Includes setup, operation, safety instructions, maintenance, and troubleshooting steps.
Table of contents
Manual images
Click an image to enlargeQuick guide from the manual
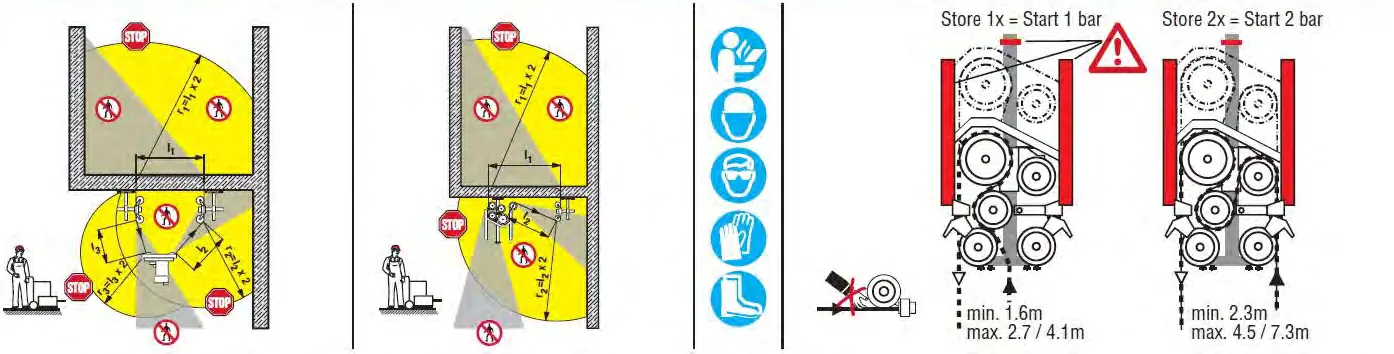
The Hilti DSW 1005E is a professional wire saw designed for the technical demolition of steel, concrete, stone, or brickwork structures. This document provides essential safety, setup, and operational instructions. Always ensure the workplace is cordoned off, as the danger area extends to at least twice the radius of the length of the wire. Operators must be trained specialists in concrete cutting techniques.
Safety instructions
- Personal Protective Equipment: Always wear eye protection, a hard hat, ear protection, protective gloves, and safety shoes.
- Workplace Safety: Cordon off the danger area. Ensure the workplace is well-ventilated and free from hazardous pipes or cables.
- Electrical Safety: Connect only to a power source equipped with an earth/ground conductor and a ground fault circuit interrupter (PRCD).
- Operation: Never enter the danger area while the wire drive unit is switched on. Always use guards.
Description
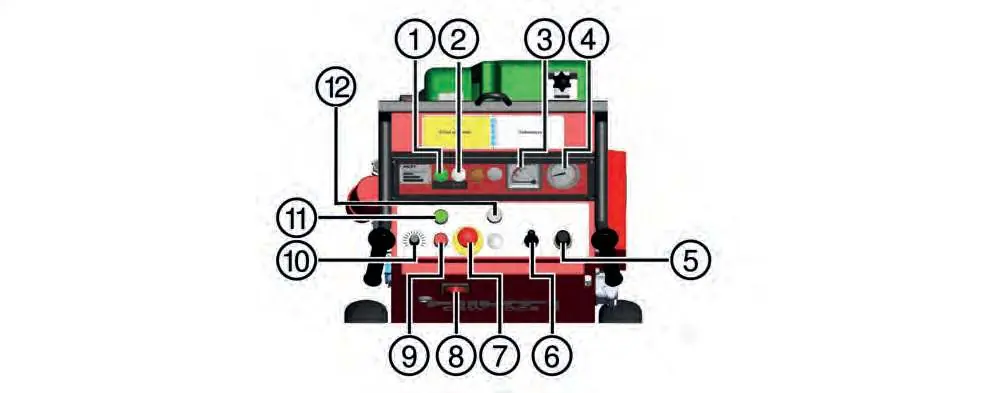
The system consists of a control unit, a drive unit, and pulley stands. The wire advance works on the block and tackle principle, using a pneumatic cylinder to maintain tension. The control unit allows for precise adjustment of wire speed and advance pressure.
Operation
Setup and installation
- Drilling: Drill through-holes for the wire. We recommend a diameter of at least 16 mm or 4% of the object's thickness.
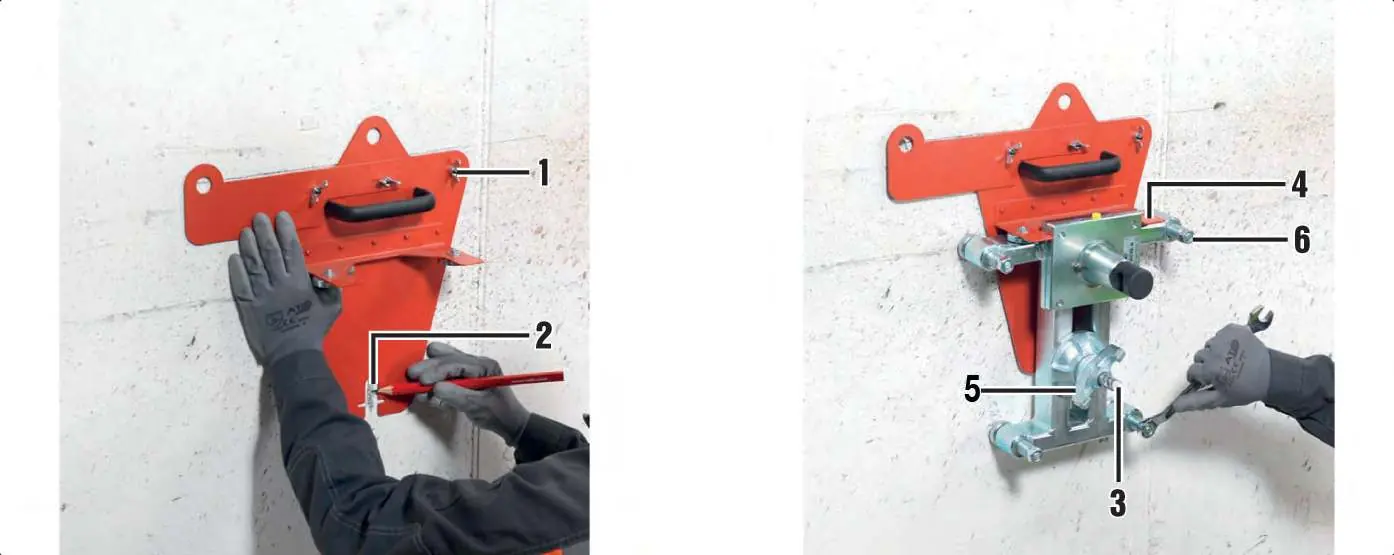
- Base Plate: Fasten the base plate securely to the surface. Vacuum pad fastening is strictly prohibited.
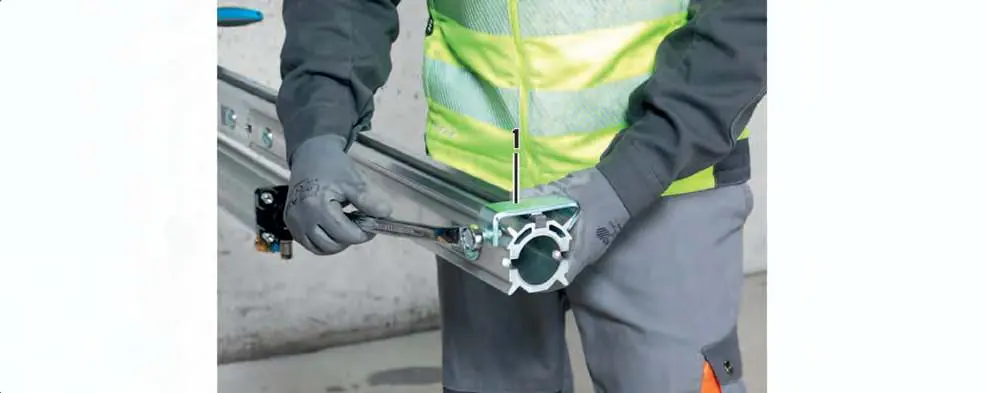
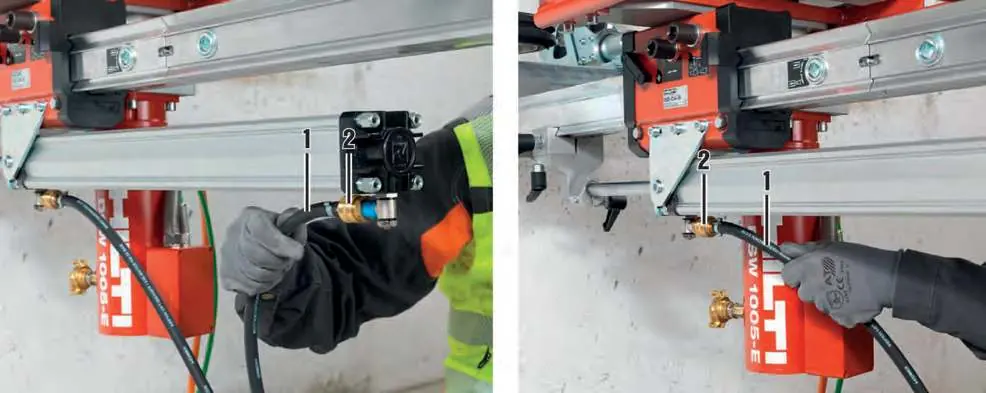
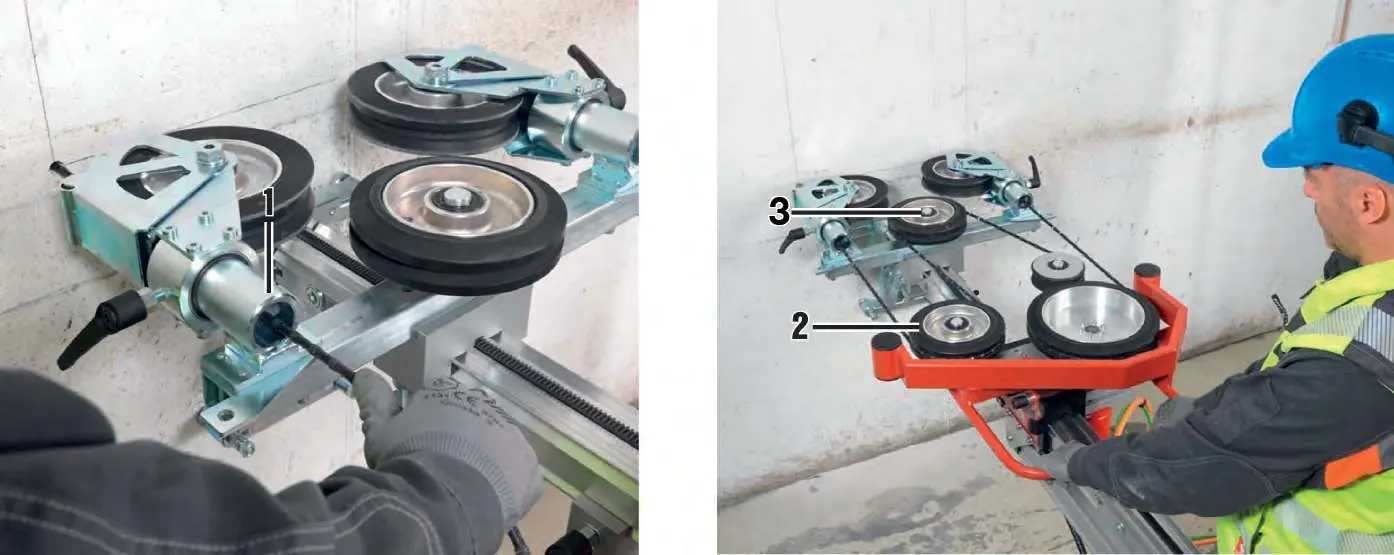
- Guidance Unit: Fit the tapered connector into the guide rail and secure it with the eccentric pin.
- Pulley Bearer: Attach the pulley bearer, ensuring the correct distance from the wall.
- Drive Unit: Fit the drive unit to the carriage and secure it.
- Wire Rigging: Pass the wire through the object, then through the pulley stands and drive unit. Tension the wire by moving the drive unit.
Sawing
Set the advance pressure on the control unit to the recommended value. Switch on the main drive and use the speed regulator to increase wire speed and advance pressure simultaneously. Monitor the cooling water flow (approx. 4 l/min) to prevent overheating.
Cleaning and maintenance
Clean the wire saw and pulley stands after each cut, paying attention to running surfaces and the toothed rack. Use plenty of water and a medium-hard brush. Do not use cleaning agents containing silicone. Check air filters in the control unit regularly.
Troubleshooting
If the wire does not rotate, check for too many acute corners (<90°) or excessive initial tension. If the drive wheel slips, increase the initial tension or check the guide carriage movement. If the wire jumps off, ensure the return stop is set and guide pulleys are aligned.
Disposal
Most materials are recyclable. Separate materials correctly before disposal. Do not dispose of electric tools with household waste.
Manufacturer information
Hilti Corporation
Practical help
Common problems
Wire does not rotate
Check for too many or too acute (<90°) corners. Reduce initial tension or divide the cut into sections.
Drive wheel slips
Increase initial tension by increasing pressure. Check that the guide carriage moves easily along the rail.
Wire jumps off pulley
Ensure the return stop is set and clamp it securely. Align guide pulleys exactly.
No sawing progress
Reduce the length of wire in contact or cut in a tighter arc. Sharpen or replace the sawing wire.
Before use
- Verify mains voltage matches the type plate.
- Ensure the workplace is cordoned off and safe.
- Check that all guards are correctly fitted.
- Verify the emergency stop button is accessible.
- Ensure the cooling water supply is connected and functional.
- Check that the wire saw and components are in good condition.
Specs in practice
- Rated voltage
- 400 V (requires 3P+N+PE or 3P+PE connection).
- Cutting speed
- 0 m/s to 29 m/s.
- Max. cutting length
- 2 meters.
- Cooling water flow
- Approx. 4 l/min at 30°C.
Images and diagrams
- Safety distance diagrams illustrate the danger zones based on wire length.
- Control unit layout identifies buttons for emergency stop, speed, and pressure.
- Setup diagrams illustrate the pulley configuration for different cut types.
Model compatibility
- Requires compressed air supply (6-8 bar).
- Sawing wires must comply with EN 13236.
- Requires 3P+N+PE or 3P+PE power supply.

Manual page author
Emily Carter
User documentation editor
Prepares concise manual descriptions and highlights the most useful setup, operation, and maintenance information for readers.