Automotive / Motor Controllers
Artillian ROPS Mounted Accessories Installation and Owner's Manual
Comprehensive installation and operation guide for Artillian ROPS mounted accessories, including tool racks, baskets, fuel can holders, beverage cooler holders, and chainsaw mounts. Learn how to use the cam lever latch system for tool-free...
Quick answers from the manual
Quick answer
- Artillian ROPS mounted accessories attach to the Artillian ROPS Mounted Tool Bar (1RMTB) using a tool-free Cam Lever Latch system. Rotate levers UP to install or remove, and DOWN to lock. p. 4, 8, 18, 24
Key actions
- Install/Remove Accessory p. 4, 8, 18, 24
- Adjust Cam Lever Tension p. 4, 8, 18, 24
Problems and fixes
Latches not sitting flush
Ensure clamp plates are fully open by tilting the accessory away from you during installation.
p. 4, 8, 18, 24Maintenance and reset
- Tighten cam lever nut and bolt if the lever becomes loose over time. p. 4, 8, 18, 24
Technical specifications
| Parameter | Value | Meaning | Pages |
|---|---|---|---|
| Tool Rack Capacity | 40 lbs | Maximum weight capacity. | p. 3 |
| Tool Basket Capacity | 65 lbs | Maximum weight capacity. | p. 7 |
| Fuel Can Holder Capacity | 45 lbs | Maximum weight capacity. | p. 15 |
| Beverage Cooler Holder Capacity | 40 lbs | Maximum weight capacity. | p. 21 |
Where to find it in the PDF
- Tool Rack Manual p. 3, 4
- Tool Basket Manual p. 7, 8
- Fuel Can Holder Manual p. 15, 16, 17, 18
- Beverage Cooler Holder Manual p. 21, 22, 23, 24
- Chainsaw Mount Manual p. 27, 28, 29
Table of contents
Manual images
Click an image to enlargeQuick guide from the manual
This manual covers the installation and operation of various Artillian ROPS mounted accessories. All accessories in this system are designed to mount onto the Artillian ROPS Mounted Tool Bar (P/N: 1RMTB), which is sold separately. The system utilizes a Cam Lever Latch mechanism that allows for tool-free installation and removal of accessories in seconds.
Installation and Operation
The installation process is consistent across most accessories:
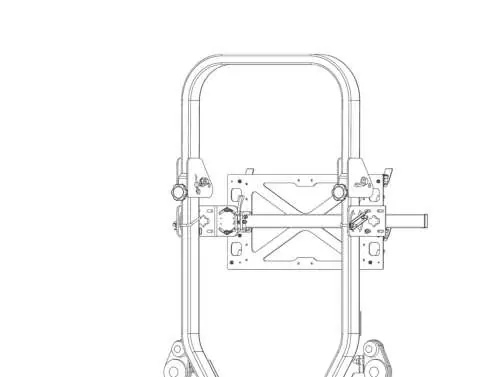
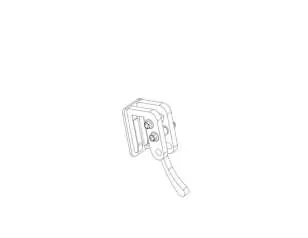
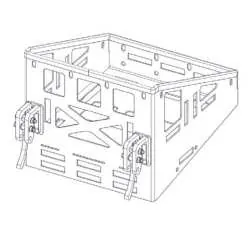
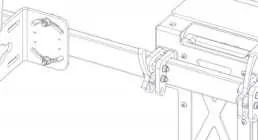
- Install: Rotate both cam levers UP to the open position.
- Mount: Place the accessory onto the Tool Bar.
- Secure: Rotate both cam levers DOWN until they cam over and lock the accessory in place.
- Remove: Rotate both cam levers UP and lift the accessory off the bar.
Note: If the latches do not sit flush on the Tool Bar, ensure the clamp plates are fully open by removing the accessory, rotating the levers up, and tilting the accessory away from you before reinstalling.
Accessory Specifics
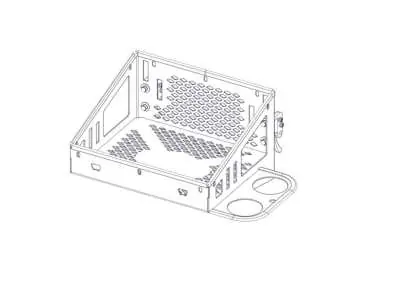
- Tool Rack (1RMTRK): Rated for 40 lbs. Holds up to 4 long-handle tools using 8 rubber clamps.
- Tool Basket (1RMTBSK): Rated for 65 lbs. Open-top design for carrying tools, hitch pins, and chains.
- Fuel Can Holder (1RMFCH): Rated for 45 lbs. Includes E-track cam-buckle strap for securing fuel cans.
- Beverage Cooler Holder (1RMBCH): Rated for 40 lbs. Includes cup holders and E-track strap for securing coolers.
- Chainsaw Mount (1RMCSM): Rated for chainsaws with 14"-24" bars. Features a spring-loaded clamping mechanism.
Maintenance and Troubleshooting
Cam Lever Adjustment: The cam lever latches are factory-assembled with some friction to prevent accidental closing. If the levers loosen over time, tighten the nut and bolt securing the lever to the housing until the desired resistance is achieved.
Security: For additional security, accessories can be locked to the Tool Bar by inserting a padlock through the holes in the mounting bracket.
Caution: Do not exceed the rated capacity for any accessory. Doing so may result in damage to the accessory and/or the Tool Bar and will void the warranty.
Practical help
Common problems
Cam lever latches do not sit flush on the Tool Bar.
Remove the accessory, rotate the cam levers up, and tilt the accessory away from you to ensure the clamp plates are fully open, then reinstall.
Cam levers are loose or flip closed too easily.
Tighten the nut and bolt that secure the lever to the housing until the desired resistance is achieved.
Before use
- Ensure the Artillian ROPS Mounted Tool Bar (1RMTB) is properly installed.
- Verify the accessory is compatible with your specific tool or container.
- Check that cam levers are in the 'down' (locked) position before operating the vehicle.
- Ensure the load does not exceed the rated capacity of the accessory.
- Confirm that any straps or bungee cords are tightened and secure.
Specs in practice
- Rated Capacity
- The maximum weight the accessory can safely hold. Exceeding this will void the warranty.
- Cam Lever Latch
- The quick-release mechanism used to attach and remove accessories without tools.
Images and diagrams
- Fig. 1 (Attaching): Shows the orientation of cam levers (UP to install, DOWN to lock).
- Fig. 2 (Padlock Holes): Indicates where to insert a padlock for added security.
Model compatibility
- All accessories require the Artillian ROPS Mounted Tool Bar (P/N: 1RMTB), sold separately.
- The Tool Bar is designed to hold multiple accessories simultaneously (up to 3 depending on size).

Manual page author
Emily Carter
User documentation editor
Prepares concise manual descriptions and highlights the most useful setup, operation, and maintenance information for readers.