Furniture / Beds & Mattresses
Assembly Manual for ELUSIA Daybed 90x190cm
Complete assembly and maintenance guide for the ELUSIA 90x190cm daybed. Includes step-by-step installation instructions, parts list, and care tips.
Table of contents
Manual images
Click an image to enlargeQuick guide from the manual
This manual provides instructions for the assembly and maintenance of the ELUSIA 90x190cm daybed. Before beginning assembly, ensure you have a clean, flat area (such as a carpet or rug) to protect the product from scratches. It is recommended to ventilate the room during and for a few hours after assembly.
Assembly preparation
Before starting, locate all parts and group the hardware. Ensure you have the necessary tools. Do not use the product if any part appears damaged, broken, or missing. Never force the joints during assembly. A key rule for this assembly is to tighten parts to 70% initially, and finish tightening to 100% only once all screws have been installed.
Parts list
The manual includes a detailed parts list on page 13, identifying all components and hardware required for assembly. Please verify all items against this list before beginning.
Assembly instructions
The assembly process consists of 10 steps:
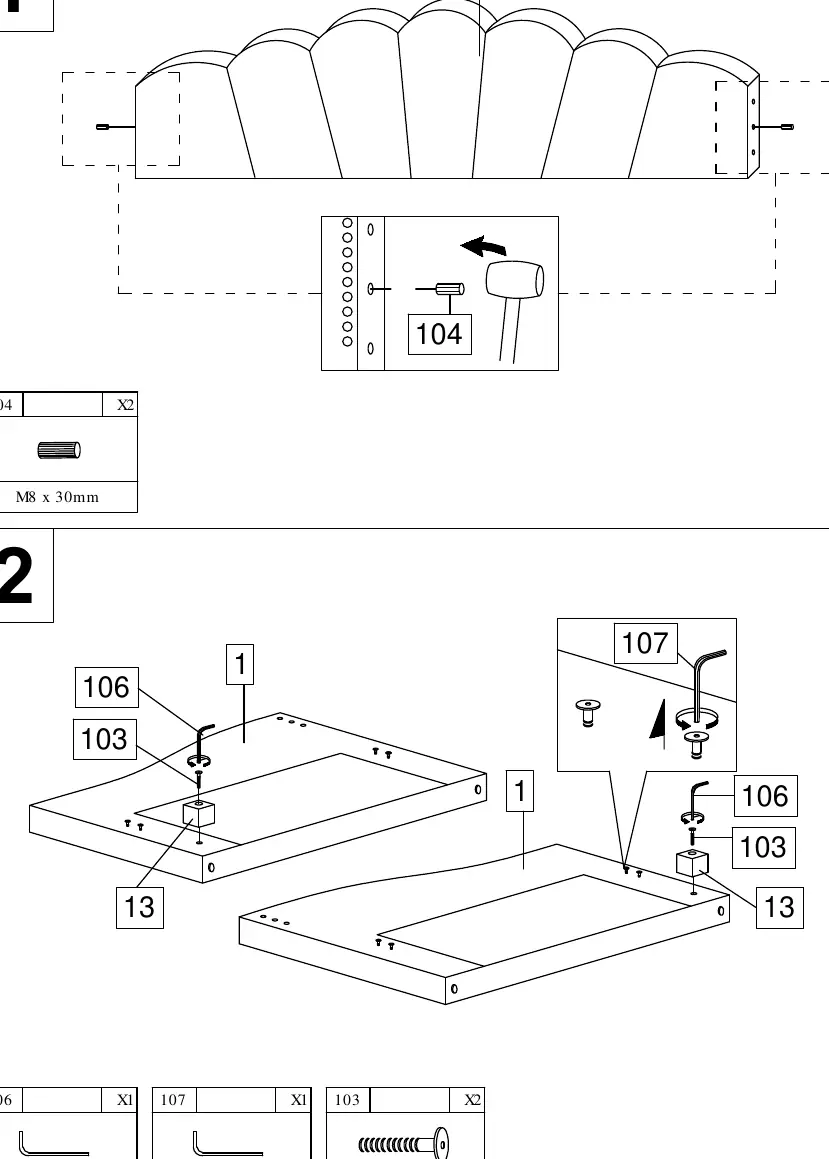
- Step 1-2: Attach the side panels and fittings using the provided M8x30mm screws and Allen keys.
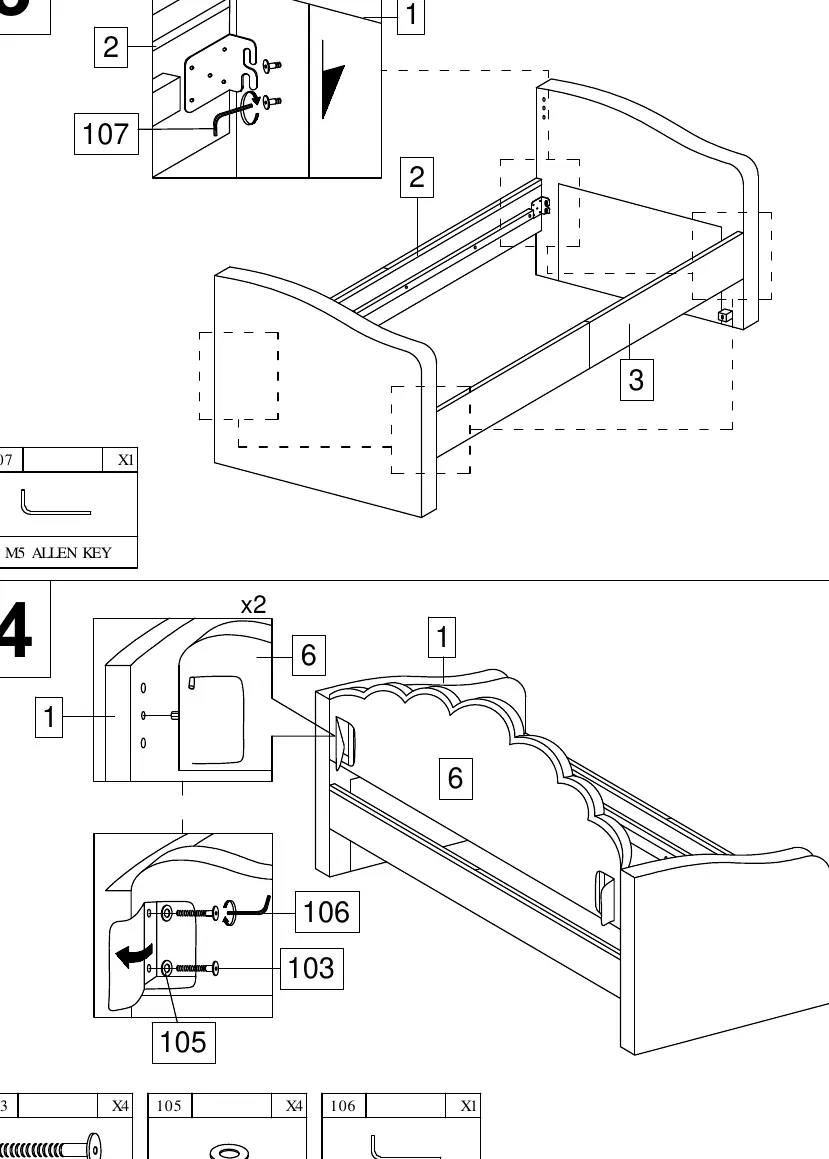
- Step 3-4: Connect the main frame components using M6x50mm screws and flat washers.
- Step 5-6: Install the bed slats and side fitters. Secure the side rails using M6x55mm screws, washers, and spring washers.
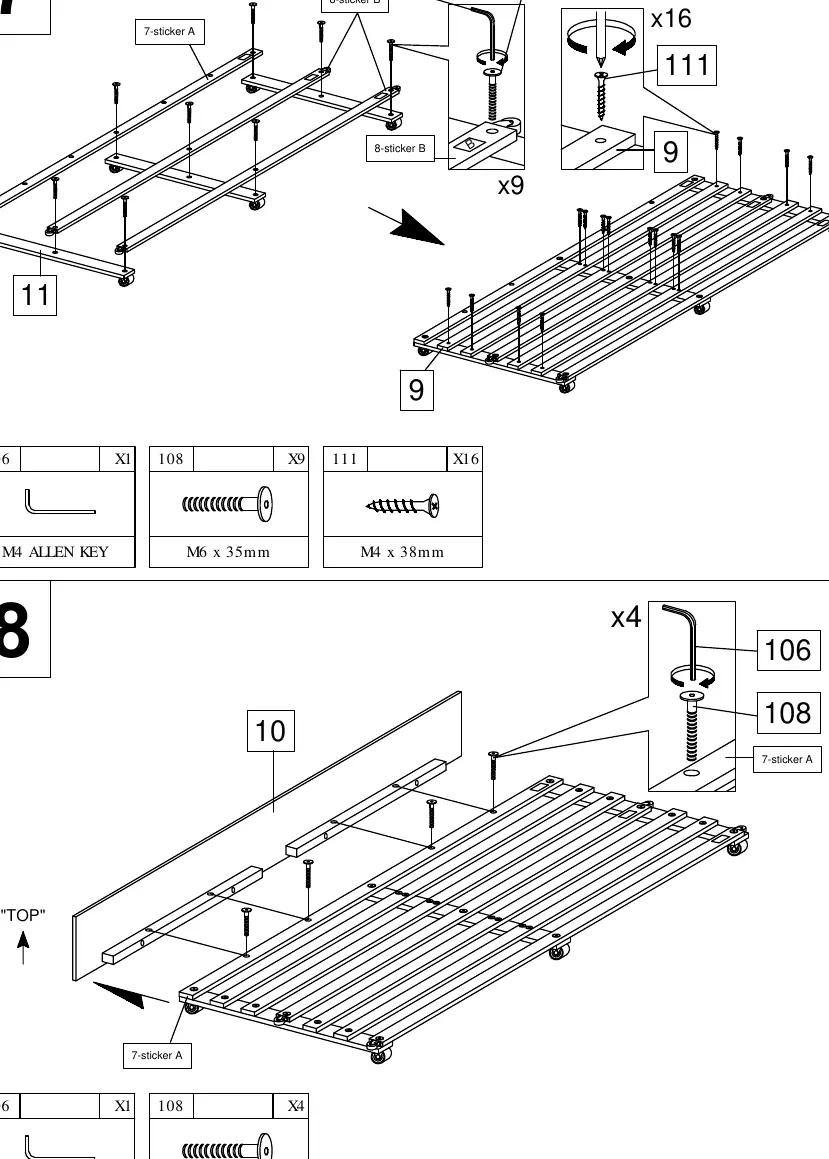
- Step 7-8: Assemble the trundle bed frame using M6x35mm and M4x38mm screws.
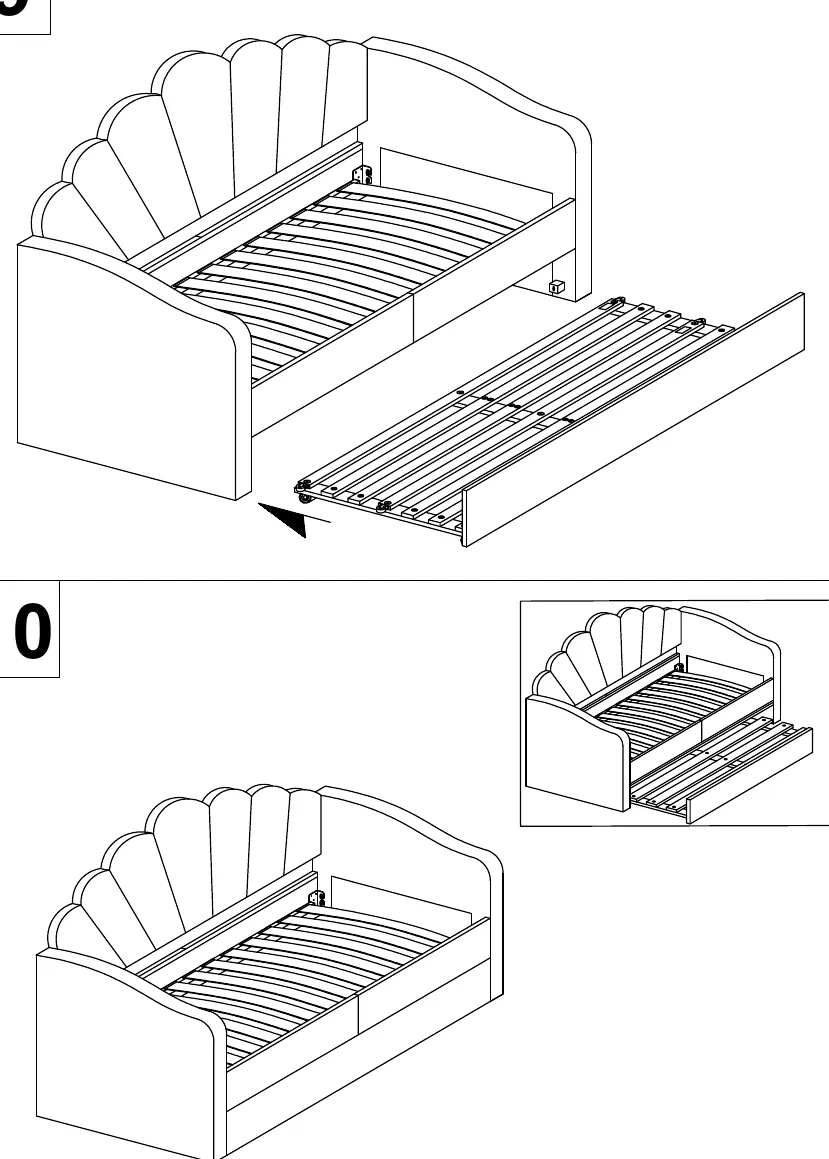
- Step 9-10: Finalize the assembly by sliding the trundle bed into the main frame.
Maintenance and care
To keep your furniture in good condition:
- Solid Timber/Veneers: Remove spills immediately with a damp cloth, then wipe dry with a clean duster. Furniture polish is not recommended.
- Melamine/Metal Surfaces: Regular dusting with a dry cloth is sufficient. For stubborn stains, use a damp cloth and washing-up liquid.
- General: Regularly check that all fasteners are tight and retighten if necessary. Avoid placing the product near open fires or high heat sources like radiators.
Practical help
Common problems
Missing or damaged parts
Do not use the product. Check the parts list on page 13 and contact your store for assistance.
Difficulty fitting parts
Ensure you are not forcing the joints. Check that all screws are only tightened to 70% until the final assembly step.
Before use
- Clear a clean, flat assembly area (carpet or rug recommended).
- Group and count all hardware components.
- Verify you have the necessary tools (Allen keys provided).
- Ensure the room is well-ventilated during and after assembly.
- Check that all fasteners are properly tightened.
Specs in practice
- Recommended mattress size
- 190 x 90 cm.
- Tightening procedure
- Tighten screws to 70% initially, then 100% after all screws are installed.
Images and diagrams
- Page 13 contains a comprehensive parts list and hardware identification guide.
- Pages 14-18 provide step-by-step visual assembly instructions.
Model compatibility
- Designed for 190x90cm mattresses.

Manual page author
David Miller
Documentation analyst
Organizes user manual content into clear summaries, with attention to model details, product context, and everyday usability.