Documents / Warranty Safety
Owner's Manual for DigiTech Polara Reverb Pedal
Quick guide for the DigiTech Polara Reverb Pedal. Learn about reverb types, connection diagrams, control settings, and how to use the included StompLock and pedalboard accessories.
Table of contents
Manual images
Jump to the sectionQuick guide from the manual
The DigiTech Polara is a stereo reverb pedal featuring 7 Lexicon reverb algorithms. To get started, connect a 9V DC power supply and your instrument cables. Use the Footswitch to engage the effect (LED will light up). Adjust the LEVEL knob to mix the reverb, LIVELINESS for high-frequency response, and DECAY for the length of the reverb tail. The TAILS switch determines if the reverb decays naturally (ON) or ends abruptly (OFF) when the effect is bypassed.
User Interface
The pedal features several controls to shape your sound:
- Tails Switch: Set to ON for natural decay when bypassing; set to OFF for abrupt cutoff and to enable true hardwire bypass.
- Reverb Type Knob: Selects between Room, Plate, Reverse, Modulated, Halo, Hall, and Spring algorithms.
- Level Knob: Controls the volume of the reverb effect.
- Liveliness Knob: Adjusts the high-frequency content of the reverb.
- Decay Knob: Controls the duration of the reverb tail.
- Inputs/Outputs: Supports mono (Input 1) or stereo operation (Inputs 1 & 2).
Making Connections
To connect the pedal to your rig:
- Turn down your amplifier's master volume.
- Connect your instrument to Input 1 (or Inputs 1 & 2 for stereo).
- Connect the outputs to your amplifier(s).
- Connect a 9V DC power supply to the power jack.
- Gradually increase the amplifier volume.
For an amplifier effects loop, connect the pedal between the FX Send and FX Return. If the amp has a mix control, set it to 100% full wet.
Performance Accessories
The Polara includes two accessories for integration:
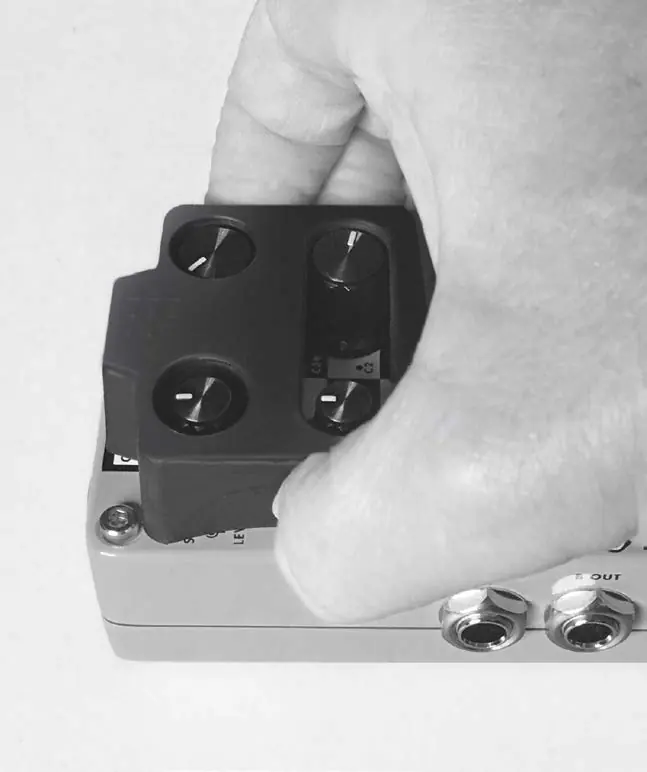
- StompLock: Keeps your knob settings in place. Align it over the knobs and gently push down to install.
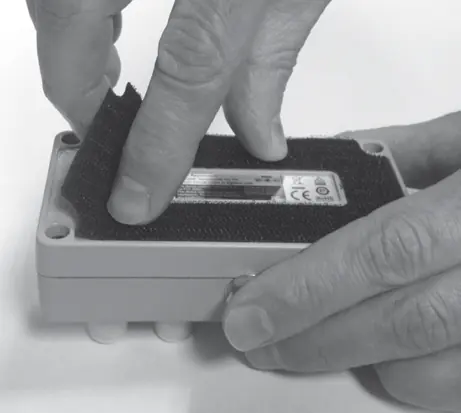
- Pedalboard Pad: Allows for easy mounting. Peel off the existing rubber skid pad from the bottom of the pedal, remove the adhesive protector from the pad, and apply it to the bottom of the pedal.
Specifications
The pedal requires an external 9V DC power supply. It features true hardwire bypass (when Tails switch is OFF). Dimensions are 4.40 inches (L) x 2.65 inches (W) x 2.0 inches (H), with a weight of 1.0 lb.
Practical help
Common problems
No sound from the pedal
Ensure the 9V DC power supply is connected and the Footswitch is engaged (LED should be lit). Check that cables are securely connected.
Reverb cuts off abruptly when bypassing
Set the Tails switch to the ON position to allow the reverb tail to decay naturally.
Need to use true hardwire bypass
Set the Tails switch to the OFF position.
Before use
- Ensure you have a compatible 9V DC external power supply (sold separately).
- Turn down the amplifier's master volume before making connections.
- Use only unbalanced TS instrument cables.
- If using an amp effects loop, set the loop mix to 100% full wet.
- Verify the serial number on the chassis sticker for support purposes.
Specs in practice
- True Hardwire Bypass
- Signal passes through the pedal without processing when the effect is off (available when Tails switch is OFF).
Images and diagrams
- Mono/Stereo Amplifier Setup: Illustrates connecting the guitar to the pedal and the pedal to one or two amplifiers.
- Amplifier Effects Loop Setup: Illustrates connecting the pedal between the amplifier's FX Send and FX Return jacks.
Model compatibility
- Requires external 9V DC power supply (not included).
- Only use unbalanced TS instrument cables.

Manual page author
David Miller
Documentation analyst
Organizes user manual content into clear summaries, with attention to model details, product context, and everyday usability.