Electronics / Networking
User Manual for Digitus 1-Phase AC EV Portable Charger
Quick guide for the Digitus 1-Phase AC EV Portable Charger. Learn how to install, operate, adjust charging current, and understand LED status indicators for safe EV charging.
Table of contents
Manual images
Click an image to enlargeQuick Start Guide
This guide provides essential information for operating your Digitus 1-Phase AC EV Portable Charger. Always inspect the cable for damage before use. Ensure your power outlet is compatible and supports 16A. The charger is designed for outdoor use with an IP55 rating but should not be used in extreme weather conditions or with extension cords.

Safety and Precautions
- Installation: Install in a location without violent vibration or impact. Place vertically to facilitate ventilation. Mount on non-combustible materials like metal.
- Electrical Safety: Use only on mains with a fault current circuit breaker. The product must be grounded. Do not use with extension cords or adapters.
- Operation: Keep children away from the device. Do not charge if the vehicle fails or if the charging cable/adapter is damaged. Do not charge in rainy or thunderous weather.
- Maintenance: Do not disassemble or modify the charger. Keep the charging adapter clean and dry. Perform safety inspections at least once a week.
Installation and Usage
- Check the power cable for any damage before powering up.
- Plug the AC Schuko plug into the wall socket.
- Ensure the power outlet complies with national standards and supports 16A.
- Plug the charging adapter into the electric vehicle socket.
- Ensure the connector is fully inserted until it clicks into place.
- The charger will work automatically; the power light will turn on, and the charger light will flash.
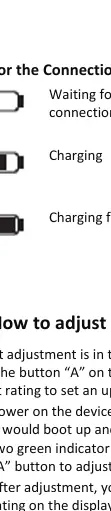
Adjusting Current
You can adjust the maximum current rating (8A, 10A, 13A, 16A) only when the device is waiting for a connection.
- Power on the device with the Schuko plug.
- Wait for the device to boot up and show two green indicator lights (waiting for connection).
- Press the 'A' button to cycle through the current settings.
- Double-check the current rating on the LCD display before plugging into your EV.
- The setting is stored in memory even after power-off.
LED Screen Description
The LCD screen provides real-time data during charging:
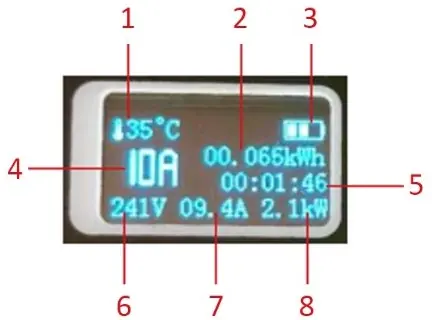
- 1: Control Box Temperature
- 2: Transferred Energy
- 3: Connection and charging status
- 4: Charging current limit
- 5: Charging Time
- 6: Charging Voltage
- 7: Charging Current
- 8: Charging Power
LED Indicator Status
The charger uses three LEDs (POWER, CHARGER, FAULT) to indicate status:
- Initial mode: All LEDs bright (0.5s).
- Waiting for charging: POWER and CHARGER LEDs on.
- Normal working mode: POWER on, CHARGER flashing.
- Charge complete: POWER on, CHARGER off.
- Faults: If the FAULT LED blinks, it indicates specific errors: 1 blink (Overheat), 2 blinks (Undervoltage), 3 blinks (Overvoltage), 4 blinks (Ungrounded), 5 blinks (Overcurrent), 7 blinks (Leakage), 9 blinks (Communication Fail).
Technical Specifications
- AC Input: Schuko Input Cable
- Rated Voltage: 250V
- Rated Power: 3.7kW
- Rated Current: 8A/10A/13A/16A (adjustable)
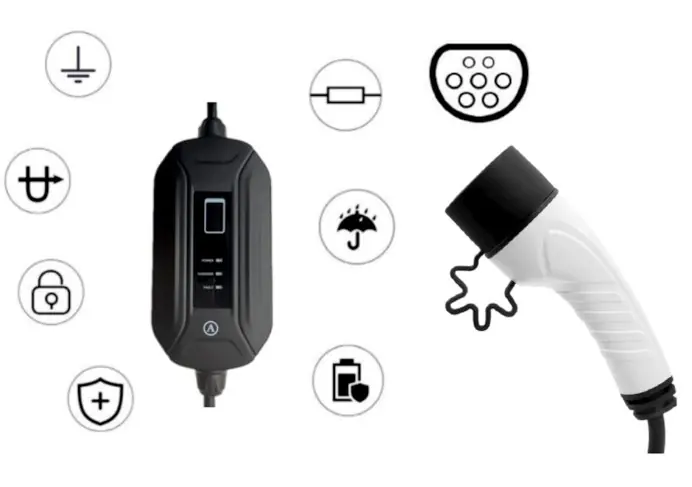
- Connector: IEC 62196-2 Type 2
- IP Rating: IP55
- Operating Temperature: -20°C to +50°C
Practical help
Common problems
Cannot adjust current
Current adjustment is only possible when the charger is waiting for a connection. It cannot be changed during the charging process or if an error has occurred.
Charger not working
Check if the power outlet is damaged, rusted, or loose. Ensure the cable is not damaged. Check the FAULT LED for specific error codes.
Fault LED is blinking
Count the blinks to identify the error (e.g., 1 blink = Overheat, 3 blinks = Overvoltage). Refer to the LED Indicator Status section for details.
Before use
- Inspect the power cable for any damage or wear.
- Ensure the power outlet is compatible and supports 16A.
- Verify the charger is properly grounded.
- Ensure the vehicle engine is off and stationary.
- Check that the charging plug is clean and dry.
- Ensure the connector is fully inserted until it clicks.
Specs in practice
- Rated Power (3.7kW)
- The maximum power output the charger can deliver to the vehicle.
- IEC 62196-2 Type 2
- The standard connector type used for the vehicle side of the charging cable.
- Adjustable Current
- Allows you to limit the charging current (8A-16A) to match your power supply capacity.
Images and diagrams
- The LCD screen displays critical charging data including voltage, current, power, and temperature.
- The LED indicators (POWER, CHARGER, FAULT) provide immediate visual feedback on the charger's operational state.
Model compatibility
- Requires a standard Schuko power outlet.
- Compatible with electric vehicles using IEC 62196-2 Type 2 charging sockets.
- Not compatible with extension cords or adapters.

Manual page author
Emily Carter
User documentation editor
Prepares concise manual descriptions and highlights the most useful setup, operation, and maintenance information for readers.