Toys / RC Models & Drones
User Manual for Eachine Lizard 105S FPV Racing Drone
Quick start guide and technical manual for the Eachine Lizard 105S FPV racing drone. Includes binding procedures for Frsky, Flysky, and DSM2/DSMX, flight controller connections, OSD configuration, and arming instructions.
Table of contents
Manual images
Click an image to enlargeQuick guide from the manual
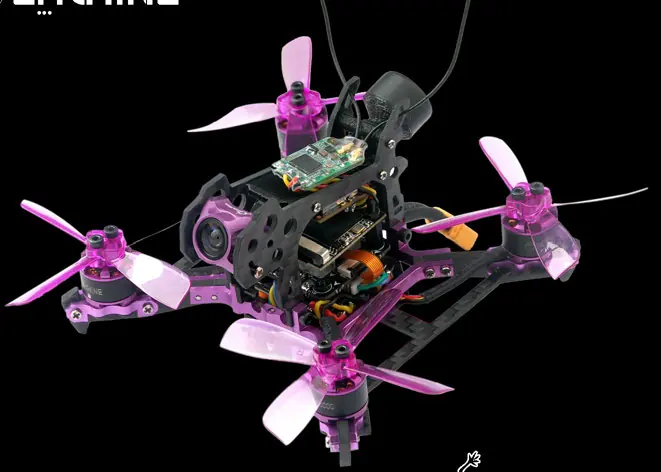
The Eachine Lizard 105S is a micro FPV racing drone. This manual provides essential setup instructions, including receiver binding, flight controller configuration, and arming procedures. Ensure you have the correct transmitter channel map (TAER1234 or AETR1234) and that your throttle settings are configured correctly to allow the drone to arm.
Specifications
- Size: 130mm x 130mm x 53mm
- Weight: 80g (excluding battery)
- Flight Controller: F4 with built-in OSD and Damping box IMU
- Motor: Eachine 1104 KV6000 brushless
- ESC: BS-28A 4IN1 DSHOT600 ready
- Camera: 130-degree 720P
- VTX: 5.8G 25MW/200MW switchable 48CH
- Battery: 14.8V 550mAh 60C Lipo
Components
The drone includes the frame, Omnibus F4 Pro flight controller, 4-in-1 ESC, 2.4G receiver (option specific), 720P HD camera and DVR, 5.8G VTX, 1104 KV6000 motors, 2435PRO propellers, 14.8V 550mAh battery, and LED board with buzzer.
Flight controller connection
The flight controller features specific pads for connections. Key connections include Lipo input, motor outputs (M1-M4), and various UART ports for receivers. Note that the camera requires 5V output with an LC power filter.
ESC connection and frame type
Motors must be connected to the ESC. The 2435PRO(R) propellers are for M1 and M4 (CW motors), and 2435PRO(L) propellers are for M2 and M3 (CCW motors). Ensure all screws are tightened securely.
VTX connection
The VTX supports power level selection and frequency group changes via short touches. Refer to the provided band and channel table to select the correct frequency for your FPV goggles.
DVR operation
The DVR supports Micro SD cards up to 32GB. The blue LED indicates status: solid for standby, blinking for video recording. The DVR automatically starts recording when powered on. Hold the start/stop button while powering on to toggle between NTSC and PAL formats.
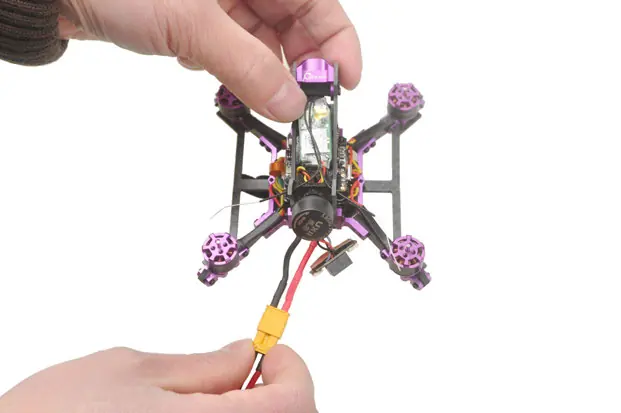
Receiver binding
Binding procedures vary by receiver type:
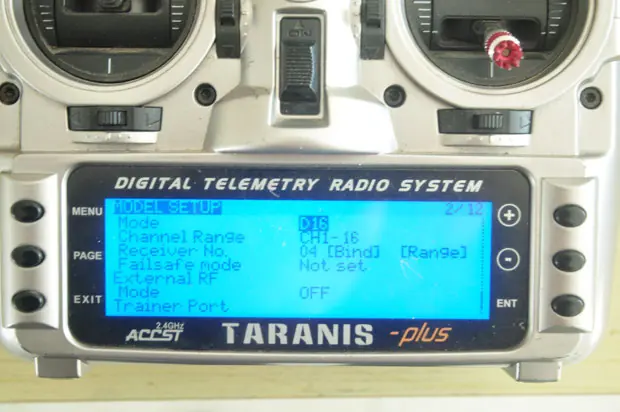
- Frsky: Hold the bind button on the receiver while connecting the battery. Once the green and red LEDs are solid, release the button. Select D16 mode on your transmitter and enter bind mode.
- Flysky: Hold the bind button on the receiver while connecting the battery. The green LED will blink fast. Set transmitter to AFHDS 2A mode and enter bind mode.
- DSM2/DSMX: Use the provided binding module. Connect the module and receiver, plug into a USB power source, and follow the transmitter binding procedure.
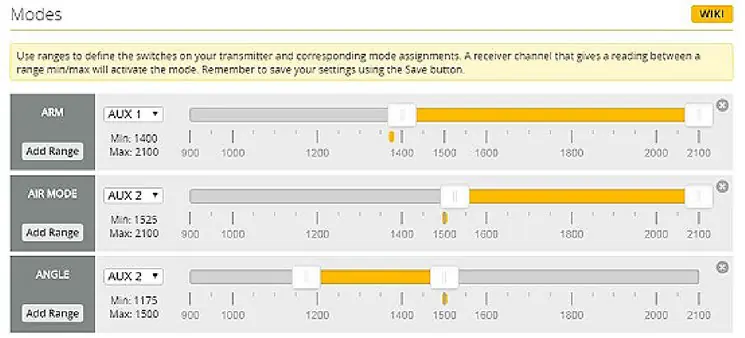
Arming and disarming
The default arm/disarm switch is AUX1 (Channel 5). AUX2 (Channel 6) is typically set for flight modes, and AUX3 (Channel 7) for the buzzer. Toggle the assigned switch to arm the motors; the buzzer will beep, and the green LED on the flight controller will turn off. Ensure the drone is level before arming.
Receiver configuration
After binding, configure the receiver in Betaflight Configurator. Enable Serial RX for UART3, select the appropriate receiver mode (Serial-based receiver), and set the Serial Receiver Provider (SBUS for Frsky, IBUS for Flysky, SPEKTRUM for DSM) to match your hardware.
OSD configuration
Connect the drone to a computer and open Betaflight Configurator. Navigate to the OSD tab to customize the layout, including battery voltage, timer, and flight mode display.
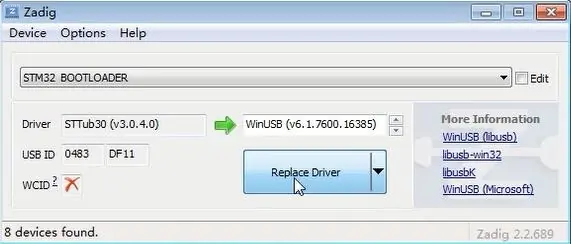
Flight controller firmware update
To update firmware: install STM32 Virtual COM Port and STM BOOTLOAD drivers. Use Zadig to replace the driver with WinUSB. In Betaflight, select the OMNIBUS F4SD target and flash the firmware.
Manufacturer information
Eachine
Practical help
Common problems
Drone will not arm
Ensure throttle is below the 'Stick Low' threshold (e.g., 1050) and the transmitter channel map is set correctly (TAER1234 or AETR1234).
Binding failed
Verify the transmitter is in the correct mode (D16 for Frsky, AFHDS 2A for Flysky) and that the binding procedure was followed exactly.
Video recording not starting
Ensure a Micro SD card (Max 32G) is inserted. The DVR starts recording automatically upon power-up.
Before use
- Ensure the battery is fully charged.
- Verify the transmitter channel map matches the drone (TAER1234 or AETR1234).
- Check that all propellers are securely tightened.
- Ensure the drone is on a level surface before arming.
- Confirm the receiver is successfully bound to your transmitter.
Images and diagrams
- Flight Controller Diagram: Details pinouts for power, motor outputs, and UART ports.
- ESC Connection: Shows motor wiring and battery input configuration.
- Binding Diagrams: Illustrates button locations and LED status indicators for different receiver types.
Model compatibility
- Supports Frsky, Flysky, and DSM2/DSMX receivers depending on the specific version.
- Requires Betaflight Configurator for advanced configuration and firmware updates.
- Micro SD card for DVR must be 32GB or less.

Manual page author
Emily Carter
User documentation editor
Prepares concise manual descriptions and highlights the most useful setup, operation, and maintenance information for readers.