Toys / RC Models & Drones
User Manual for Scorpion Tribunus II 06-120A ESC SBEC
Comprehensive user guide for the Scorpion Tribunus II 06-120A ESC SBEC. Includes installation, wiring, throttle calibration, PC/Android programming, VBar integration, and safety instructions.
Table of contents
Manual images
Click an image to enlargeQuick guide from the manual
The Scorpion Tribunus II 06-120A ESC SBEC is a high-performance electronic speed controller. Before use, ensure you have removed the propeller or pinion gear for safety. The ESC requires throttle range calibration before the first flight. It supports PC and Android programming for advanced settings and integrates with systems like Mikado VBar.
Installation and wiring
Connecting the ESC:
- Battery: Solder a quality connector to the red (positive) and black (negative) wires. Ensure correct polarity.
- Motor: Use bullet connectors or solder directly. Ensure proper insulation with heat shrink.
- Receiver/Governor: Connect the Master lead (three colored wires) to the throttle channel. Connect the Slave lead to an external governor or extra BEC. If not using RPM signal, the yellow wire can be unplugged.
- Mounting: Mount with the heatsink facing outward. Use a fastening strap or double-sided tape. If using zip ties, secure around the heatsink, not components.
Throttle calibration
You must perform throttle range calibration before the first use:
- Turn on the transmitter and set the throttle to maximum.
- Connect the battery to the ESC.
- Wait for one beep, then move the throttle to the lowest position.
- Wait for two beeps and the POS Morse code signal, confirming calibration is stored.
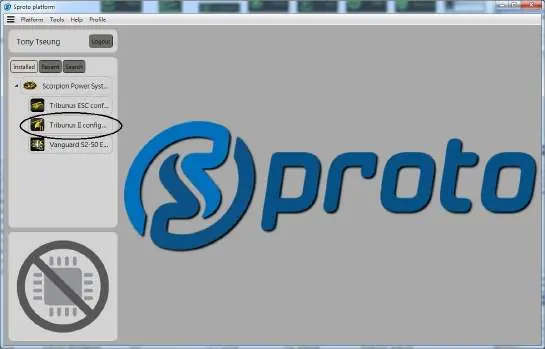
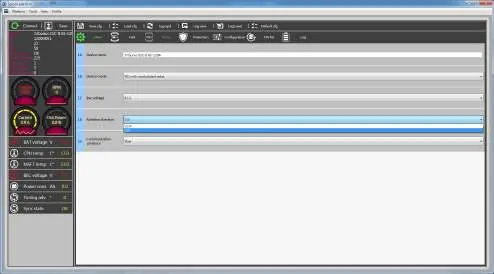
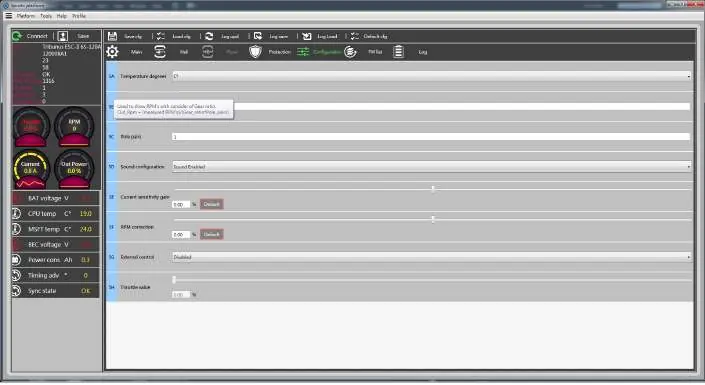
Programming and software
The ESC can be configured using the Scorpion Sproto PC program or the Android app. You will need the Diode Adaptor Cable (included) and a V-Link II cable (optional) or a standard USB cable depending on the connection method. Always save settings before navigating away from a page in the software.
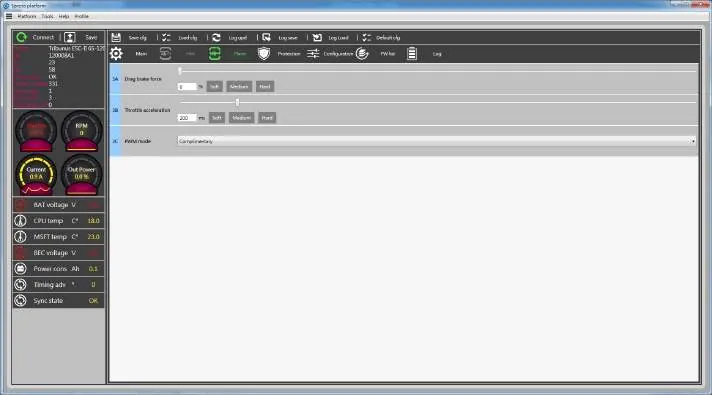
Helicopter and Airplane modes
The ESC features specific modes for different aircraft types:
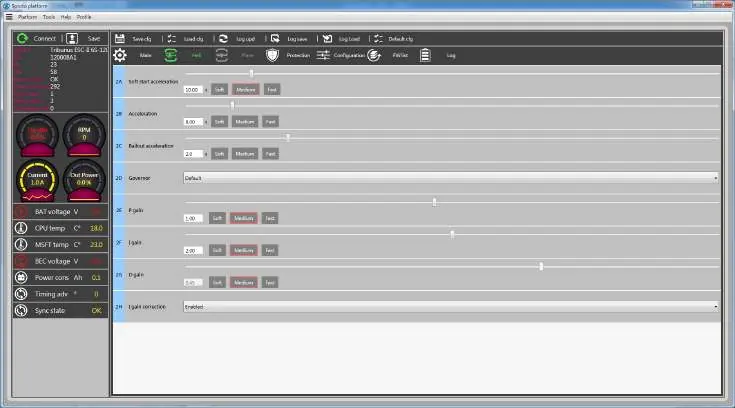
- Helicopter: Includes Soft Start, Acceleration, Bailout Acceleration, and Governor settings.
- Airplane: Includes Drag Brake, Throttle Acceleration, and PWM mode (Regular or Complimentary).
Protection settings
Configure protection limits to prevent damage:
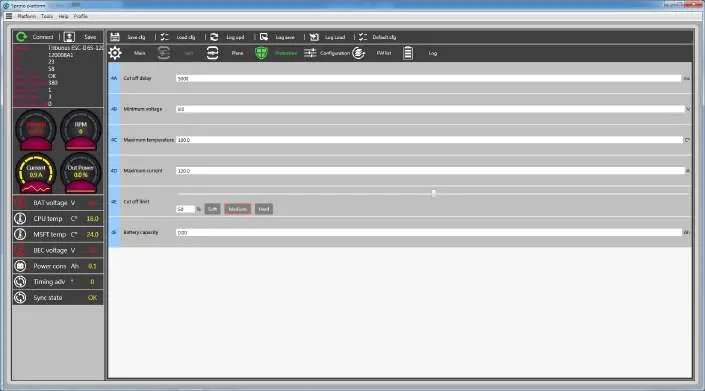
- Cutoff Delay: Time for protection to engage after signal loss (recommended 5,000ms).
- Minimum Voltage, Max Temperature, Max Current: Set these to trigger RPM reduction if limits are exceeded.
- Battery Max Capacity: Set to trigger RPM reduction when a specific capacity is consumed.
VBar integration
The Tribunus ESC supports direct integration with Mikado VBar Control. Connect the telemetry cable to the VBar telemetry port, install the 'Scorpion ESC Support' app on your radio, and ensure the ESC firmware is V52 or higher. This allows for automatic setup and real-time telemetry.
Anti-Spark DIY kit
To prevent sparks when connecting the battery, use the included Anti-Spark DIY kit. This involves soldering a PTC resettable fuse to the positive wire and insulating it with the provided plastic tube and heat shrink.
Warranty and service
The ESC is covered by a 1-year manufacturer's warranty. For repairs, contact [email protected] to obtain an RMA number. Shipping charges for repairs are the user's responsibility, while Scorpion covers return shipping.
Practical help
Common problems
ESC beeps Morse code
Check the LED status and Morse code table in the manual. Common codes: N (No throttle), Z (Not zero), V (Voltage error), I (Current error), P (Power error), T (Temperature error).
Motor will not start
Ensure the throttle stick is at the zero position at startup. Check that the ESC is connected to the correct receiver channel.
Spark when connecting battery
Use the included Anti-Spark DIY kit or install a resistor-based anti-spark connector to the positive wire.
Before use
- Remove propeller or pinion gear before initial setup.
- Ensure battery polarity is correct (Red to Red, Black to Black).
- Calibrate throttle range before first flight.
- Verify BEC voltage is set correctly for your servos (5.1V-8.1V).
- Ensure all connectors are insulated with heat shrink.
Specs in practice
- Input Voltage
- 11-26.1V (3S-6S Hv-LiPo).
- Continuous Current
- Up to 120A.
Images and diagrams
- Wiring Diagram: Shows connections for motor, battery, receiver (Master/Slave), and PC/Android interface.
- Anti-Spark DIY: Step-by-step assembly of the PTC resettable fuse to the positive wire.
Model compatibility
- Compatible with Mikado VBar Control.
- Supports Futaba Sbus 2 and Jeti Exbus.
- Requires 3S battery minimum for PC/Android configuration.

Manual page author
Michael Turner
Technical manual editor
Reviews PDF manuals for structure, safety notes, and practical product details so readers can find the right information quickly.