Power / Solar Chargers
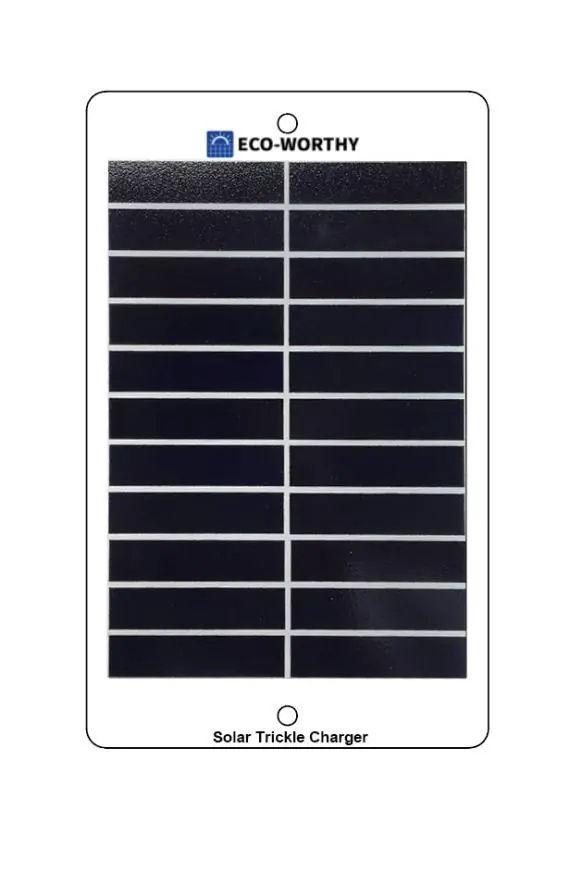
User Manual for ECO-WORTHY 2.5W Solar Trickle Charger
A comprehensive guide for the ECO-WORTHY 2.5W Solar Trickle Charger. Learn how to install, connect, and maintain your solar panel to keep your vehicle battery charged.
Quick answers from the manual
Quick answer
- The ECO-WORTHY 2.5W Solar Trickle Charger is designed to maintain battery charge for vehicles. It connects via a cigarette lighter port or alligator clips and uses sunlight to prevent battery drainage during long periods of inactivity. p. 2, 3
Key actions
- Mount the panel using suction cups on the windshield or exterior. p. 5
- Connect to the battery using either the cigarette lighter plug or alligator clips. p. 6
Problems and fixes
Low voltage output
Check for shade, high temperatures, or improper connections. If voltage is half the rate, the bypass diode may be defective.
p. 7Maintenance and reset
- Clean the glass surface with water and a soft sponge; check connections every six months. p. 8
Technical specifications
| Parameter | Value | Meaning | Pages |
|---|---|---|---|
| Rated Maximum Power | 2.5W | Peak power output | p. 4 |
| Maximum Working Voltage | 16.0V | Operating voltage | p. 4 |
Where to find it in the PDF
- Safety and Disclaimer p. 2
- Features and Applications p. 3
- Specifications and Components p. 4
- Mounting and Wiring p. 5, 6
- Troubleshooting and Maintenance p. 7, 8
Table of contents
Manual images
Click an image to enlargeQuick Guide
The ECO-WORTHY 2.5W Solar Trickle Charger is designed to maintain battery charge for vehicles, preventing drainage during long periods of inactivity. It features a built-in diode to prevent reverse current at night. The device can be connected via a cigarette lighter port or directly to the battery using alligator clips. Ensure the panel is placed in a sunny location for optimal performance.
Features
- Built-in diode prevents reverse current.
- SAE quick connector for plug-and-play operation.
- IP64 waterproof junction box.
- Includes 2 large PVC suction cups for mounting.
- Comes with alligator clips and cigarette lighter plug.
Installation and Mounting
The solar panel can be mounted using the two included PVC suction cups. Attach the panel to the inside of the car's windshield or any suitable exterior surface. Ensure the suction cups are clean before application to maintain a secure hold. Avoid shading the panel during operation, as this significantly reduces power generation.

General Wiring
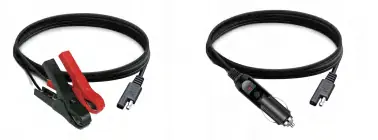
The charger offers two connection methods:
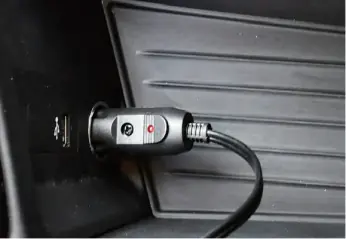
- Cigarette Lighter Connection: Connect the cigarette lighter + SAE cable to the solar panel's SAE plug. Plug the connector into the vehicle's cigarette lighter port. Note: This works for the majority of vehicles, but some models disconnect the cigarette lighter port when the ignition is off.
- Alligator Clip Connection: Connect the alligator clip cable to the solar panel's SAE plug and attach the clips directly to the battery terminals. Ensure correct polarity (positive to positive, negative to negative) to avoid short circuits.
Testing and Troubleshooting
If you experience issues, follow these steps:
- Indicator Light Behavior: The green light indicates charging. If it flickers, charging is over. If it is off, there is no PV input. The light may remain on as long as the panel receives sunlight, even if disconnected from the vehicle.
- Low Voltage: If the output is significantly lower than expected, check for shade, high temperatures, or improper connections. If the measured voltage is half the rated value, it may indicate a defective bypass diode, which should be inspected by a technician.
- Battery Voltage Dropping: Ensure the panel is in direct sunlight. The panel will not produce significant output without direct sun.
Maintenance
To ensure optimum performance and longevity:
- Clean the glass surface of the solar panel when necessary using water, a soft sponge, or a cloth. A mild, non-abrasive cleaning agent can be used.
- Check electrical and mechanical connections every six months to verify they are clean, secure, and undamaged.
- Inspect the panel for dust, dirt, or debris and clean as needed.
- Check and replace any damaged components.
Technical Specifications
The following parameters define the performance of the 2.5W Solar Trickle Charger:
- Rated Maximum Power: 2.5W
- Solar Cell Type: Monocrystalline
- Maximum Working Voltage: 16.0V
- Maximum Working Current: 0.156A
- Open Circuit Voltage: 19.2V
- Short Circuit Current: 0.171A
- Working Temperature: -20 to 60°C
- Dimensions: 7.7 x 4.9 x 0.4 inches (196 x 125 x 12mm)
Manufacturer information
ECO-WORTHY
Practical help
Common problems
Indicator light stays on after disconnecting
The light remains on as long as the panel receives sunlight and converts it to electricity. It will turn off once the panel is placed in a dark place.
Cannot charge via cigarette lighter
Some vehicles disconnect the cigarette lighter port when the ignition is off. In such cases, use the alligator clips to connect directly to the battery.
Low voltage output
Check for shade, high temperatures, or improper terminal connections. If voltage is half the rated value, the bypass diode may be defective.
Before use
- Ensure the panel is placed in a sunny location.
- Clean the PVC suction cups for a secure mount.
- Verify the vehicle's cigarette lighter port remains active when the ignition is off.
- Check that all electrical connections are secure and free of corrosion.
- Ensure the panel is not shaded during operation.
Specs in practice
- Rated Maximum Power (2.5W)
- The peak power output the panel can generate under ideal sunlight conditions.
- Maximum Working Voltage (16.0V)
- The optimal voltage at which the panel operates to charge a 12V battery.
- Working Temperature (-20~60°C)
- The ambient temperature range in which the panel is designed to operate safely.
Images and diagrams
- Mounting holes: Shows the dimensions and placement for fixed installation.
- Wiring: Illustrates the two connection methods using the SAE connector.
Model compatibility
- Compatible with 12V vehicle batteries.
- Requires a cigarette lighter port that stays powered when the ignition is off for that specific connection method.

Manual page author
David Miller
Documentation analyst
Organizes user manual content into clear summaries, with attention to model details, product context, and everyday usability.