Lighting / Stage Lighting
User Manual for Elation Professional SixPar 100IP and SixPar 100WMG
Comprehensive user guide for the Elation Professional SixPar 100IP and SixPar 100WMG LED fixtures. Includes installation, DMX setup, maintenance, safety guidelines, and technical specifications.
Table of contents
Manual images
Click an image to enlargeQuick Guide
This manual provides essential instructions for the operation and maintenance of the SixPar 100IP and SixPar 100WMG. Key procedures include proper IP65 maintenance, DMX addressing, and safe rigging practices. Always ensure the fixture is powered off before performing any maintenance or cleaning.
Safety Guidelines
This fixture is a sophisticated electronic device. Follow these safety precautions:
- Grounding: Protection Class 1 - fixture must be properly grounded.
- UV Radiation: Risk Group 3. Avoid direct eye and skin exposure at distances less than 11 feet (3.3m). Wear proper protection.
- Distances: Keep flammable materials at least 1.6 feet (0.5m) away. Minimum distance to objects/surfaces is 65.6 feet (20m).
- Operation: Do not plug into a dimmer pack. Never open the fixture while in use. Allow 15 minutes to cool before servicing.
Installation
Installation must be performed by qualified personnel. Ensure the mounting structure is certified to hold the fixture's weight.

- Rigging: Use the provided dual yokes and an M10 screw for mounting. Always attach an appropriately rated safety cable in suspended environments.
- Cabling: To maintain IP65 integrity, all cables must be run towards the ground to prevent water accumulation around connections.
- Temperature: Ambient operating range is 14°F to 113°F (-10°C to 45°C).
DMX Setup
The fixture supports DMX-512 protocol. Use standard 3-pin or 5-pin XLR cables for data input and output. Daisy-chaining is required; do not split the DMX line with 'Y' connectors. A DMX terminator (120 ohm resistor) should be used at the end of the chain to prevent erratic behavior.
System Menu
The 4-button control panel allows access to settings. Use the MODE button to navigate, ENTER to select, and UP/DOWN to adjust values. For permanent installations, it is recommended to set the display to ON1 to prevent phantom touches from environmental conditions.
Maintenance
Regular maintenance is required to ensure longevity and IP65 integrity.
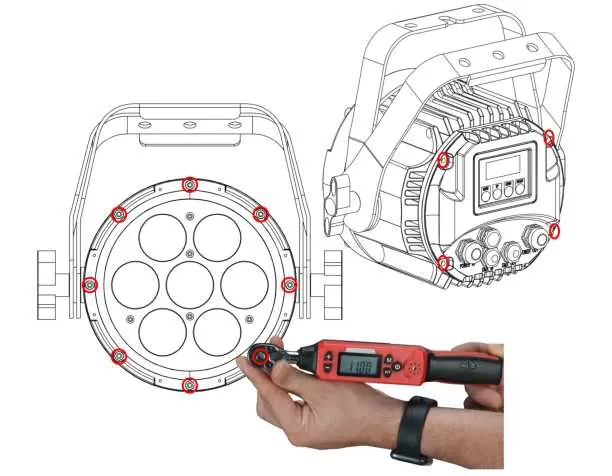
- Exterior: Inspect every 30 days. Clean optics and chassis. Reapply di-electric grease to connectors annually.
- Interior: Inspect every 30 days. Clean fans, lubricate linear bearings, and check belts.
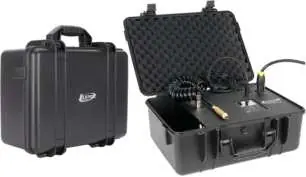
- IP Testing: After any disassembly, use the Elation IP Tester to confirm integrity.
- Torque: Hex-head screws on panels or base must be tightened to 11 lbf-in (12.7kgf-cm).
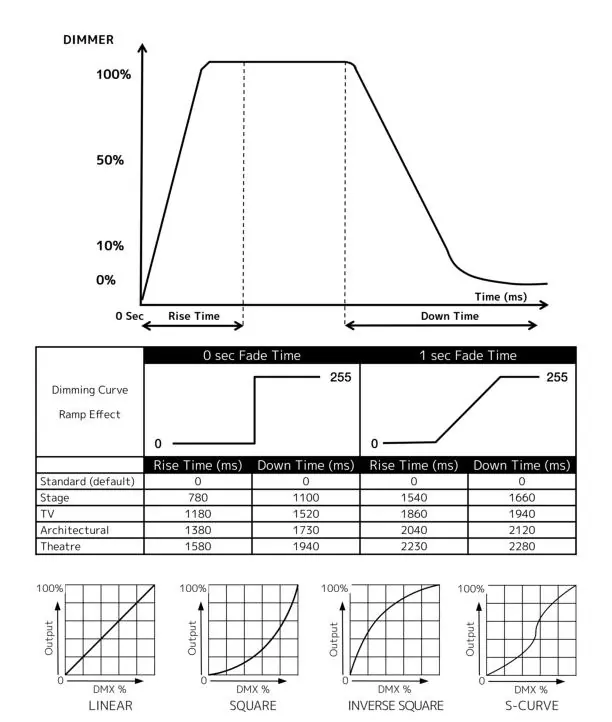
Dimmer Mode
The fixture offers 5 variable dimming curve modes: Standard, Stage, TV, Architectural, and Theatre. These can be adjusted via the system menu to control rise and down times.
Specifications
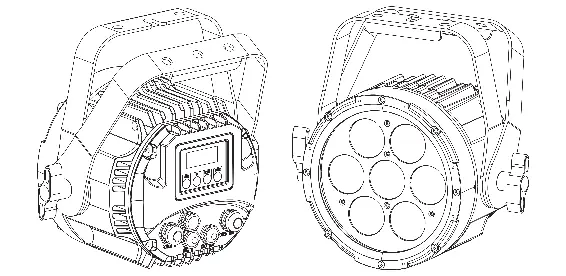
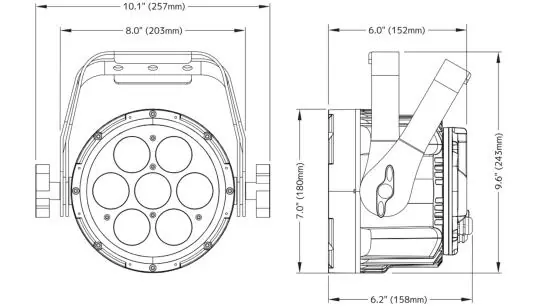
Source: (7) 12W 6-in-1 RGBAW+UV LEDs. Power: 89W Max. Dimensions: 10.1" x 6.2" x 9.6". Weight: 9.5 lbs (4.3 kg). Approvals: CE, cETLus, IP65.
Practical help
Common problems
Fixture not receiving DMX signal
Check XLR cable connection, ensure controller is on, verify DMX terminator usage, or check for defective cable.
Fogging/condensation inside
Position unit with air valve pointing up, run for 1-2 hours, re-install valve while hot.
LCD display locked
Press and hold MODE for 3 seconds (ON mode) or use sequence UP, DOWN, UP, DOWN, ENTER (ON1 mode).
Before use
- Inspect shipping carton for damage.
- Verify all accessories are present.
- Ensure fixture is properly grounded (Class 1).
- Check that cables are run towards the ground to maintain IP65 rating.
- Verify ambient temperature is between 14°F and 113°F.
Specs in practice
- Torque Setting
- 11 lbf-in (12.7kgf-cm) for hex-head screws on panels or base.
- DMX Channel Modes
- 6, 7, 8, or 12 channels available for control.
- UV Wavelength
- 395nm.
Images and diagrams
- Overview diagram shows power/DMX ports, air valve, and mounting brackets.
- Rigging diagram illustrates proper safety cable attachment.
- Dimmer mode graph shows rise/down times for different curves.
Model compatibility
- Requires RDM-enabled equipment for full RDM functionality.
- Use only original rigging parts (omega brackets).

Manual page author
Emily Carter
User documentation editor
Prepares concise manual descriptions and highlights the most useful setup, operation, and maintenance information for readers.