Garden / Fencing & Gates
Installation Guide for Everbilt Welded Wire Fencing
A comprehensive installation guide for Everbilt welded wire fencing. Learn how to properly install U-Posts and T-Posts, attach wire mesh, and secure your fence perimeter for various projects.
Table of contents
Manual images
Click an image to enlargeQuick guide from the manual
This document provides installation instructions for Everbilt Welded Wire fencing using either U-Posts or T-Posts. Before starting, ensure you have identified the correct post type for your project height: U-Posts are recommended for projects under 4 feet, while T-Posts are recommended for projects 4 feet or taller. Always check for underground utilities before installing posts.
Preparation
Before beginning the installation, perform the following steps:
- Check for underground hazards: Ensure the installation area is free of underground wires or pipes.
- Measure the perimeter: Determine the total length of your fence. Ensure your selected welded wire length is equal to or greater than the perimeter.
- Select the right post: Use U-Posts for light-duty/temporary projects under 4 feet. Use T-Posts for projects 4 feet or taller.
- Height requirement: Ensure the selected post is at least 1 foot taller than the welded wire.
Installing U-Posts
- Install the first U-Post at one end of the perimeter using a rubberized mallet.
- Ensure the tabs face outward from the perimeter area.
- Drive the post approximately 12 inches into the ground so the anchor plate is below the dirt or grass line.
- Install a second post at the other end. For enclosed areas, install a post at every corner or bend.
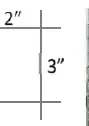
- Install additional posts at 5 to 7-foot intervals for a uniform look.
Installing T-Posts
- Install the first T-Post at one end of the perimeter using a post driver.
- Ensure the tabs face outward from the perimeter area.
- Drive the post approximately 12 inches into the ground so the anchor plate is below the dirt or grass line.
- Install a second post at the other end. For enclosed areas, install a post at every corner or bend.
- Install additional posts at 5 to 7-foot intervals.
Installing Welded Wire
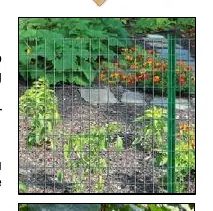
- Unwind the welded wire on the ground.
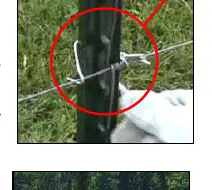
- Starting at the first post, hook the wire onto the post tabs. For U-Posts, you may need to bend the tabs slightly with a flathead screwdriver. For T-Posts, secure the wire using T-Post clips.
- Ensure the wire touches the grass.
- Continue along the perimeter, hooking or securing the wire to each consecutive post.
- If the perimeter has corners, carefully bend the wire around the post.
Cutting and Finishing
If your final fence design is shorter than the length of the welded wire, use side cutters to trim the fence to size. Use caution as this creates sharp ends. It is recommended to bend these cut ends over to prevent injury or damage.
Practical help
Common problems
Sharp wire ends after cutting
Carefully bend the cut ends over to mitigate the risk of injury or damage.
Post movement after installation
Ensure the anchor plate is installed below the dirt or grass line to prevent the post from moving.
Difficulty hooking wire onto U-Post tabs
Use a flathead screwdriver to bend the U-Post tabs out slightly.
Before use
- Check for underground wires or pipes in the installation area.
- Measure the fence perimeter.
- Ensure posts are at least 1 foot taller than the welded wire.
- Wear gloves for protection.
- Have a rubber mallet (for U-Posts) or post driver (for T-Posts) ready.
Specs in practice
- Anchor Plate
- A plate welded near the bottom of the post to prevent it from moving once installed in the ground.
Images and diagrams
- U-Post tabs must face outward from the perimeter area.
- Anchor plates must be buried below the grass line.
Model compatibility
- U-Posts are recommended for projects under 4 feet.
- T-Posts are recommended for projects 4 feet or taller.

Manual page author
Michael Turner
Technical manual editor
Reviews PDF manuals for structure, safety notes, and practical product details so readers can find the right information quickly.