Garden / Gazebos & Canopies
Installation Guide for Garvee 7AZ56 DIY Garden Fence
Quick installation guide for the Garvee 7AZ56 DIY Garden Fence. Includes a complete parts list, step-by-step assembly instructions, and safety precautions for proper setup.
Table of contents
Manual images
Click an image to enlargeQuick guide from the manual
This document provides the necessary steps to assemble the Garvee 7AZ56 DIY Garden Fence. Ensure all parts are accounted for before beginning the installation. The process involves connecting fence panels using the provided connectors and rings.
Parts list
Before starting, verify that you have the following components:
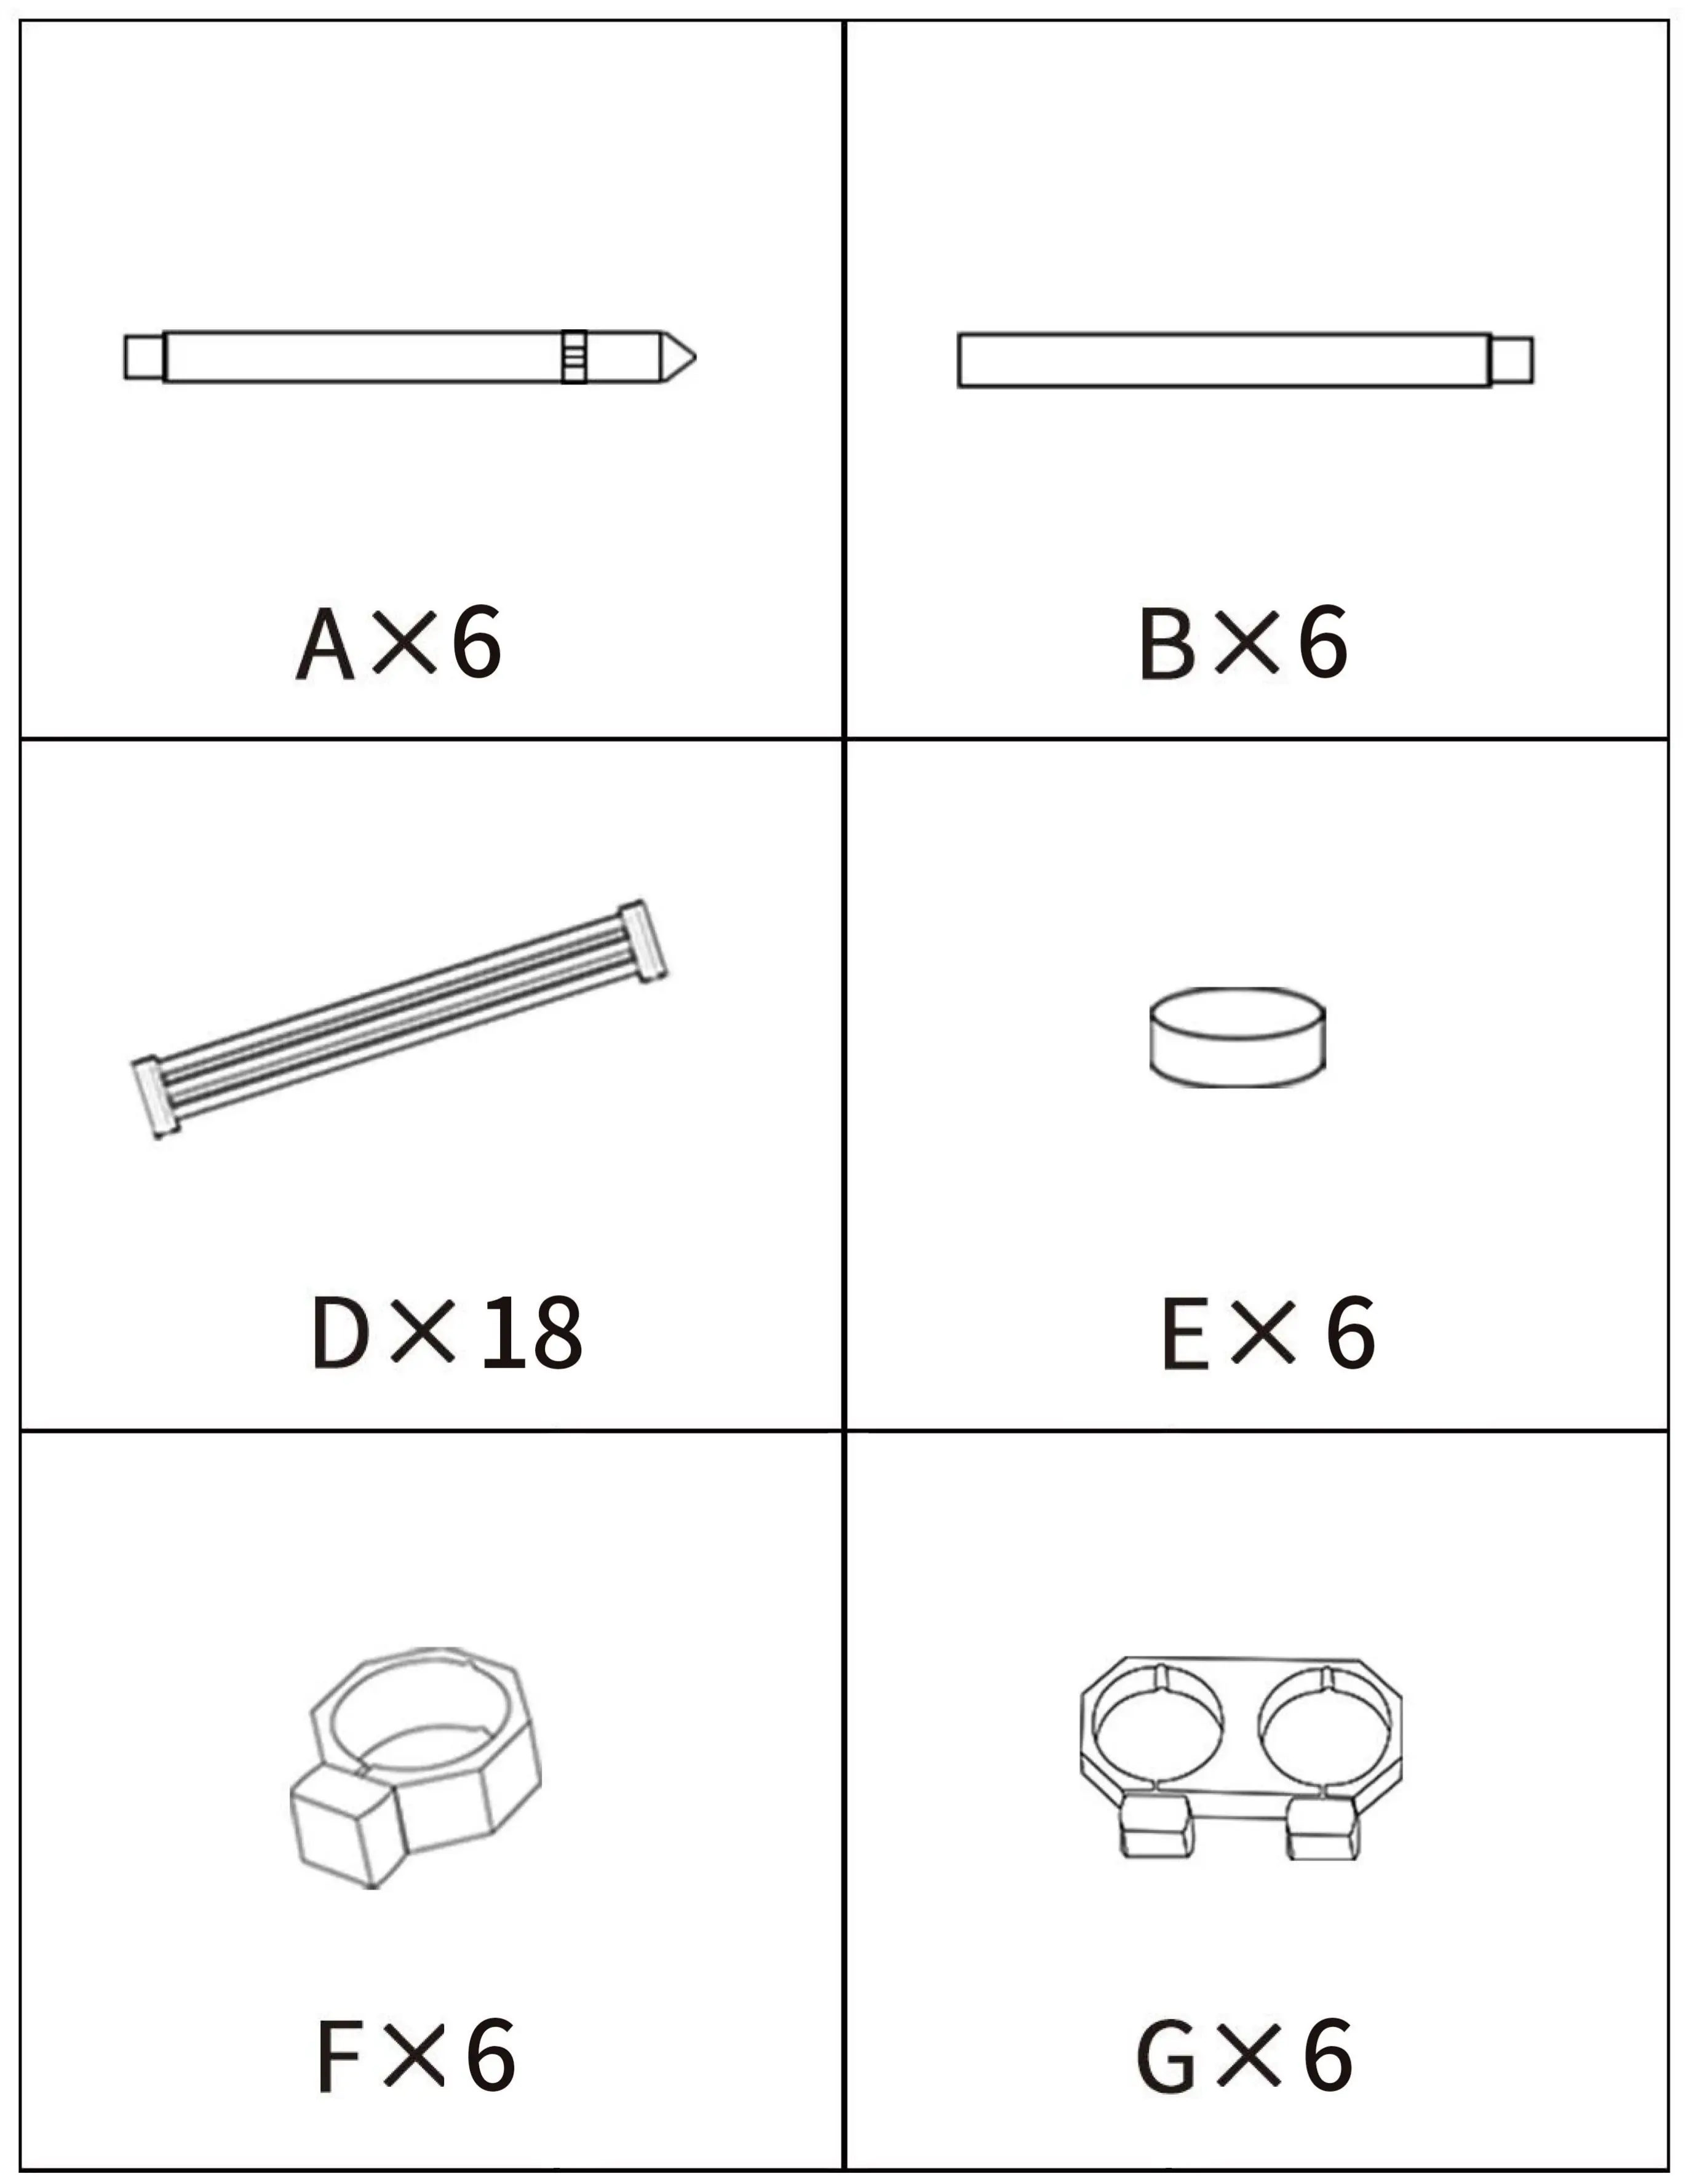
- A: 6 pieces
- B: 6 pieces
- C: Not specified
- D: 18 pieces
- E: 6 pieces
- F: 6 pieces
- G: 6 pieces
Assembly instructions
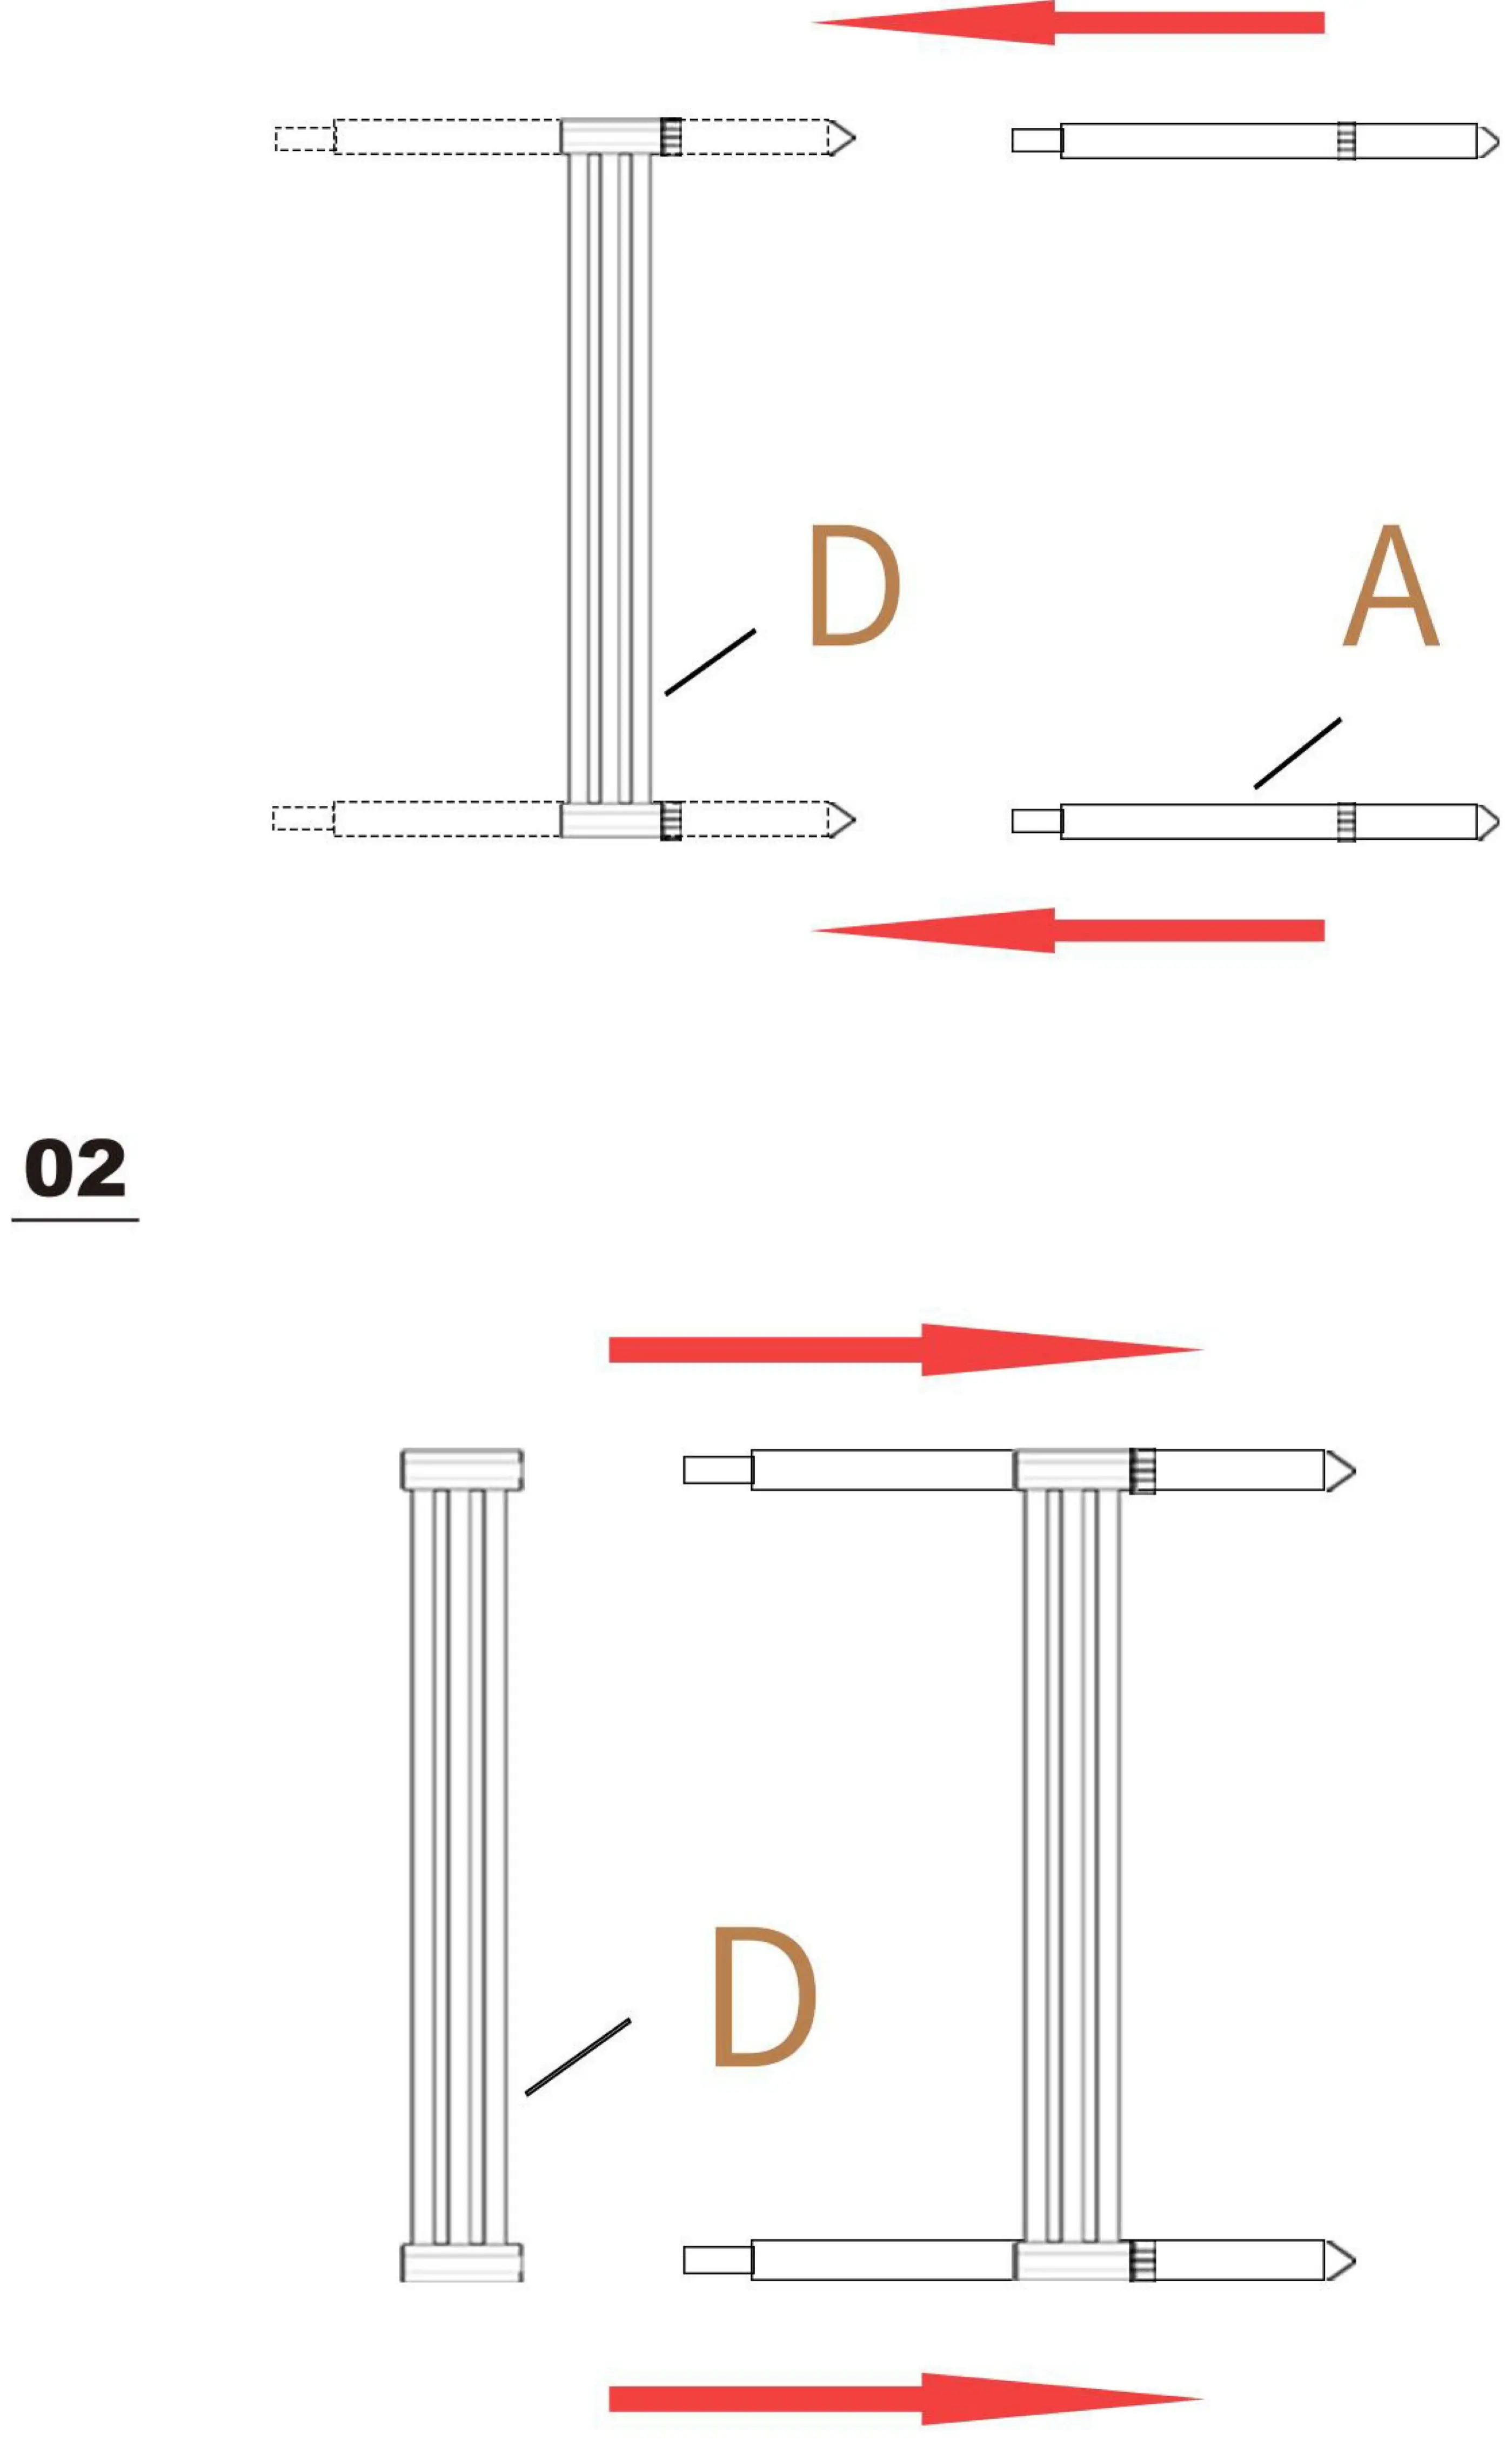
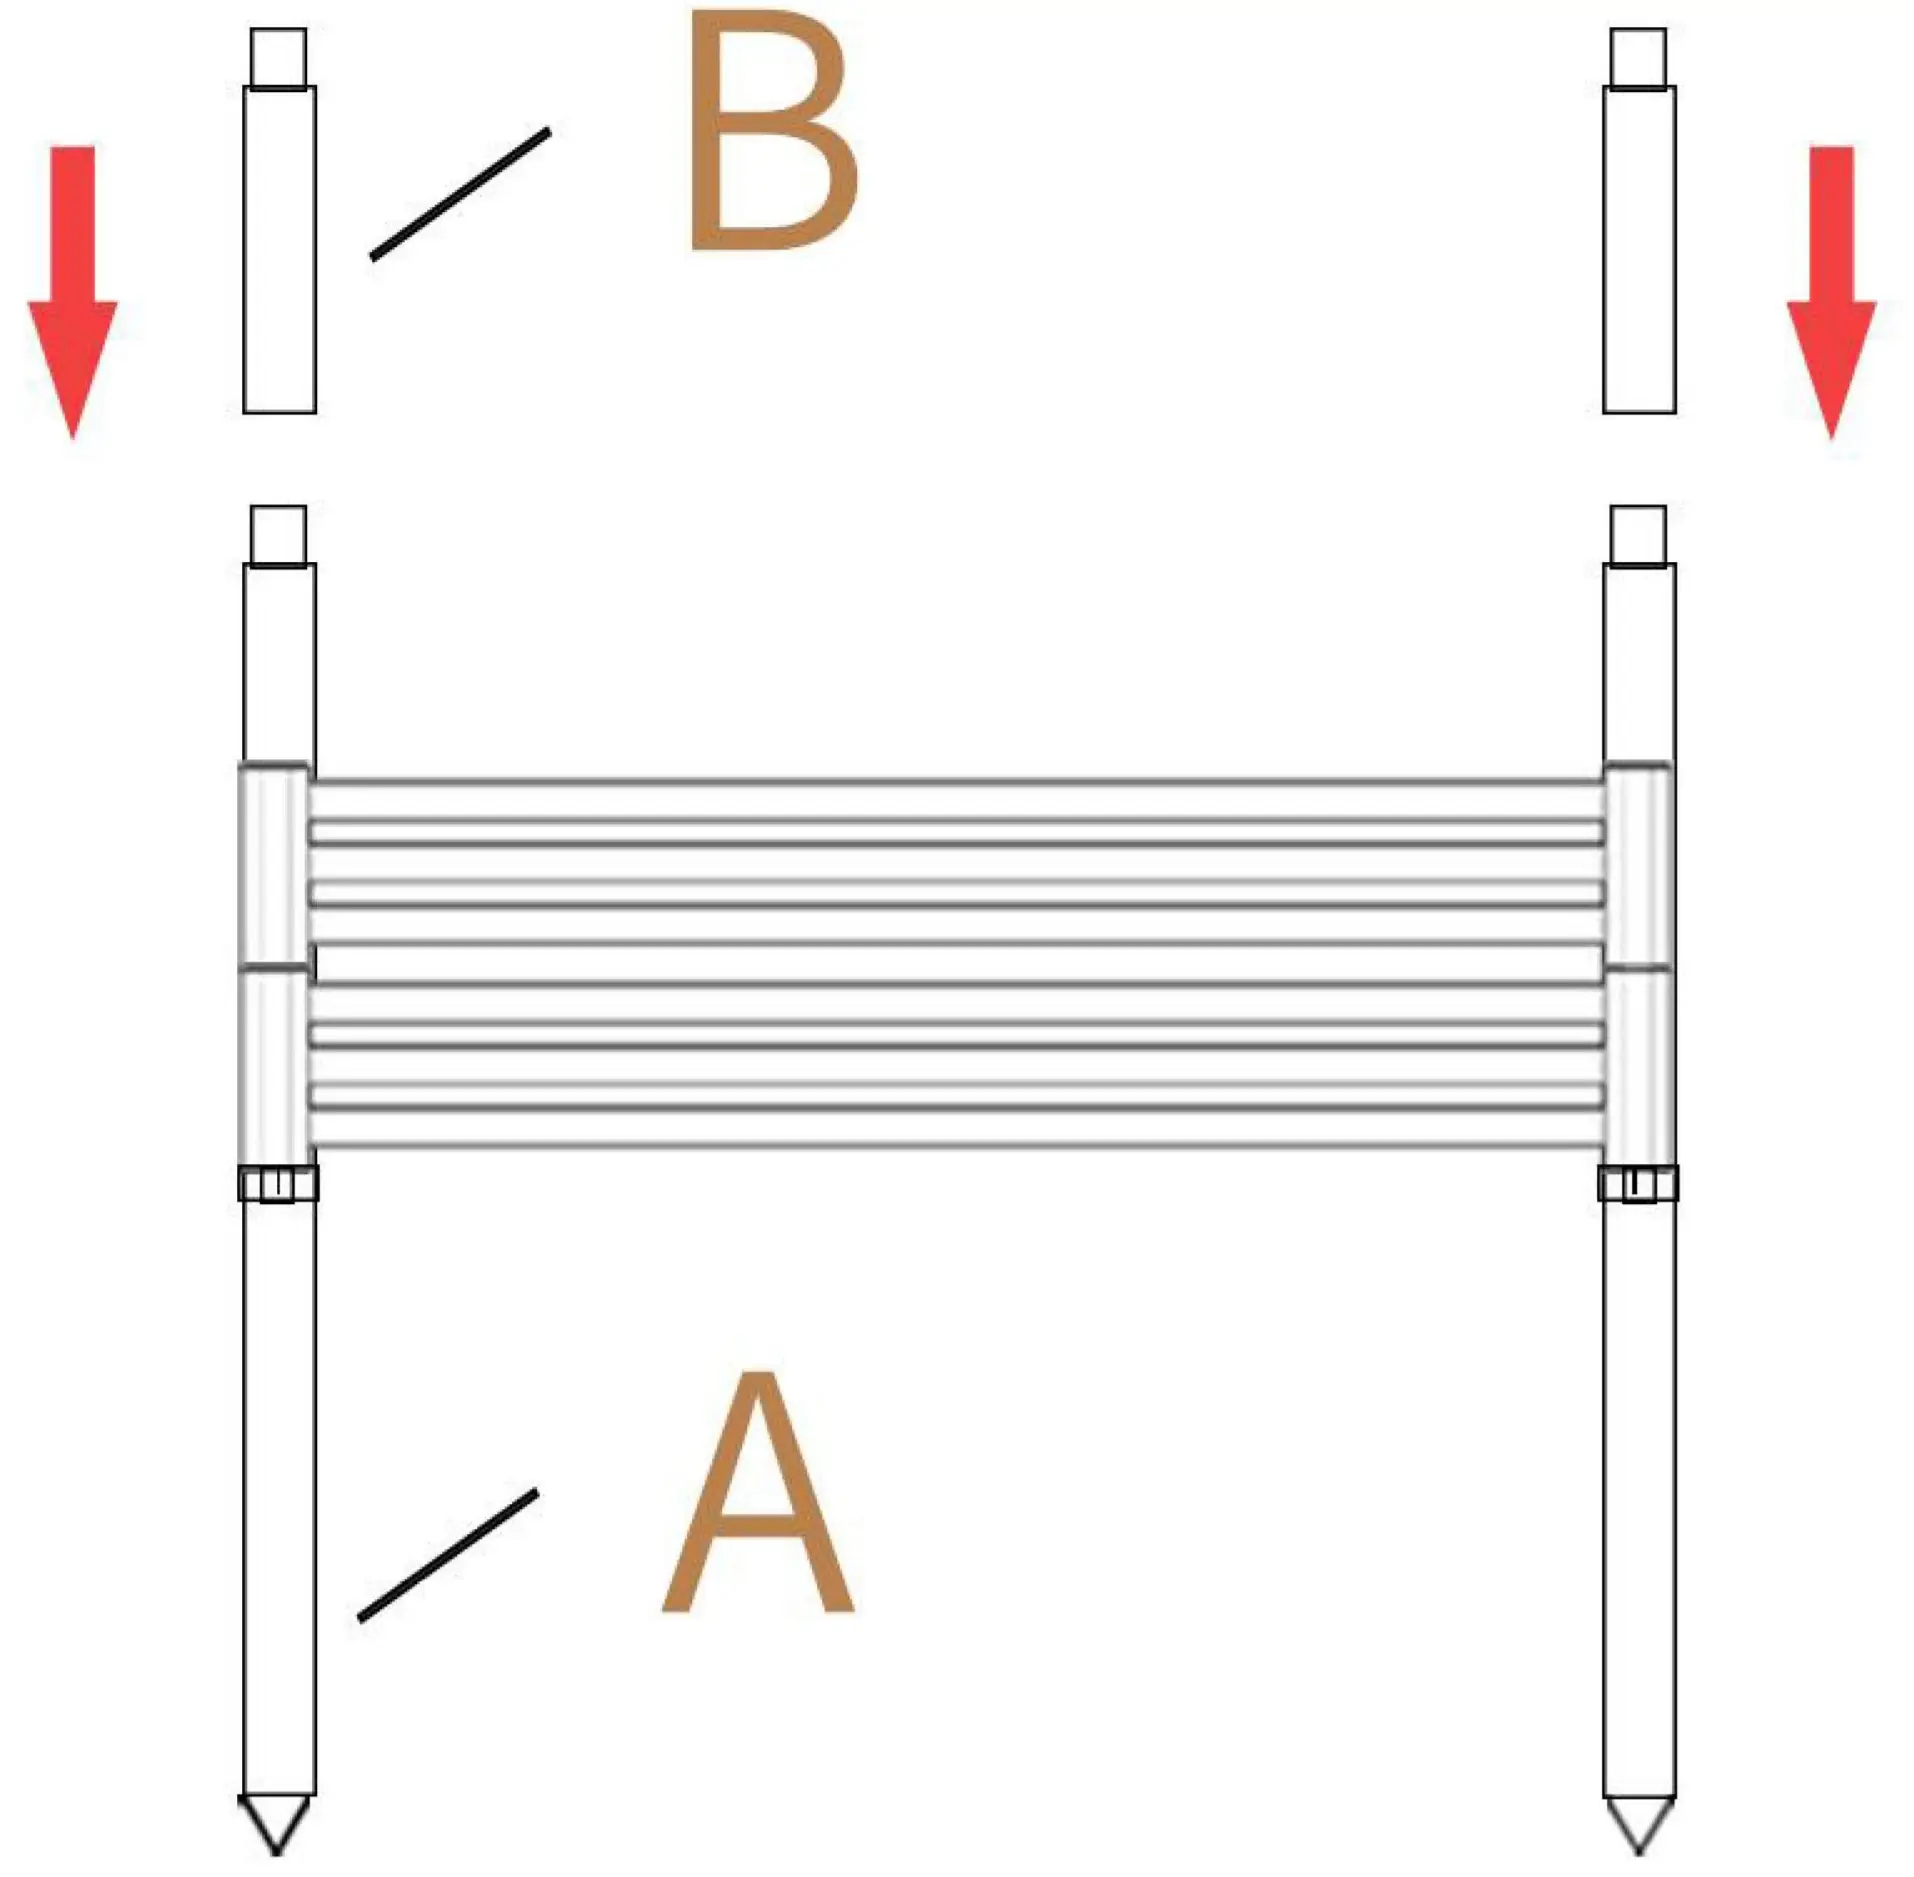
- Step 01: Insert the fence panel (D) into the side pole (A).
- Step 02: Connect the second side pole (A) to the other side of the fence panel (D).
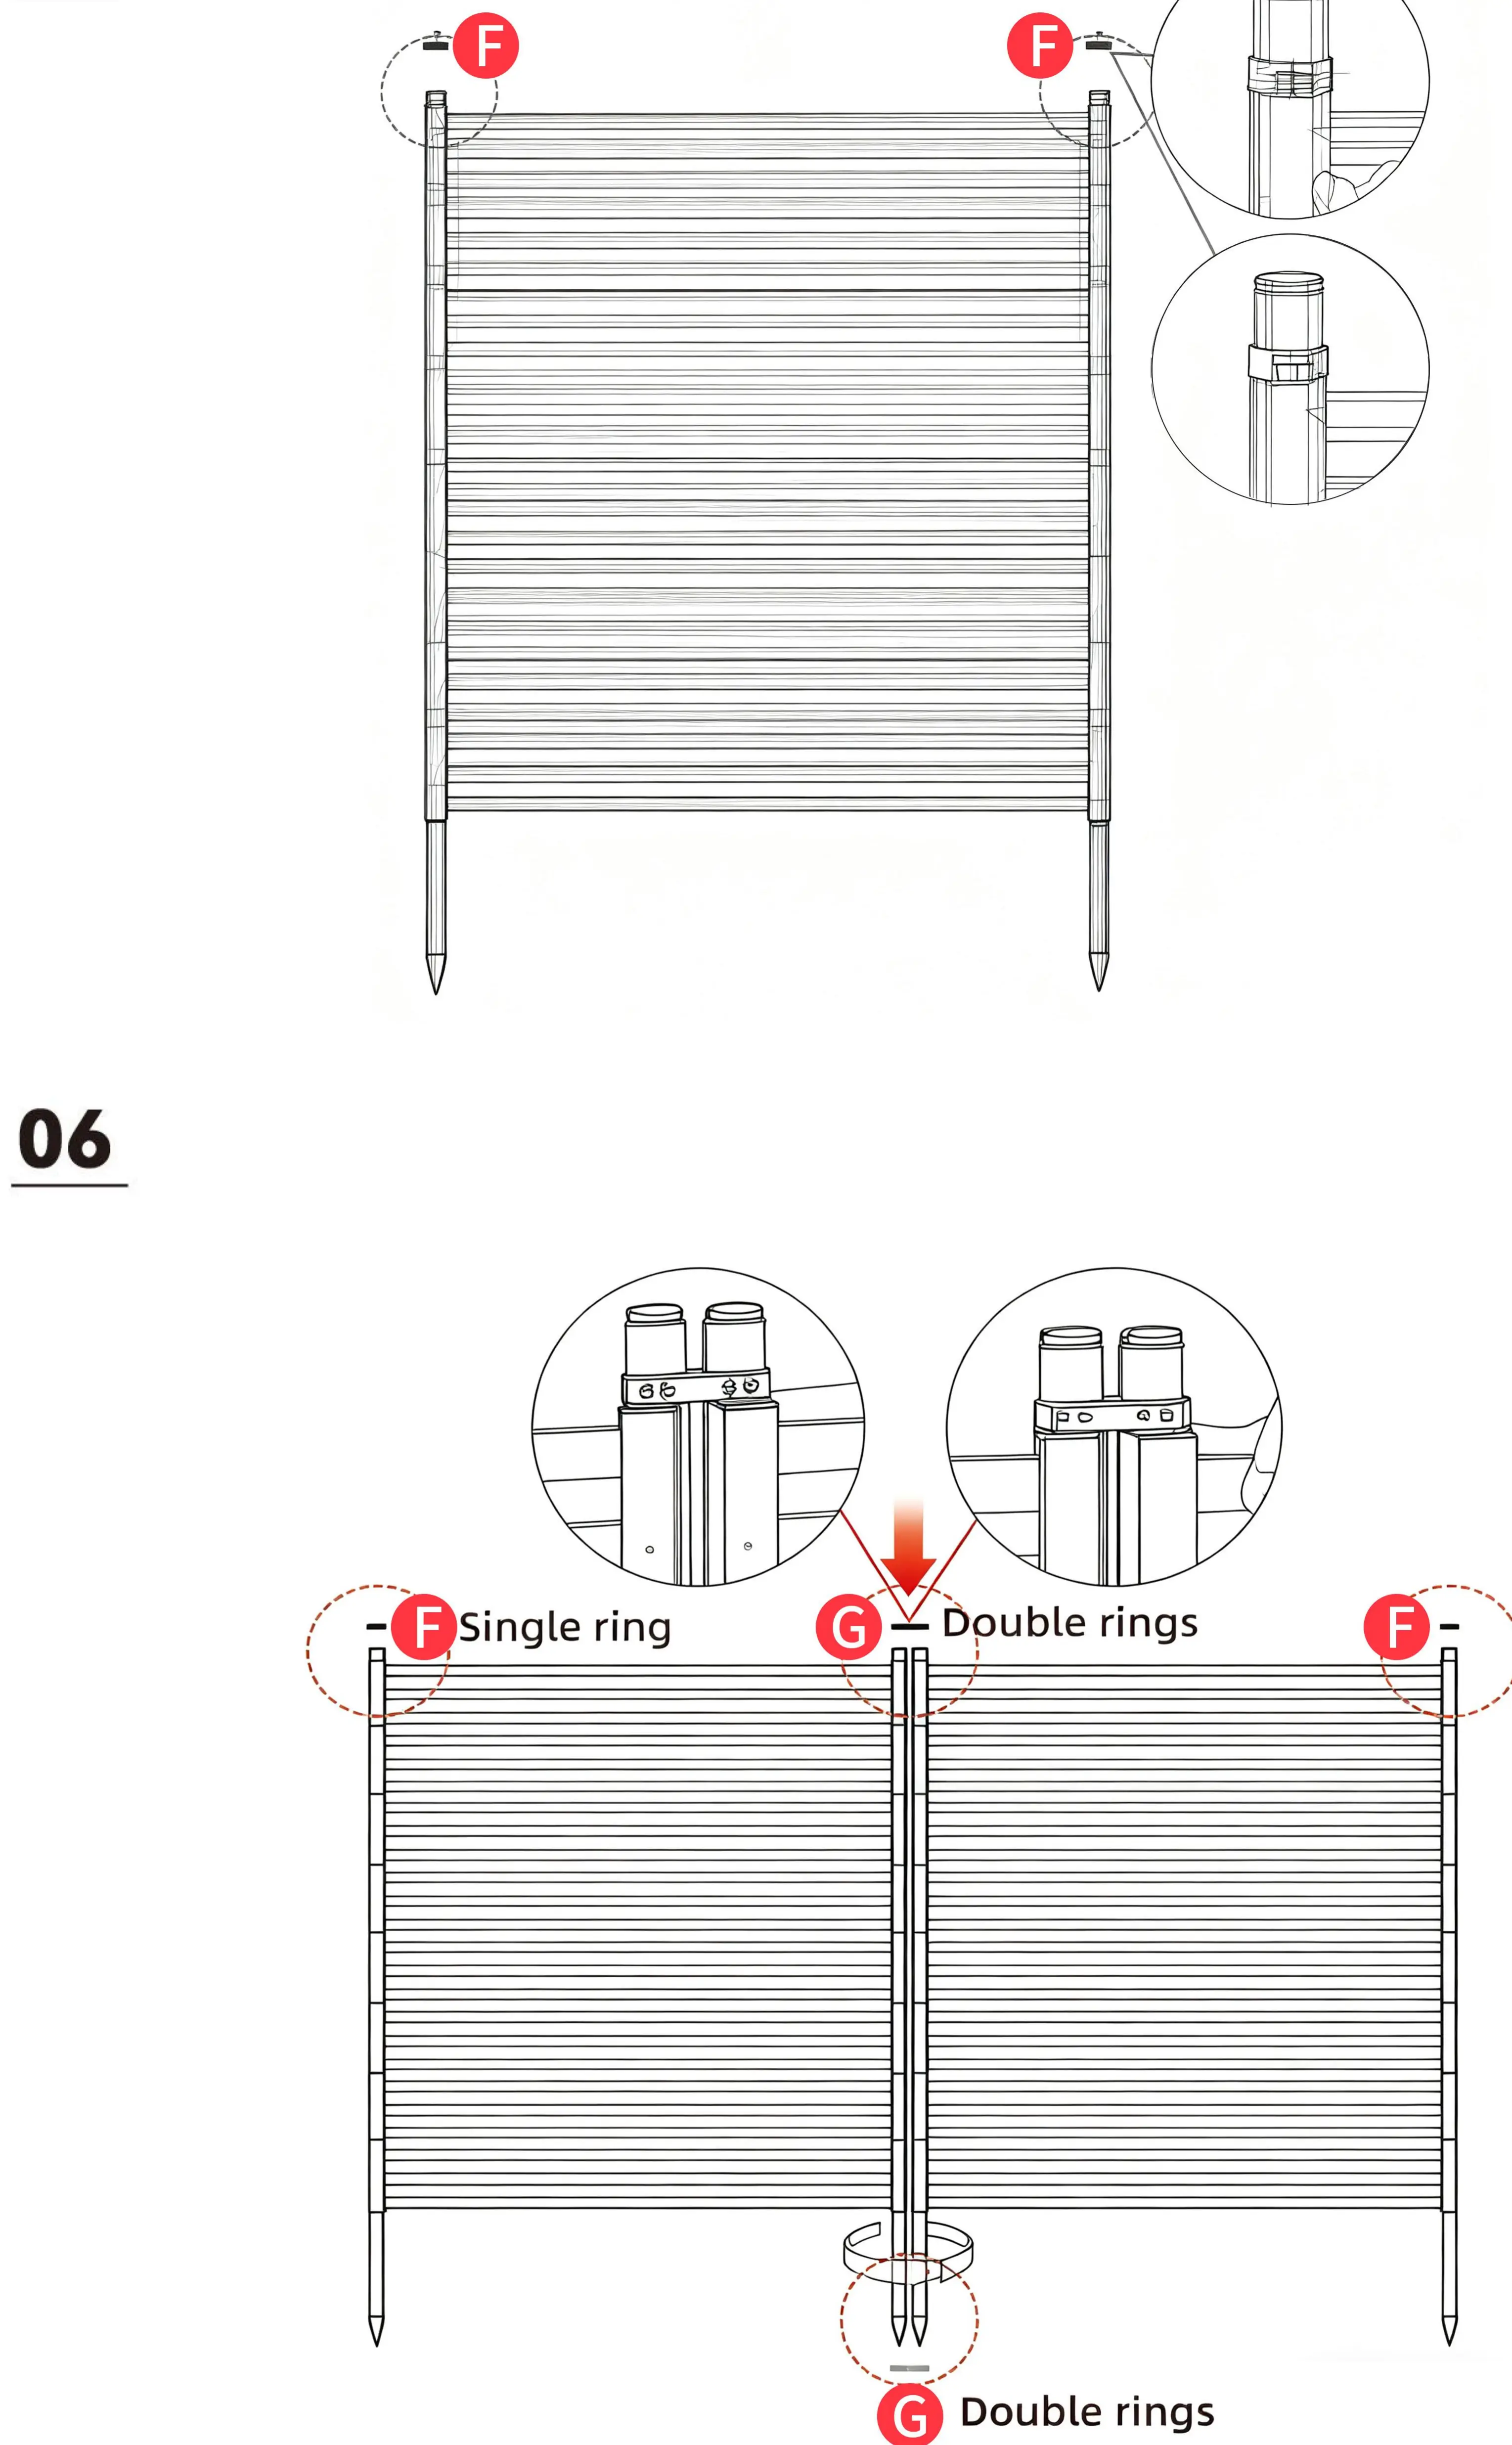
- Step 03: Insert the top poles (B) into the side poles (A).
- Step 04: Place the top caps (E) onto the top of the fence panel (D).
- Step 05: Secure the top corners using the single rings (F).
- Step 06: Connect adjacent fence panels using the double rings (G) at the bottom and top connection points.
Safety precautions
Consumers must take necessary safety precautions during installation. Ensure that children and pets are properly protected when in contact with the product to avoid accidents such as bumps or scratches. The manufacturer is not liable for personal injury or property damage resulting from improper installation.
Manufacturer information
Garvee
Practical help
Common problems
Improper installation
The manufacturer is not liable for personal injury or property damage resulting from improper installation, such as product collapse. Ensure all parts are securely connected.
Safety risks
Take necessary safety precautions during installation to protect children and pets from bumps or scratches.
Before use
- Verify all parts (A, B, D, E, F, G) are present according to the parts list.
- Clear the installation area of debris.
- Ensure you have enough space for the number of fence panels being installed.
- Check that all connections are tight and secure during assembly.
Images and diagrams
- The manual uses letter codes (A, B, D, E, F, G) to identify specific components.
- Red arrows in the diagrams indicate the direction of insertion or connection for parts.

Manual page author
Michael Turner
Technical manual editor
Reviews PDF manuals for structure, safety notes, and practical product details so readers can find the right information quickly.