Toys / RC Components
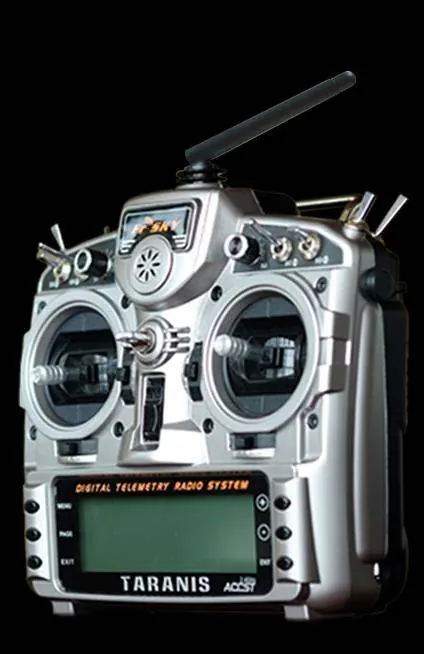
User Guide for FrSky TARANIS X9D Digital Telemetry Radio System
Comprehensive user guide for the FrSky TARANIS X9D Digital Telemetry Radio System. Learn about button navigation, model setup, mixer configuration, telemetry, and advanced features.
Quick answers from the manual
Quick answer
- The TARANIS X9D is a digital telemetry radio system. It uses a flexible mixer-based programming philosophy, allowing users to map any input to any output channel. p. 1, 15
Key actions
- Binding the receiver p. 15
- Creating a mixer line p. 10, 18
First start
- Configure general settings p. 15
Problems and fixes
Servo binding
Adjust min and max limits in the SERVOS screen.
p. 20Maintenance and reset
- Reset timers or telemetry data p. 3
Where to find it in the PDF
- Button Navigation p. 3
- Model Setting Menu p. 5, 7, 8, 9
- Telemetry p. 13, 15
Table of contents
Manual images
Click an image to enlargeQuick Guide from the Manual
The FrSky TARANIS X9D is a digital telemetry radio system that uses a flexible, mixer-based programming philosophy. Instead of predefined usage scenarios, it provides a blank canvas where you define how controls map to output channels. Key navigation involves 6 input keys (+/-, ENTER, EXIT, MENU, PAGE). To get started, configure general settings (Date, Time, Sound, Backlight, RF country code, Stick mode) using the Radio Setup menu (MENU LONG).
Button Navigation
The radio features 6 input keys: +/-/ENTER/EXIT, plus contextual MENU and PAGE keys. Use +/- to navigate fields, ENTER to edit, and EXIT to return. Long presses on MENU or PAGE keys provide access to specific sub-menus and telemetry displays.
Main Screens
The radio has 4 main views showing basic information (battery voltage, signal strength, model name, flight mode) and different inputs/outputs. A short press of the PAGE key cycles through these views. A long press of the ENTER key on the main screen opens a menu to reset timers or view statistics.
Radio General Settings
Access this menu with a long press of the MENU key. Key settings include:
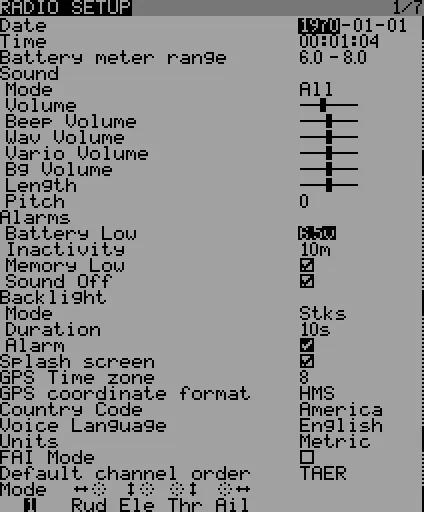
- Date/Time: For file and log timestamps.
- Battery range: Configure based on your battery type.
- Sound: Adjust mode, length, pitch, and volume.
- Alarms: Set values for battery low, inactivity, and memory low.
- Backlight: Configure mode, duration, and alarm behavior.
- Country code: Must match your location for regulatory compliance.
- Mode: Set your stick mode (e.g., Mode 1 or Mode 2).
Model Setup
The Model Setting Menu is the core of the radio's operation. It includes:
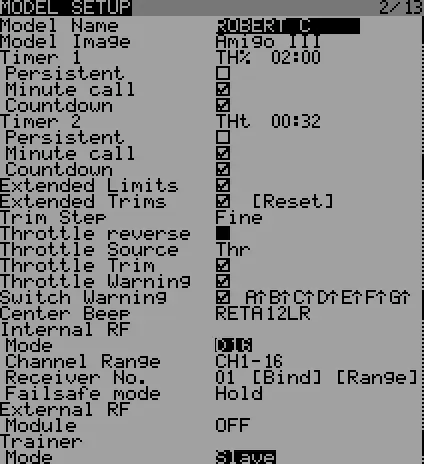
- Model Selection: Create, select, delete, back up, or restore models.
- Model Setup: Configure basic parameters like timers, extended limits, and internal RF settings (Mode, Channel Range, Receiver No.).
- Mixer: The central screen where you map inputs (sticks, switches, pots) to output channels. You can add, multiply, or replace mixer lines.
- Servos: Interface between the mixer logic and physical servos. Adjust offsets, subtrims, limits, and reverse here.
- Flight Modes: Define up to 8 flight modes with specific trims and fade settings.
- Custom Switches: Create logic switches to compare values and combine conditions.
- Custom Functions: Trigger special actions like trainer mode, audio playback, or logging based on switch positions.
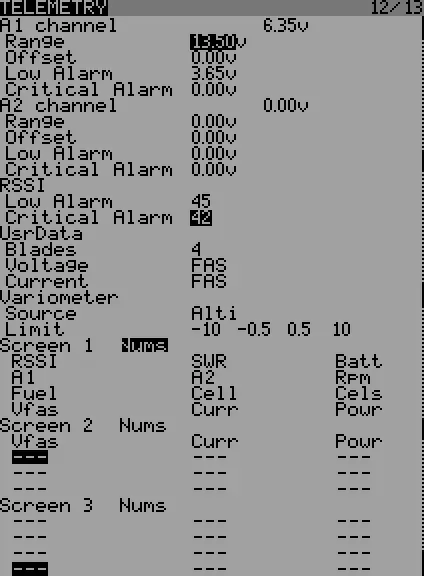
- Telemetry: Configure sensors and telemetry screens to display data like voltage, altitude, or RPM.
Advanced Features
The radio supports advanced features including:
- Flight Modes: Use these to create complex functions by controlling mixer lines based on the active mode.
- Audio: Play sound files, announce telemetry values, or play background music using a micro SD card.
- Global Variables: Group adjustments for multiple parameters, making them flight-mode specific and adjustable in flight.
Manufacturer information
FrSky Electronic Co., Ltd.
Practical help
Common problems
Radio not binding to receiver
Ensure the correct RF mode is selected in Model Setup. Follow receiver-specific binding instructions (e.g., holding F/S button or using a jumper).
Servo not responding
Check the Mixer screen to ensure inputs are assigned to channels. Verify channel order and servo connections.
Mechanical binding
Adjust servo limits in the SERVOS screen to prevent binding at extreme stick positions.
Before use
- Charge the battery.
- Configure general settings (Date, Time, Sound, Backlight).
- Set RF country code to your location.
- Set stick mode to match your flying style.
- Bind the receiver.
Specs in practice
- Global Variables
- Values that can be substituted for weights, offsets, or expo, allowing easy adjustment of multiple parameters at once.
- Custom Switches
- Logic switches used to compare values and combine conditions for advanced control.
Images and diagrams
- Button navigation layout
- Main screen views
- Mixer screen interface
- Telemetry setup screen
Model compatibility
- Compatible with FrSky D and X series receivers.
- Requires micro SD card for audio and logging features.

Manual page author
Emily Carter
User documentation editor
Prepares concise manual descriptions and highlights the most useful setup, operation, and maintenance information for readers.