Music / Guitar Amplifiers
Equinox Helix XP 150W Gobo Flower User Manual
Quick guide for the Equinox Helix XP 150W Gobo Flower. Includes setup, DMX configuration, operating modes, gobo replacement, and technical specifications.
Table of contents
Manual images
Click an image to enlargeQuick guide from the manual
This document provides essential instructions for the Equinox Helix XP 150W Gobo Flower. Before initial startup, inspect the unit for transport damage. Ensure the mains voltage is between 100-240V AC, 50/60Hz. This fixture is for professional use only and must be installed by a qualified technician.
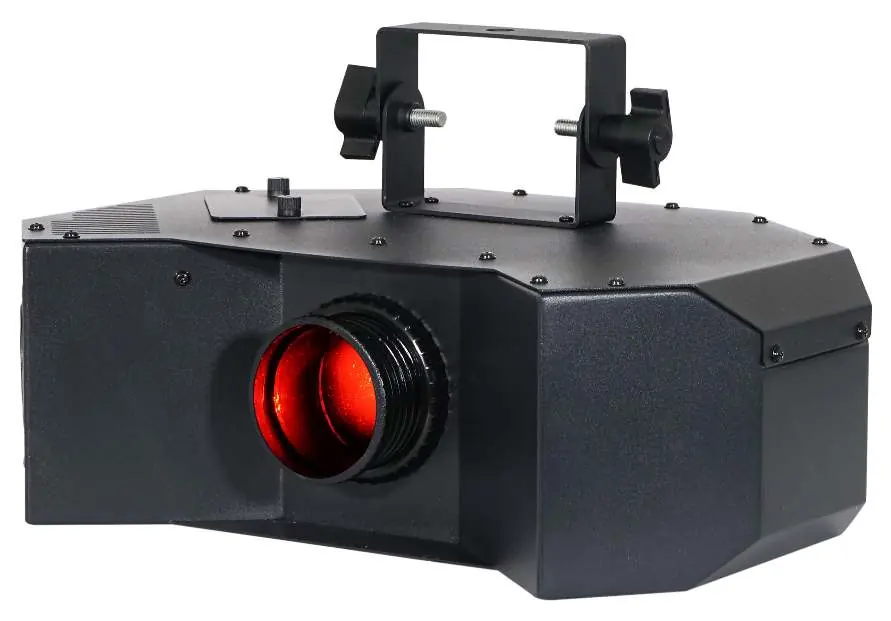
Product overview
The Helix XP is a 150W LED gobo flower featuring 8 rotating, replaceable gobos and a separate colour wheel with 9 colours plus open. It includes an additional 11-piece gobo pack. The unit supports DMX, auto, sound active, and master/slave modes.
Gobo replacement
To replace a gobo:
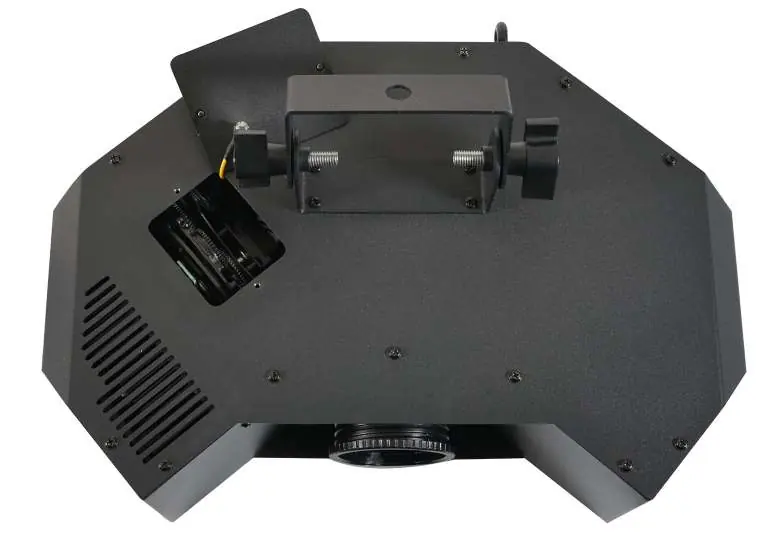
- Disconnect from power and allow the unit to cool.
- Unscrew the thumbscrews on the gobo access door and remove it.
- Push the gobo holder away from the wheel and pull it out.
- Remove the circlip, swap the gobo, and replace the circlip.
- Push the holder back into the slot, replace the access door, and tighten the thumbscrews.
Operating modes
The unit features a 4-button menu with an LED display. Key modes include:
- DMX Mode: Set the start address via the 'Addr' menu. Choose between 2, 6, or 8 channel modes via 'CHnd'.
- Master/Slave: Set the master unit via 'NASt' and slave units via 'SLnd'.
- Show Mode: Select built-in programs (SH-0 to SH-6) via 'SHnd'.
- Sound Active: Enable via 'SoUn' and adjust sensitivity via 'SEnS'.
- Manual Mode: Adjust dimmer, strobe, colour, gobo, and rotation via 'MANU'.
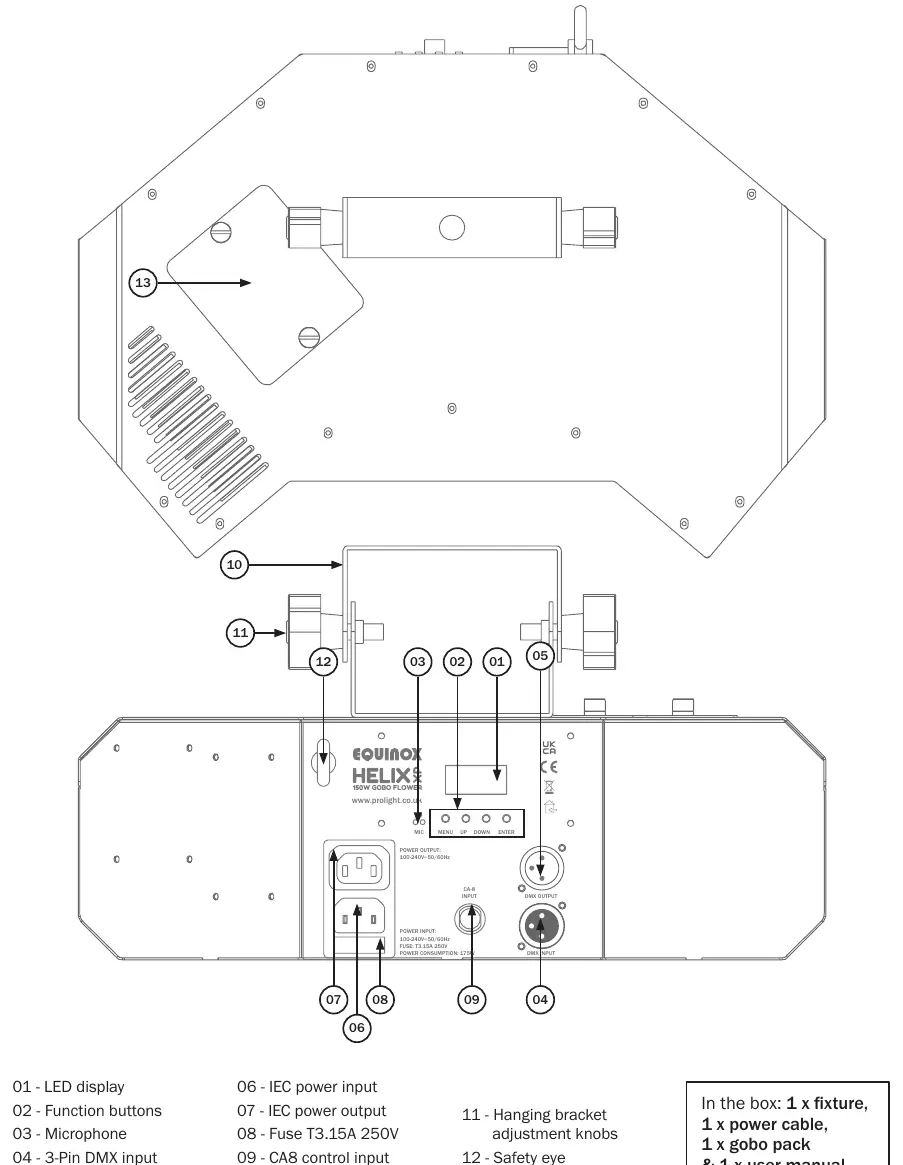
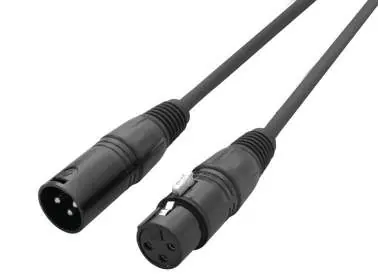
DMX setup
Use standard 3-pin or 5-pin XLR cables for DMX linking. Daisy-chain units and use a terminator (120 Ohm resistor) on the last fixture to prevent erratic behavior. The DMX address is set on the rear of the unit.
Technical specifications
- Power consumption: 175W
- Power supply: 100-240V, 50/60Hz
- Fuse: T3.15A 250V
- Dimensions: 205 x 370 x 273mm
- Weight: 4.8kg
Practical help
Common problems
Unit fails to function
Check power connection, fuse, and ensure the unit is not in blackout mode.
Erratic behavior
Use a DMX terminator (120 Ohm resistor) on the last unit in the DMX chain.
Condensation after transport
Do not power on immediately; leave the unit switched off until it reaches room temperature.
Before use
- Check for transport damage.
- Ensure mains voltage is 100-240V AC, 50/60Hz.
- Verify fuse rating (T3.15A 250V).
- Ensure proper ventilation (do not block air intake).
- Confirm the unit is for indoor use only.
Specs in practice
- DMX Channels
- 2, 6, or 8 selectable channels for control.
- Power Consumption
- 175W.
Images and diagrams
- Gobo replacement steps show removing the access door and swapping the gobo holder.
- DMX setup diagram illustrates daisy-chaining units and using a terminator.
Model compatibility
- Professional use only, not for household use.
- Compatible with CA-8 remote controller (sold separately).

Manual page author
Michael Turner
Technical manual editor
Reviews PDF manuals for structure, safety notes, and practical product details so readers can find the right information quickly.