Home Appliances / Air Purifiers
User Manual for Global Sources 10408 7-Inch Wireless Monitor
Comprehensive user guide for the Global Sources 10408 7-inch wireless monitor. Includes installation, wiring, menu settings, camera pairing, and troubleshooting instructions.
Quick answers from the manual
Quick answer
- This device is a wireless color LCD monitor for vehicle rear-view systems, supporting up to 4 wireless cameras and 10-32V power input. p. 1, 7
Key actions
- Pairing cameras p. 25
- Wiring installation p. 14
First start
- Pair the monitor with the camera before installing the wireless system on the vehicle. p. 25
Problems and fixes
No signal
Check whether the camera has power supply. Pair the monitor and the camera again.
p. 26Maintenance and reset
- Use a mild household detergent and clean the unit with a slightly damp, soft cloth. p. 6
Technical specifications
| Parameter | Value | Meaning | Pages |
|---|---|---|---|
| Power Supply | DC 10-32V | Operating voltage range | p. 8 |
| Transmitting Distance | Max. 300 m | Maximum wireless range | p. 8 |
Where to find it in the PDF
- Installation and Wiring p. 9, 14
- Menu Settings p. 14, 23
Table of contents
Manual images
Click an image to enlargeQuick guide from the manual
This monitor is designed for vehicle rear-view systems. Before installation, ensure the vehicle power supply is between 10-32V. The system supports up to 4 wireless cameras. Always pair the monitor with the cameras before permanently installing them on the vehicle to ensure signal connectivity.
Product description
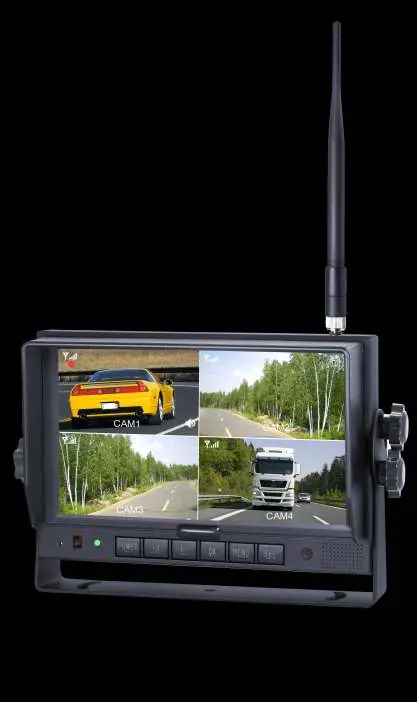
The device is a 7-inch TFT LCD monitor featuring high-resolution display, 4 wireless camera inputs, and support for multiple display modes (single, dual, quad). It includes a 1.5W speaker and can be operated via remote control or the front keypad.
Installation
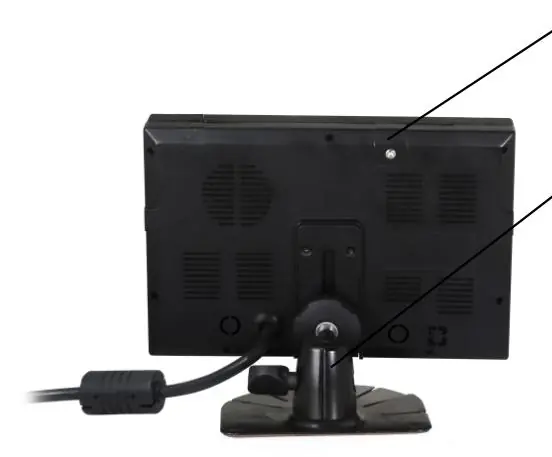
Mounting: The monitor comes with a center mounting bracket or a U-support bracket. Adjust the monitor level by sliding the support and tighten the knob to secure the angle.

Wiring: Connect the power cable as follows:
- Red wire: Positive power supply (DC 10-32V).
- Black wire: Ground.
- Brown wire: Positive power wire of back-up light.
- White wire: Positive power wire of left light.
- Blue wire: Positive power wire of right light.
- Green/Yellow wire: Other positive power wire.
Pairing cameras
To pair a camera with the monitor:
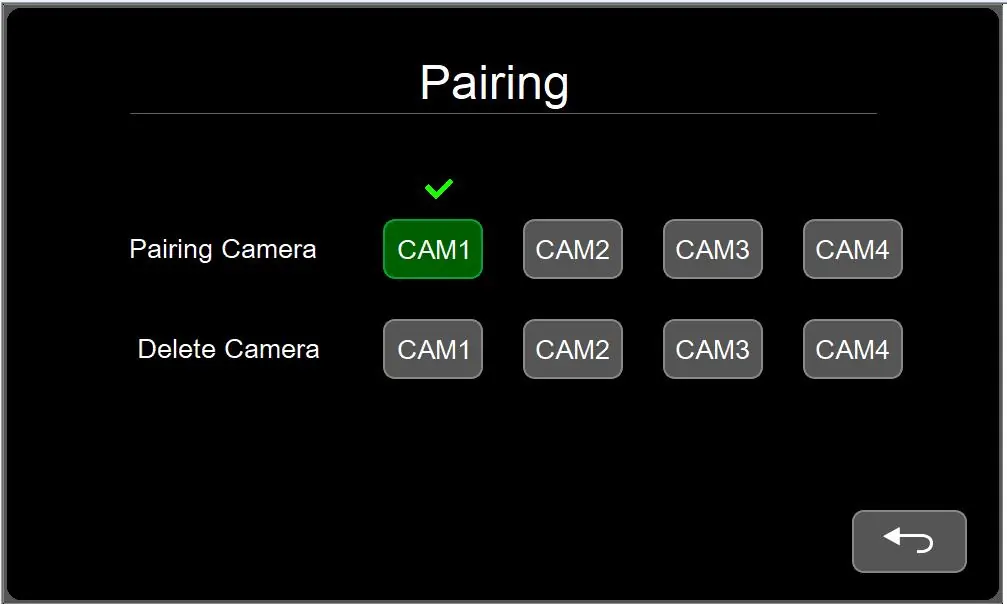
- Power off the unpaired camera.
- Switch the monitor channel to the one you wish to pair.
- Enter the MENU interface and select PAIRING.
- Press OK to start the 20-second countdown.
- Connect the camera to the power supply during this countdown.
- The camera will pair within 5 seconds, and the image will appear on the screen.
Menu operation and settings
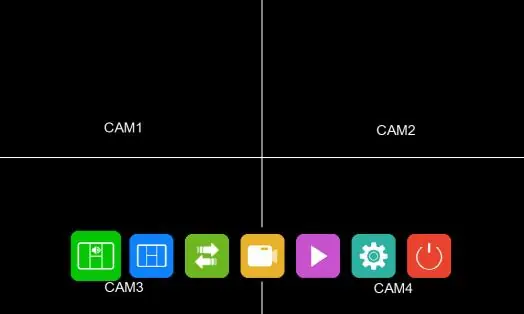
Access the main menu by touching the screen or pressing the MENU button on the remote. Key settings include:
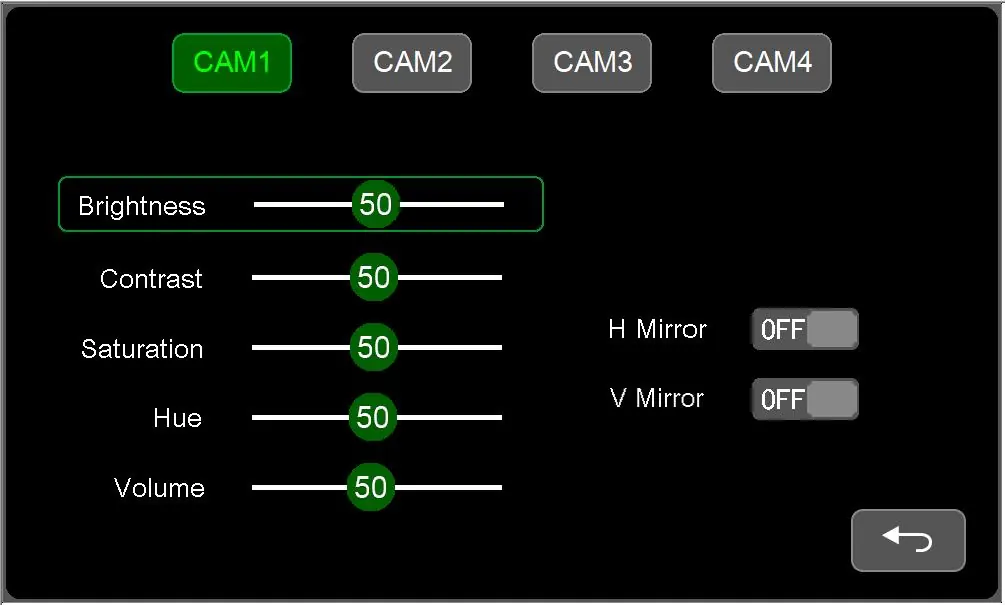
- Camera Display Settings: Adjust brightness, contrast, saturation, hue, and volume. Set H-Mirror or V-Mirror for each channel.
- Record: Set recording duration, format the SD card, and adjust date/time.
- System: Adjust backlight (dimmer), menu lock, and system upgrades.
- Trigger: Configure trigger priority and delay for specific camera views.
- Auto Scan: Enable automatic channel scanning with adjustable duration.
- Parking/Guide Line: Enable and adjust parking/guide lines for specific camera views.
Maintenance
Before cleaning, remove all cable connections. Use a mild household detergent and a slightly damp, soft cloth. Do not use strong solvents like thinner or benzine, as they may damage the device finish.
Troubleshooting
If you encounter issues, check the following:
- No picture/sound: Check the automobile adapter connection and ensure the power switch is not in the OFF position.
- No signal: Verify the camera has power and re-pair the monitor and camera.
- No sound: Ensure the volume is not turned off or set too low.
- Dark picture: Adjust the brightness and contrast settings.
- No color: Adjust the HUE settings.
Practical help
Common problems
No signal
Check if the camera has power supply. Pair the monitor and the camera again.
No picture, no sound
Check automobile adapter connection and ensure the power switch is not in the OFF position.
Dark picture
Check whether brightness and contrast are adjusted correctly.
No color
Adjust the HUE settings.
Before use
- Verify vehicle power supply is 10-32V.
- Ensure antennas are vertically aligned to the ground.
- Pair the monitor with the camera before final installation.
- Check that all cables are connected with correct polarity.
- Ensure there is no metal shielding between the monitor and camera.
Specs in practice
- Power Supply
- DC 10-32V input range.
- Transmitting Distance
- Maximum 300 meters.
Images and diagrams
- Wiring diagram shows color-coded wires for power and trigger lights.
- Remote control diagram identifies buttons for Mute, Power, Menu, Volume, Pairing, and Mirror flip.
- Installation tips show correct vertical antenna alignment and magnet-based extension antenna placement.
Model compatibility
- Supports 4 wireless camera inputs.
- Compatible with 12V or 24V vehicle electrical systems.

Manual page author
Emily Carter
User documentation editor
Prepares concise manual descriptions and highlights the most useful setup, operation, and maintenance information for readers.