Home Appliances / Space Heaters
Operating Instructions for Goldair Ceramic Wall Heater GCW220
Quick guide for the Goldair GCW220 Ceramic Wall Heater. Includes installation steps, safety warnings, operating instructions, and maintenance tips.
Quick answers from the manual
Quick answer
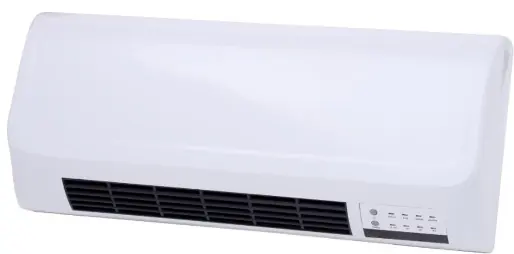
- The Goldair GCW220 is a 2000W ceramic wall heater. It must be wall-mounted at least 1.8m from the floor. It features heat settings, a timer, and a remote control. p. 1, 4, 6
Key actions
- Mounting the heater p. 5
- Operating heat settings p. 6
First start
- Initial use p. 6
Problems and fixes
Overheating
Clean dust or fluff from air vents and grills.
p. 2, 7Maintenance and reset
- Cleaning p. 7
Technical specifications
| Parameter | Value | Meaning | Pages |
|---|---|---|---|
| Wattage | 2000W | Power output | p. 7 |
| Supply | 220-240VAC 50Hz | Electrical requirements | p. 7 |
Where to find it in the PDF
- Safety Guide p. 2, 3
- Installation p. 4, 5
- Operation p. 6
- Technical Specs p. 7
Table of contents
Manual images
Click an image to enlargeQuick guide from the manual
The Goldair GCW220 is a 2000W ceramic wall heater designed for household use. It must be wall-mounted at a height of 1.8m from the floor. The unit features multiple heat settings, a timer function, and a remote control. Always ensure the unit is not covered and has proper clearance from surrounding objects to prevent fire hazards.
Safety Warnings
- Fire Risk: Never cover the appliance. Keep all objects at least 1 metre away from the front, sides, and rear.
- Installation: Do not mount directly under or over an electrical power socket.
- Usage: Do not use with external programmers, remote-control systems, or timers that switch the appliance on automatically.
- Children: Keep out of reach of children. Do not allow children to play with the appliance.
- Environment: Indoor use only. Do not use near baths, showers, swimming pools, or in areas where flammable liquids are stored.
Components
- Main Unit
- Remote Control
- Screw Pack (2 screws, 2 expanding screw pipes)
Installation
Before using, the appliance must be wall-mounted. Ensure all packaging is removed.
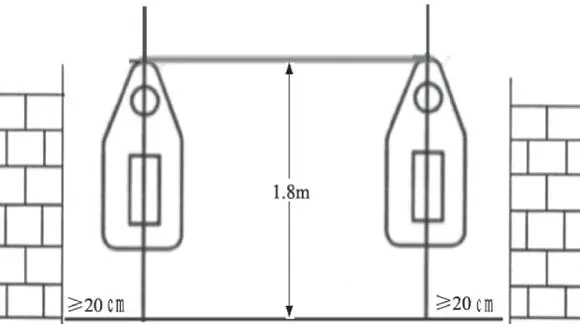

- Clearances: Install at least 1.8m from the floor, 300mm from the ceiling, and 200mm from any surrounding parts (side walls, shelves, etc.).
- Mounting: Drill two holes in the wall. Insert expanding screw pipes. Fix screws, leaving tips out approximately 10mm. Hang the heater on the screws and slide to the right and down to lock it in place.
- Power: Do not run the power cord behind the heater.
Operating your Appliance
Plug the heater in and turn on at the mains supply.
- Power Button: Press once to turn on (fan only). Press a second time for Low Heat. Press a third time for High Heat. Press again to turn off.
- Timer: Press the TIME button to set operation from 0.5 to 7.5 hours in 0.5-hour increments.
- Remote: Requires 1 x CR2025 battery (not included). Has a 3-metre range.
- Note: When turned on for the first time, a slight odour or smoke may occur; this is normal.
Care and Cleaning
- Always unplug and allow the appliance to cool completely before cleaning.
- Use a damp cloth (not wet) to wipe the exterior.
- Use a vacuum cleaner to remove dust and fluff from air vents and grills.
- Do not use abrasive cleaning products, benzene, or thinners.
- There are no user-serviceable parts inside.
Technical Specifications
- Model: GCW220
- Supply: 220-240VAC 50Hz
- Wattage: 2000W
Manufacturer information
Goldair
Practical help
Common problems
Heater not working
Check power supply, ensure the unit is not covered, and verify the thermal link has not tripped due to overheating.
Overheating
Ensure vents are free of dust and fluff. Maintain at least 1 metre clearance from objects.
Remote not working
Check if the CR2025 battery is installed correctly. Ensure you are within the 3-metre range and aiming at the sensor.
Before use
- Remove all packaging from the unit.
- Check for transport damage.
- Verify the wall is suitable for mounting.
- Ensure the power supply matches the rating label.
- Check that the power cord is not damaged.
Specs in practice
- 220-240VAC 50Hz
- Standard electrical supply requirements for the device.
Images and diagrams
- Installation diagram: Shows 1.8m height from floor and 20cm side clearance.
- Mounting steps: Illustrates drilling, inserting screw pipes, and locking the heater onto the wall screws.
Model compatibility
- Must be wall-mounted.
- Not for use with external timers or programmers.
- Not for commercial or industrial use.

Manual page author
Emily Carter
User documentation editor
Prepares concise manual descriptions and highlights the most useful setup, operation, and maintenance information for readers.