Home Appliances / Vacuum Cleaners
Service Manual for Grundig M 100-CDC 3-Disc CD Changer
Comprehensive service and operating guide for the Grundig M 100-CDC 3-disc CD changer. Includes detailed disassembly instructions, lubrication points, technical specifications, operating procedures, and complete circuit diagrams.
Table of contents
Manual images
Click an image to enlargeImportant Information from the Manual
This document is a comprehensive Service Manual for the Grundig M 100-CDC 3-Disc CD Changer. It provides essential information for technicians and advanced users, including disassembly procedures, circuit diagrams, and maintenance instructions. Please note that this device contains a Class 1 Laser Product; always follow safety regulations when servicing.
Product Overview
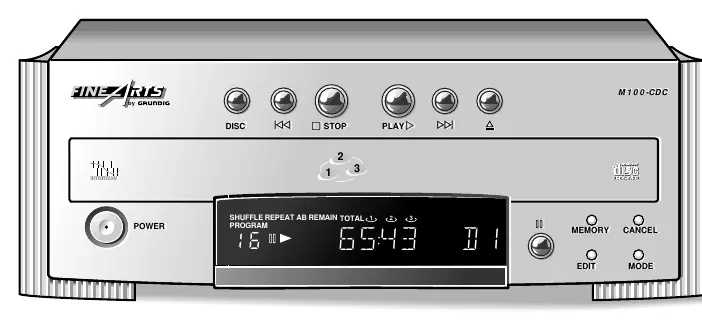
The M 100-CDC is a carousel-type 3-disc CD changer featuring a high-performance DAC. It allows for up to 3.5 hours of continuous playback. The unit is designed to be integrated into a Grundig M 100 series system via the RC-BUS, allowing for remote control and automatic source selection.
Installation and Connections
- Ventilation: Ensure at least 3 cm of free space on the sides and top, and 5 cm at the back.
- Audio Connections: Connect the ANALOG OUTPUT to the CD input of your amplifier. Use the DIGITAL OUTPUT if your amplifier or recorder supports it.
- RC-BUS: Interconnect the RC-BUS sockets to enable remote control functionality via the amplifier or receiver.
- Power: Connect to a 230V~, 50/60 Hz power source.
Operating Procedures
- Inserting CDs: Press the eject button to open the compartment. Insert discs into the left and right trays. Press the DISC button to rotate the carousel for the third disc.
- Playback: Press PLAY to start. The unit automatically searches for a disc in tray 1, then 2, then 3.
- Programming: You can program up to 40 tracks from the 3 discs. Press MEMORY to enter program mode, select the CD and track, and press MEMORY again to store.
- CD Copy: Use the CD COPY function to record to a cassette deck. Ensure both units are connected via RC-BUS.
Disassembly and Maintenance
Safety Warning: Before servicing, ensure the unit is disconnected from the power supply. When unhooking the mains switch push rod, the switch must be in the OFF position.
Disassembly Steps
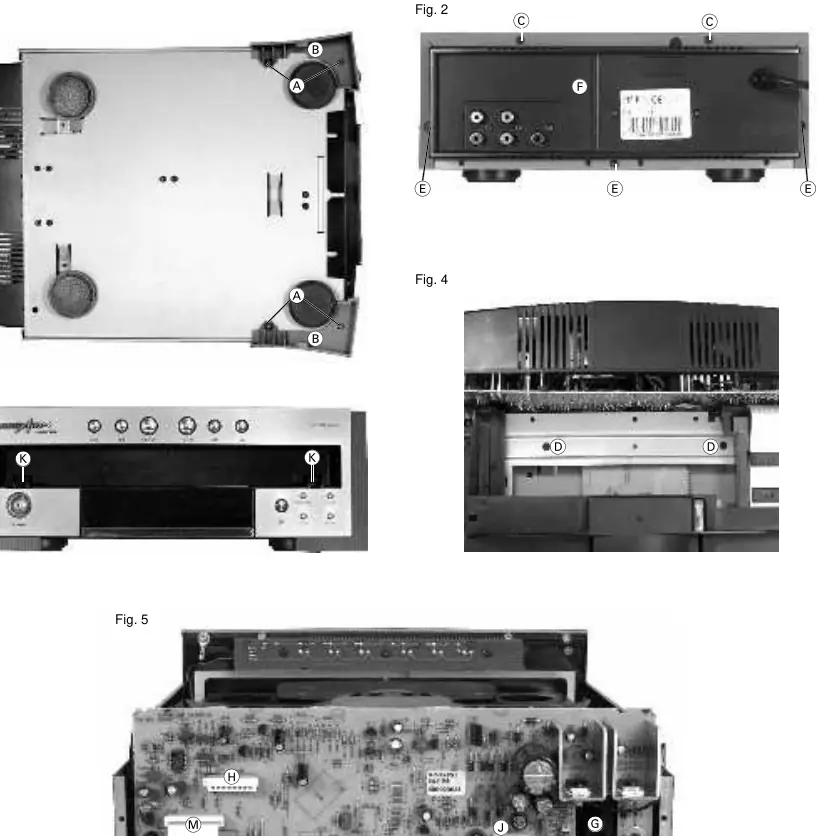
- Cover: Remove 4 screws from the side covers and 2 screws from the back to remove the top cover.
- CD Drive: Remove the cover, open the drawer, remove the mask, and undo the specified screws (D and E) to remove the drive.
- Pick-Up Unit: Remove the CD PCB, undo the screws (T), and remove the holders (U). Turn the gear wheel (V) to position the turntable between two discs to remove the unit.
Lubrication
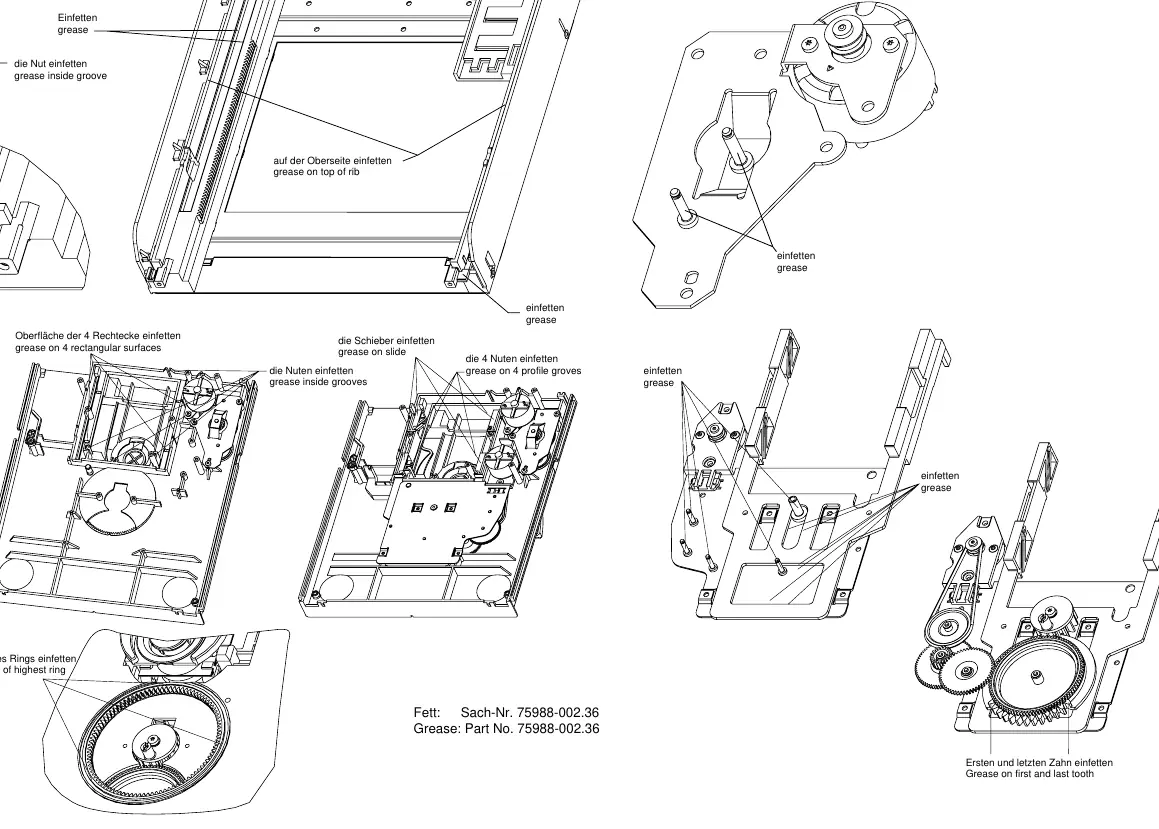
Use grease (Part No. 75988-002.36) for maintenance. Apply grease to the grooves, slides, and gear teeth as indicated in the lubrication diagram. Ensure the first and last teeth of the main gear are greased.
Technical Data
- Frequency Response: 20–20,000Hz (±0.5dB)
- Signal-to-Noise Ratio: ≥95dB
- Power Consumption: ≤12W
- Dimensions: 270 x 95 x 340mm
- Weight: Approx. 3.8kg
Practical help
Common problems
No disc found message
The unit checks trays 1, 2, and 3 sequentially. Ensure a disc is loaded in at least one of the trays.
Playback interrupted
Check RC-BUS connections if using remote control, or ensure the amplifier source has not been changed.
Before use
- Ensure sufficient ventilation (3cm sides/top, 5cm back).
- Connect ANALOG OUTPUT to amplifier CD input.
- Connect RC-BUS cables for remote control integration.
- Verify mains voltage is 230V~, 50/60 Hz.
- Ensure the power switch is in the ON position if using an amplifier as a central switch.
Specs in practice
- Frequency response
- The range of audio frequencies the device can reproduce accurately (20–20,000Hz).
- Signal-to-noise ratio
- Indicates the level of background noise relative to the signal; higher is better (≥95dB).
- Power consumption
- Maximum electrical power used by the device (≤12W).
Images and diagrams
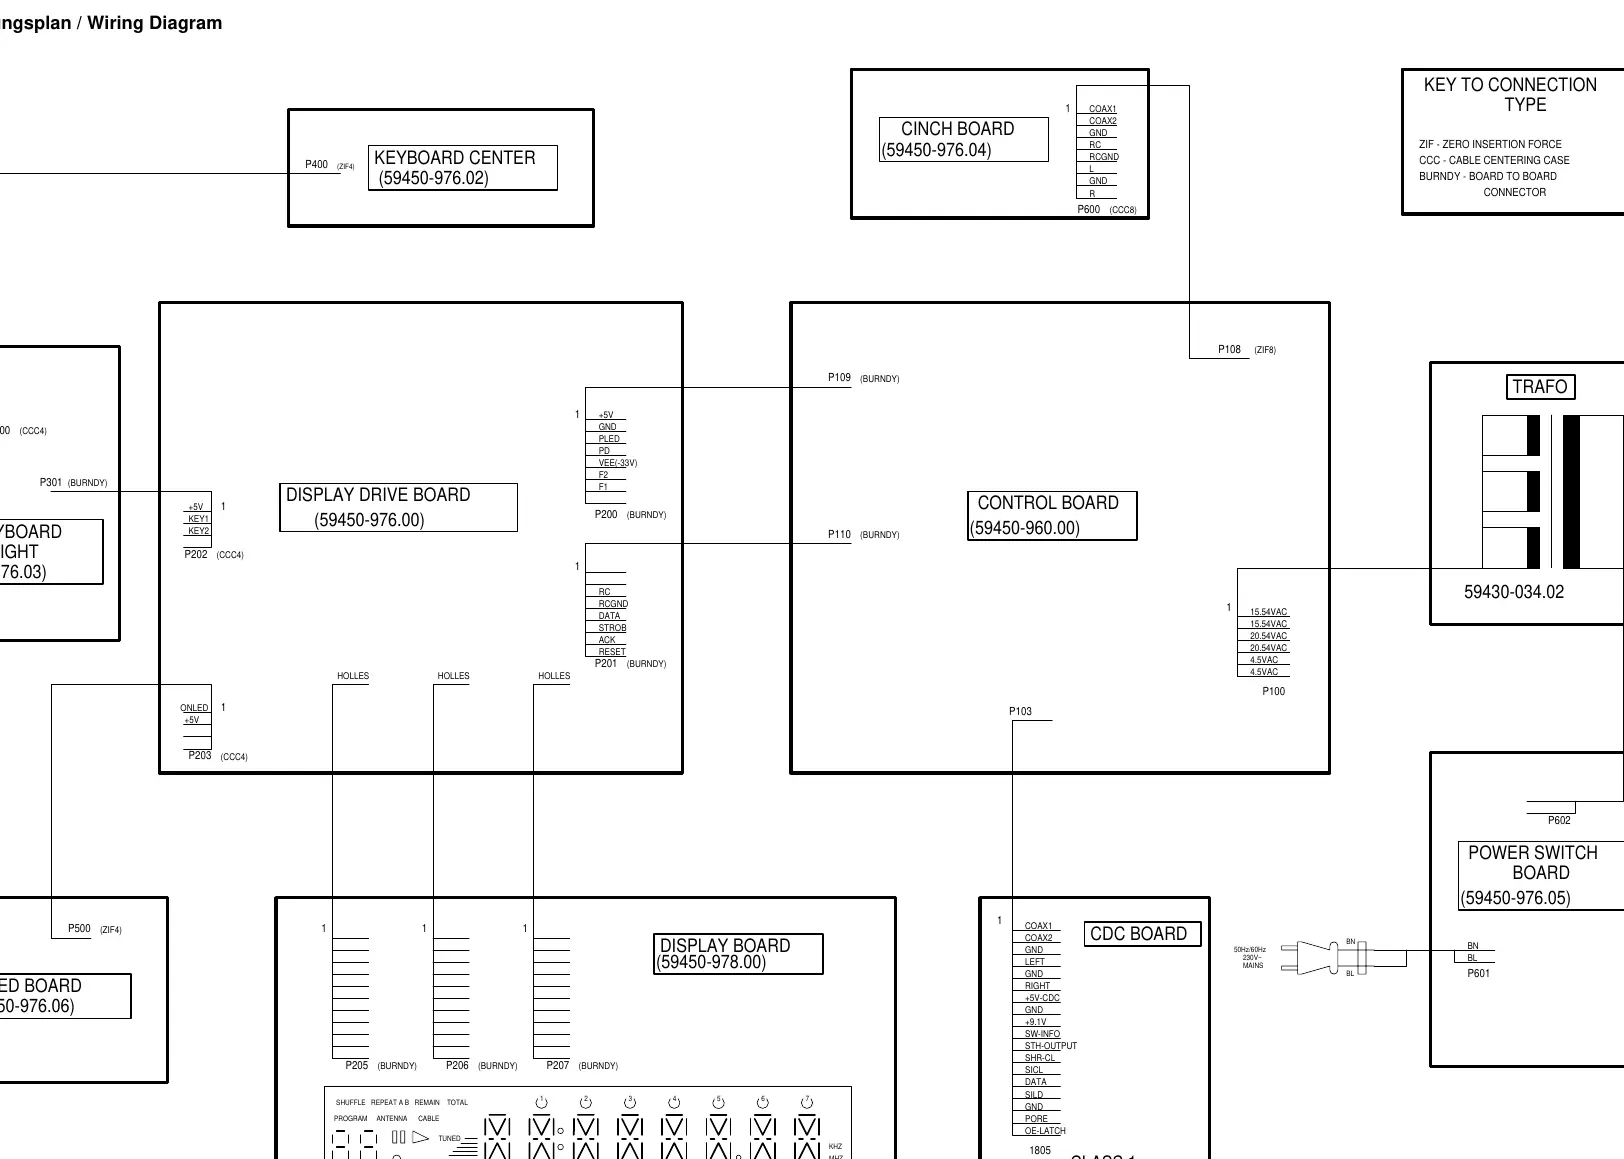
- Wiring diagram shows the interconnection between the Control Board, Display Drive Board, and CD Changer board.
- Exploded views detail the assembly of the CD drive mechanism, including the drawer and turntable.
Model compatibility
- Designed for use with Grundig M 100 series amplifiers/receivers via RC-BUS.

Manual page author
Emily Carter
User documentation editor
Prepares concise manual descriptions and highlights the most useful setup, operation, and maintenance information for readers.