Health / Medical Devices
User Manual for Health o meter 201HR Wall-Mounted Height Rod
Quick guide for the Health o meter 201HR wall-mounted height rod. Includes installation steps, height measurement procedures, maintenance, and technical specifications.
Quick answers from the manual
Quick answer
- The 201HR is a wall-mounted height rod. Installation requires a drill, level, and screwdriver. To measure, slide the headpiece to the patient's head and read the value at the blue line. p. 5, 7, 10
Key actions
- Mounting the height rod p. 5, 6, 7, 8
- Measuring patient height p. 10
Problems and fixes
Height rod does not slide
Press the black button at the top to release the lock.
p. 9Maintenance and reset
- Clean with a damp cloth or mild soap solution. Do not use abrasive cleaners or Isopropyl Alcohol. p. 11
Technical specifications
| Parameter | Value | Meaning | Pages |
|---|---|---|---|
| Height Range | 2" - 90" / 6 cm - 230 cm | Measurement range | p. 3 |
| Accuracy | +/- 1 mm (1/8") | Precision | p. 3 |
Where to find it in the PDF
- Wall Mount Instructions p. 5, 6, 7, 8
- Height Measurement Instructions p. 10
Table of contents
Manual images
Click an image to enlargeQuick guide from the manual
The Health o meter 201HR is a wall-mounted telescopic height rod designed for professional medical use. This manual provides instructions for proper installation, patient measurement, and maintenance. Always ensure the device is securely mounted and level before use.
Safety and Cautions
- Ensure the mounting location is free of electrical lines, gas pipes, and other hazards.
- The wall must be of construction capable of supporting the device.
- Do not mount the device on a door.
- The patient must be attended throughout the entire measuring event.
- Do not use in the presence of flammable materials.
- Fold the headpiece into the down position when not in use.
Specifications
- Height Range: 2" to 90" (6 cm to 230 cm).
- Accuracy: +/- 1 mm (1/8").
- Operating Temperature: 5°C to 40°C (41°F to 104°F).
- Humidity: Maximum 85% RH.
Wall Mount Instructions
Tools Required: Drill, 5mm (3/16") drill bit, 1.50mm (1/16") drill bit, Phillips head screwdriver, Level.
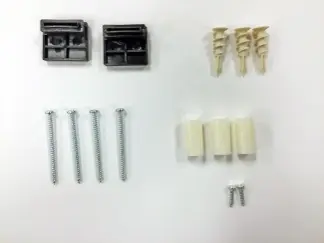
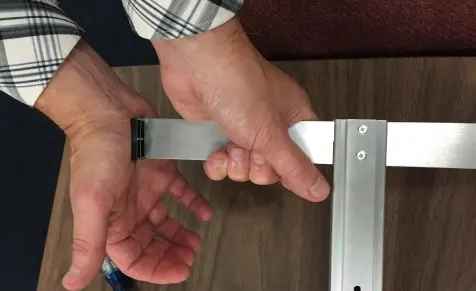
- Preparation: Attach the footpiece to the bottom of the height rod using the provided 1/2" screws. Attach the black end caps.
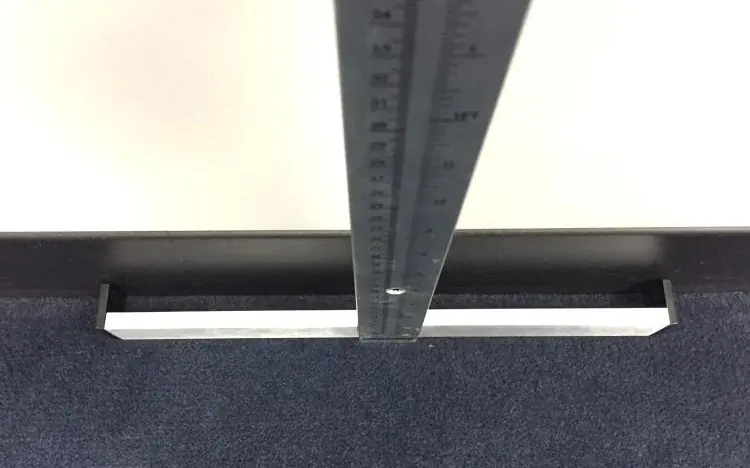
- Positioning: Place the rod against the wall with the footpiece resting on the floor. Ensure the rod is vertically straight using a level.
- Marking: Mark the screw holes (top, center, bottom) on the wall.
- Drilling: Drill lead holes at the marked locations. Use a 5mm bit for drywall/plasterboard or a 1.5mm bit for wood/metal.
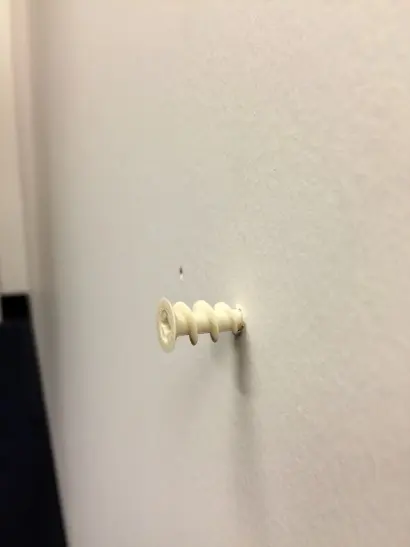
- Anchoring: If using drywall, insert the provided anchors.
- Securing: Align the rod with the holes. Insert the 2" screws with spacers through the rod into the wall. Tighten securely.
Height Measurement Instructions

- Slide the headpiece to the estimated height of the patient. For patients shorter than 53" (134.5 cm), press the black button at the top to release the lock and slide the headpiece down.
- Position the patient with their back against the rod and heels touching the footpiece.
- Ensure the patient's posture is upright and head is level.
- Slide the headpiece down until it rests on the patient's head.
- Read the height at the blue line: center of the rod for heights above 53" (134.5 cm), or the bottom of the headpiece for heights below 53" (134.5 cm).
Maintenance and Cleaning
Clean all external surfaces with a clean damp cloth or tissue. A mild antimicrobial or antibacterial soap and water solution may be used. Dry with a clean soft cloth. Do not use abrasive cleaners or Isopropyl Alcohol.
Practical help
Common problems
Height rod does not slide down
Press the black button at the top of the height rod to release the lock. If it still does not slide, ensure the wall screws are not overtightened.
Measurement is inaccurate
Verify the rod is level and securely attached to the wall. Ensure the patient's posture is upright and their head is straight.
Before use
- Check for obvious damage or wear
- Verify the rod is level
- Ensure the mounting surface is stable
- Confirm the headpiece folds down correctly
- Check that the rod slides smoothly
Specs in practice
- Height Range
- The device can measure patients from 2 inches (6 cm) to 90 inches (230 cm).
Images and diagrams
- The manual provides visual steps for attaching the footpiece to the rod.
- Diagrams illustrate how to use a level and mark holes on the wall.
- Visual guides show the difference between drilling for drywall versus wood/metal.
- Images demonstrate the correct way to read the height at the blue line for different patient heights.
Model compatibility
- Do not mount on a door.
- Requires specific drill bits based on wall material (drywall vs. wood/metal).

Manual page author
Michael Turner
Technical manual editor
Reviews PDF manuals for structure, safety notes, and practical product details so readers can find the right information quickly.