Home Appliances / Space Heaters
User Manual for Heatstrip Design Radiant Heater
Quick guide for the Heatstrip Design radiant heater. Includes installation instructions, mounting options, wiring diagrams for the wall controller, and maintenance tips.
Table of contents
Manual images
Click an image to enlargeQuick guide from the manual
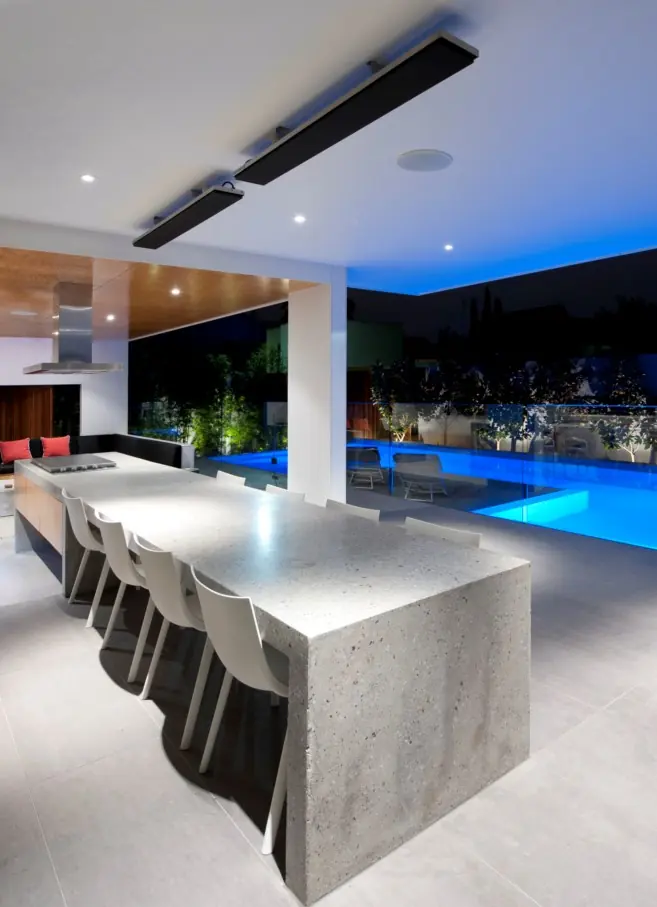
The Heatstrip Design is a high-intensity electric radiant overhead heater designed for undercover outdoor and indoor areas. It uses infra-red waves to heat objects directly rather than the air. Key operational requirements include maintaining a mounting height between 2.1m and 2.7m for optimal performance. The unit is IP55 rated, meaning it is safe for water ingress from all directions, but it must be installed by a licensed electrician.
Product Overview
Heatstrip Design (THH models) provides effective, energy-efficient comfort heating. It features a slimline black face that does not emit light or glow. It is ideal for outdoor rooms with 1, 2, 3, or 4 enclosed sides, as well as protected indoor applications.
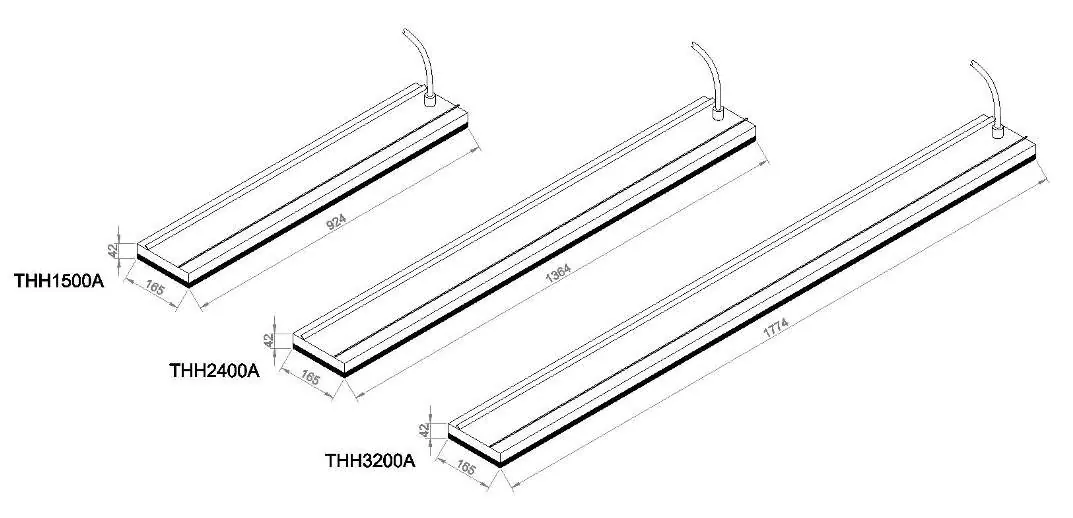
Specifications
The heaters are available in various wattages and dimensions. All models operate on 230-240V, 50-60Hz, single phase power. The IP55 protection rating ensures durability in outdoor environments. Refer to the model code chart for specific power, current, and dimension details for the THH1500AEU, THH2400AEU, and THH3200AEU models.
Installation Requirements
The ideal mounting position is on the ceiling, directly above the area to be heated. If wall mounting is necessary, ensure the unit is angled downwards. Electrical connections must not be located at the back of the heater to minimize heat build-up. If mounting on an incline, the electrical connection must be at the lowest point of the heater.
Mounting Options
The heater comes with standard brackets for parallel, 22.5°, or 45° mounting. Additional mounting accessories are available for specific needs:
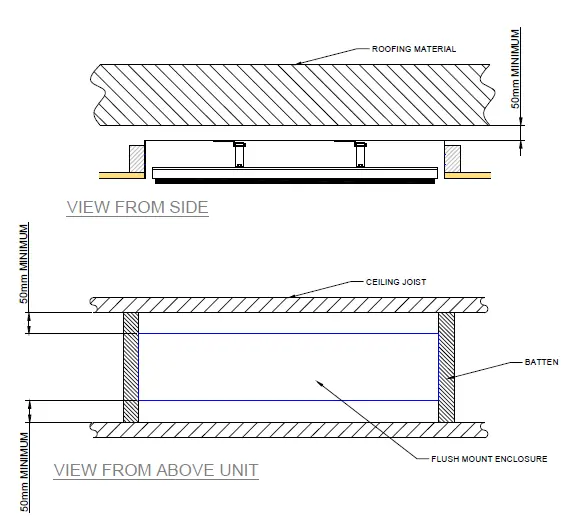
- Flush Mount Enclosure: For a neat, recessed installation.
- Pole/Beam Mounting Kit: For mounting onto wooden beams, rafters, or umbrella struts.
- Twin Mounting Bracket: Allows two units to be mounted side-by-side.
- End to End Mounting Bracket: For joining multiple units in a straight line.
- Suspension Mount Bracket: For lowering the heater from high ceilings using chains or wires.
- Extension Mount Bracket: For lowering the heater using rigid poles.
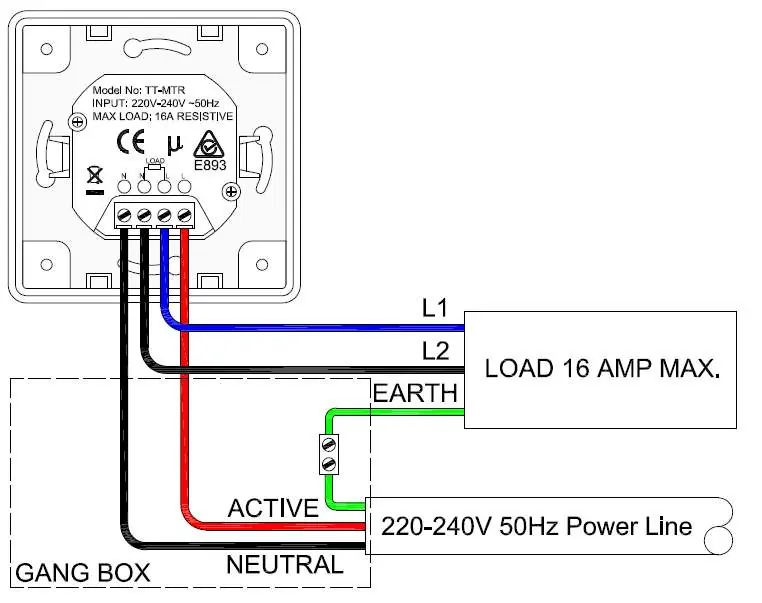
Wall Controller
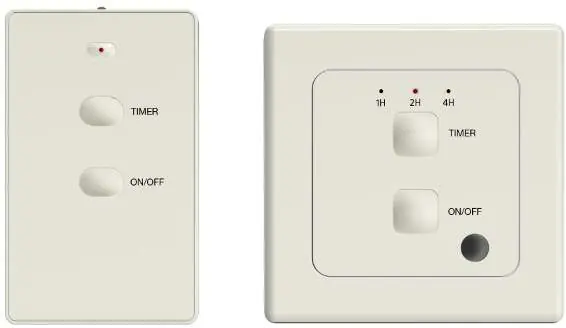
The TT-MTR wall controller allows for easy operation and includes a timer function (1, 2, or 4 hours). It is rated for 16 Amps and 220-240V. It can control multiple heaters up to the 16A load limit. The controller must be installed in a dry location.
Maintenance
Regular maintenance prolongs the life of the heater. Hose down the heater and use a soft bristle brush with a mild detergent to remove contaminants. Rinse thoroughly. In corrosive environments (e.g., salt spray), clean weekly. Always ensure the heater is switched off and cooled down before cleaning. Do not use abrasive materials or high-pressure water.
Safety
The heater is Class 1 equipment and must be earthed. Do not touch the heater while in operation or for 30 minutes after turning it off. Ensure no flammable materials are in contact with the heater. If the supply lead is damaged, return the unit to the point of purchase for repair.
Practical help
Common problems
Heater not heating
Check power supply, ensure the wall switch is on, and verify electrical connections.
Surface discoloration
This is a normal occurrence over time and does not constitute a warrantable defect.
Heater too hot or cold
Adjust the mounting height or the quantity of heaters based on the radiant footprint guidelines.
Before use
- Ensure mounting height is between 2.1m and 2.7m.
- Verify electrical connection is not located behind the heater.
- Confirm the heater is earthed (Class 1 equipment).
- Ensure no flammable materials are in contact with the heater.
- Check that the installation location is suitable for an IP55 rated device.
Specs in practice
- Radiant Heat
- Heats objects directly via infra-red waves, not the surrounding air.
Images and diagrams
- Wiring diagram shows the connection of the TT-MTR controller to the power line and the heater.
- Mounting diagrams illustrate parallel, 22.5°, and 45° angle options.
- Flush mount clearance diagrams show the required 50mm minimum distance from roofing materials.
Model compatibility
- Suitable for indoor and outdoor undercover areas.
- Not recommended for highly exposed outdoor areas without protection.
- TT-MTR controller fits standard European wall gangboxes.

Manual page author
Emily Carter
User documentation editor
Prepares concise manual descriptions and highlights the most useful setup, operation, and maintenance information for readers.