Tools / Drills
Operating Instructions for Hilti SFC 14-A / SFC 18-A Cordless Drill/Driver
Quick guide for the Hilti SFC 14-A and SFC 18-A cordless drill/driver. Learn about operation, battery care, safety, and troubleshooting.
Table of contents
Manual images
Click an image to enlargeQuick guide from the manual
This manual provides essential operating instructions for the Hilti SFC 14-A and SFC 18-A cordless drill/drivers. Always read these instructions before first use and keep them with the tool. Ensure the tool is switched off and the safety lock (forward/reverse switch in the middle position) is engaged before performing any maintenance, changing accessories, or transporting the tool.
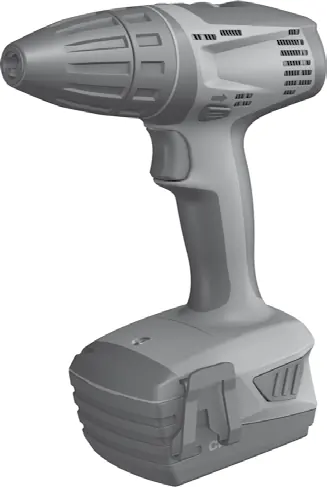
Product overview
The drill/driver features a keyless chuck, a torque and drilling mode setting ring, a 2-speed gear selector switch, a forward/reverse selector switch with transport lock, a control switch with electronic speed control, a grip, and a lamp. The battery includes release buttons and a charge status display.
Before use
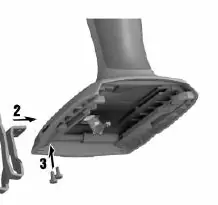
Ensure the battery is clean and dry before inserting it into the charger. To insert the battery, slide it into the tool until it clicks securely. To remove, press the release buttons and pull the battery out. The belt hook can be attached to either side of the tool for left- or right-handed use by securing it with the provided screws.

Operation
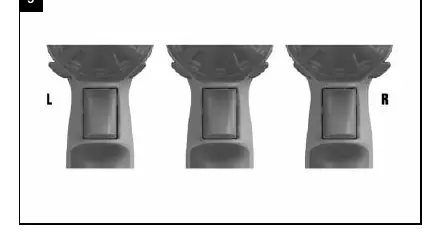
Forward/Reverse Rotation: Use the selector switch to choose the direction. When the switch is in the middle position, the control switch is locked (transport lock).
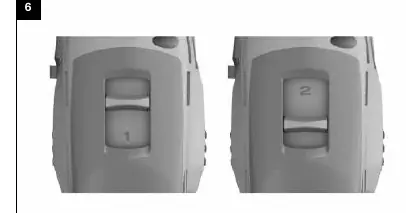
Speed Selection: Use the 2-speed gear switch to select the required speed range. Always operate large and heavy insert tools in the first gear to prevent damage.
Drilling and Screwdriving: Turn the torque/mode setting ring to the drilling symbol for drilling. For screwdriving, select the appropriate torque setting. Ensure the workpiece is secured with clamps or a vice.
Battery care and protection
The tool is equipped with an electronic protection system to prevent overloading and overheating. If the tool stops automatically, release the control switch and allow it to cool down. Check the charge status by pressing the battery release buttons; the LEDs will indicate the remaining charge. If the battery is too hot, it may be defective; allow it to cool down and contact Hilti Service if issues persist.
Care and maintenance
Keep the tool, especially grip surfaces, clean and free from oil and grease. Do not use cleaning agents containing silicone. Clean ventilation slots with a dry brush. Do not use spray, steam pressure cleaning equipment, or running water.
Manufacturer information
Hilti Corporation
Practical help
Common problems
The power tool does not run.
Check if the battery is discharged or not pushed all the way in. If the issue persists, it may be an electrical fault; contact Hilti Service.
The power tool does not run and 1 LED blinks.
The battery is discharged or too hot/cold. Charge the battery or bring it to the recommended working temperature.
The on/off switch cannot be pressed (locked).
The forward/reverse switch is in the middle position (transport lock engaged). Push the switch to the left or right.
The battery does not engage with an audible double click.
The retaining lugs on the battery are dirty. Clean the lugs and push the battery in until it engages.
Before use
- Ensure the battery is clean and dry.
- Check that the tool is switched off.
- Set the forward/reverse switch to the middle position (transport lock).
- Ensure the drill bit or bit holder is securely inserted in the keyless chuck.
- Verify the correct gear (1st or 2nd) is selected for the task.
Specs in practice
- Torque setting
- Adjustable settings (15 levels) to control the force applied during screwdriving.
Images and diagrams
- 1: Product overview showing chuck, gear switch, and controls.
- 2: Battery insertion procedure.
- 3: Battery removal procedure.
- 4: Belt hook installation steps.
- 5: Forward/reverse switch positions.
Model compatibility
- Use only genuine Hilti batteries and accessories.
- Recommended battery: B12/2.6 Li-Ion.
- Recommended charger: C 4/12-50.

Manual page author
Michael Turner
Technical manual editor
Reviews PDF manuals for structure, safety notes, and practical product details so readers can find the right information quickly.