Tools / Power Tools
User Manual for Hilti ST 1800-A22 Cordless Metal Screwdriver
Quick guide for the Hilti ST 1800-A22 cordless metal screwdriver. Includes setup, operation, maintenance, and troubleshooting steps.
Table of contents
Manual images
Click an image to enlargeQuick guide from the manual
This guide provides essential information for the safe and efficient use of the Hilti ST 1800-A22 cordless metal screwdriver. Always read the full documentation before initial operation.
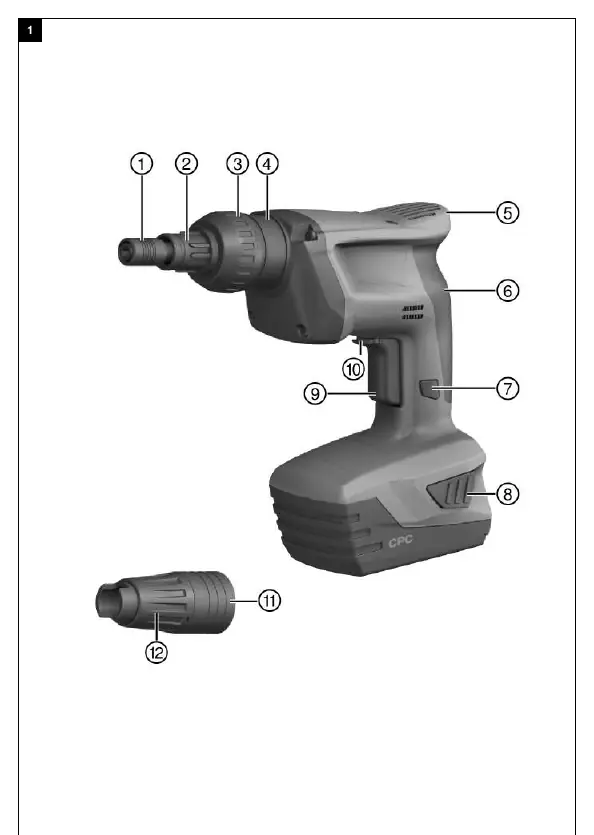
Product Overview
The tool features a chuck, depth gauge, torque adjustment, and a forward/reverse switch. The battery status and tool malfunctions are indicated by LEDs on the Li-ion battery.
Intended Use
The product is a hand-held cordless screwdriver designed for fastening profile metal sheets, metal sheets, and sandwich panels in metal construction. It is designed for driving and removing self-drilling and self-tapping screws.
Operation
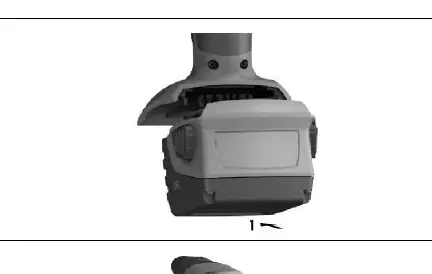
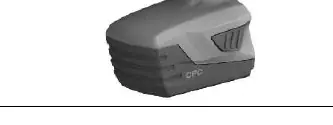
Battery: Use only Hilti Li-ion batteries of the B 22 series and Hilti battery chargers of the C4/36 series. Ensure contacts are clean and dry before insertion.
Depth Gauge: Use the depth gauge for screws with a sealing washer to ensure the seal is correctly compressed. It attaches via a snap-on connection.
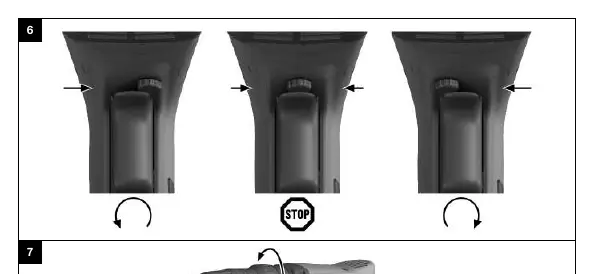
Rotation: Use the forward/reverse switch to set the desired direction. The switch is locked in the middle position.
Switching On: The tool must be pressed lightly against the working surface to start. Speed is controlled by the pressure on the control switch.
Sustained Operation: Press the lockbutton while the control switch is pressed to enable sustained operation.
Care and Maintenance
Keep the tool and battery clean and free from oil and grease. Clean air vents with a dry brush. Use only a slightly damp cloth for the casing; do not use silicone-based cleaning agents.
Troubleshooting
If the tool does not start, check if the battery is fully inserted and charged. If the tool or battery gets very hot, stop immediately and contact Hilti Service. If the screw is not driven correctly, adjust the depth gauge.
Manufacturer information
Hilti Corporation
Practical help
Common problems
Screwdriver does not start
Ensure the battery is fully inserted and charged. If the issue persists, it may be an electrical fault; contact Hilti Service.
Control switch is locked
Check that the forward/reverse switch is not in the middle (safety lock) position.
Screw is driven too tightly or too loosely
Adjust the depth gauge setting.
LED 1 blinks
Battery is discharged, too hot, or too cold. Charge or bring to recommended operating temperature.
Before use
- Ensure the battery is fully charged.
- Check that battery and tool contacts are clean and dry.
- Verify the forward/reverse switch is set to the desired direction.
- Ensure the depth gauge is correctly adjusted for the screw type.
- Check the tool for any visible damage.
Specs in practice
- Rated voltage
- 21.6 VDC
Images and diagrams
- Overview of the tool showing chuck, depth gauge, and controls.
- Battery insertion and removal steps.
- Forward/reverse rotation setting.
- Depth gauge adjustment.
Model compatibility
- Use only Hilti Li-Ion batteries of the B 22 series.
- Use only Hilti battery chargers of the C4/36 series.

Manual page author
David Miller
Documentation analyst
Organizes user manual content into clear summaries, with attention to model details, product context, and everyday usability.