Lighting / Fixtures
Assembly and Installation Guide for Hinkley Edgewater Wall Mount 1670OZ
Quick guide for installing the Hinkley Edgewater Wall Mount 1670OZ. Includes step-by-step assembly, wiring instructions for indoor/outdoor use, and essential caulking procedures for weatherproofing.
Table of contents
Manual images
Click an image to enlargeQuick guide from the manual
This document provides installation and wiring instructions for the Hinkley Edgewater Wall Mount (Item No: 1670). Before beginning, ensure the power supply is turned off. The installation requires basic tools and, for outdoor applications, a high-quality waterproof caulk or silicone sealant (not included).
Assembly Instructions
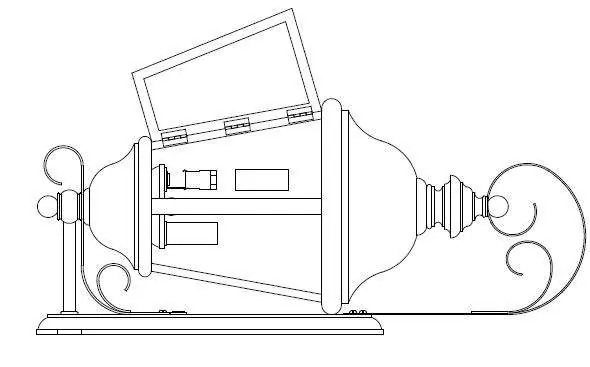
- Find a clear area to work and unpack the fixture and glass.
- Prepare the mounting strap: Thread the two 1 1/4" mounting screws (B) into the back of the gull wing bracket (see Drawing 1). Ensure the screw spacing matches the holes (D) in the fixture backplate (E).
- Attach the strap: Secure the mounting strap (A) to the junction box (J) using the two 1" screws (C) provided.
- Mount the fixture: Slide the holes (D) in the backplate (E) over the screws (B) on the mounting strap.
- Secure: Thread the ball knobs (F) onto the screws to lock the fixture against the wall.
Wiring Instructions
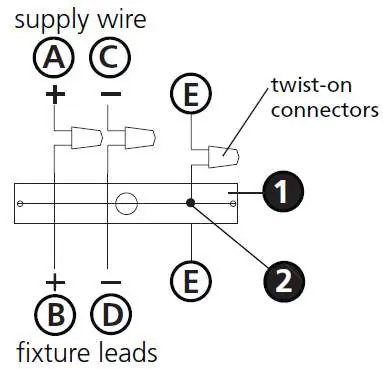
Refer to the I.S. 18 wiring instructions provided in the manual for specific grounding procedures.
- Indoor Fixtures: Connect the positive supply wire (A) to the positive fixture lead (B) and the negative supply wire (C) to the negative fixture lead (D) using appropriately sized twist-on connectors.
- Outdoor Fixtures: Follow the same connection steps as indoor fixtures. Additionally, cover the open ends of the connectors with silicone sealant to create a watertight seal.
Caulking and Weatherproofing
To prevent water from entering the outlet box, proper sealing is required for outdoor installations:
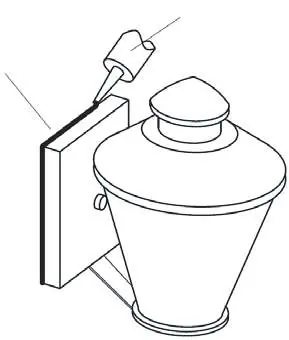
- Backplate: After securing the fixture, seal the gap between the wall and the fixture backplate on the top and both sides using waterproof caulk or silicone sealant.
- Ball Knobs: It is recommended to apply a small bead of caulk or sealant under the ball knobs used to mount the fixture.
Maintenance
The side door (W) can be opened to re-lamp the fixture. When installing the fixture, slide the candle sleeves (Z) over the sockets.
Manufacturer information
Hinkley Lighting
Practical help
Common problems
Water entering the outlet box
Ensure the backplate is sealed on the top and both sides with waterproof caulk or silicone sealant.
Fixture not secure against the wall
Verify that the ball knobs are fully threaded and tightened onto the mounting screws.
Difficulty re-lamping
The side door (W) is designed to open for easy access to the lamp.
Before use
- Turn off the main power supply before starting installation.
- Verify that the junction box is compatible with the mounting strap.
- Ensure you have a high-quality waterproof caulk or silicone sealant for outdoor installation.
- Check that the mounting screws (B) align with the backplate holes (D) before attaching the strap to the junction box.
Images and diagrams
- Drawing 1 (Page 1): Illustrates the preparation of the mounting strap and screw alignment.
- Drawing 2 (Page 1): Shows the final mounting of the fixture backplate over the strap.
- Drawing 1 (Page 3): Demonstrates the correct application of caulk to seal the fixture against the wall.
Model compatibility
- Suitable for both indoor and outdoor use.
- Outdoor installation requires additional weatherproofing with silicone sealant.

Manual page author
Michael Turner
Technical manual editor
Reviews PDF manuals for structure, safety notes, and practical product details so readers can find the right information quickly.