Garden / Outdoor Furniture
Lansi LED Magnifying Mirror User Guide
Quick guide for the Lansi LED Magnifying Mirror. Includes installation steps, battery charging instructions, light settings, and maintenance tips for your wall-mounted vanity mirror.
Quick answers from the manual
Quick answer
- The Lansi LED Magnifying Mirror is a wall-mounted vanity mirror with 3-color LED lighting, 360-degree swivel, and a 10-minute auto-off timer. It is powered by 4x AAA Ni-MH rechargeable batteries or a USB connection. p. 1
Key actions
- Install the mirror using the 10-step procedure provided, ensuring the bracket is securely fixed to the wall. p. 4
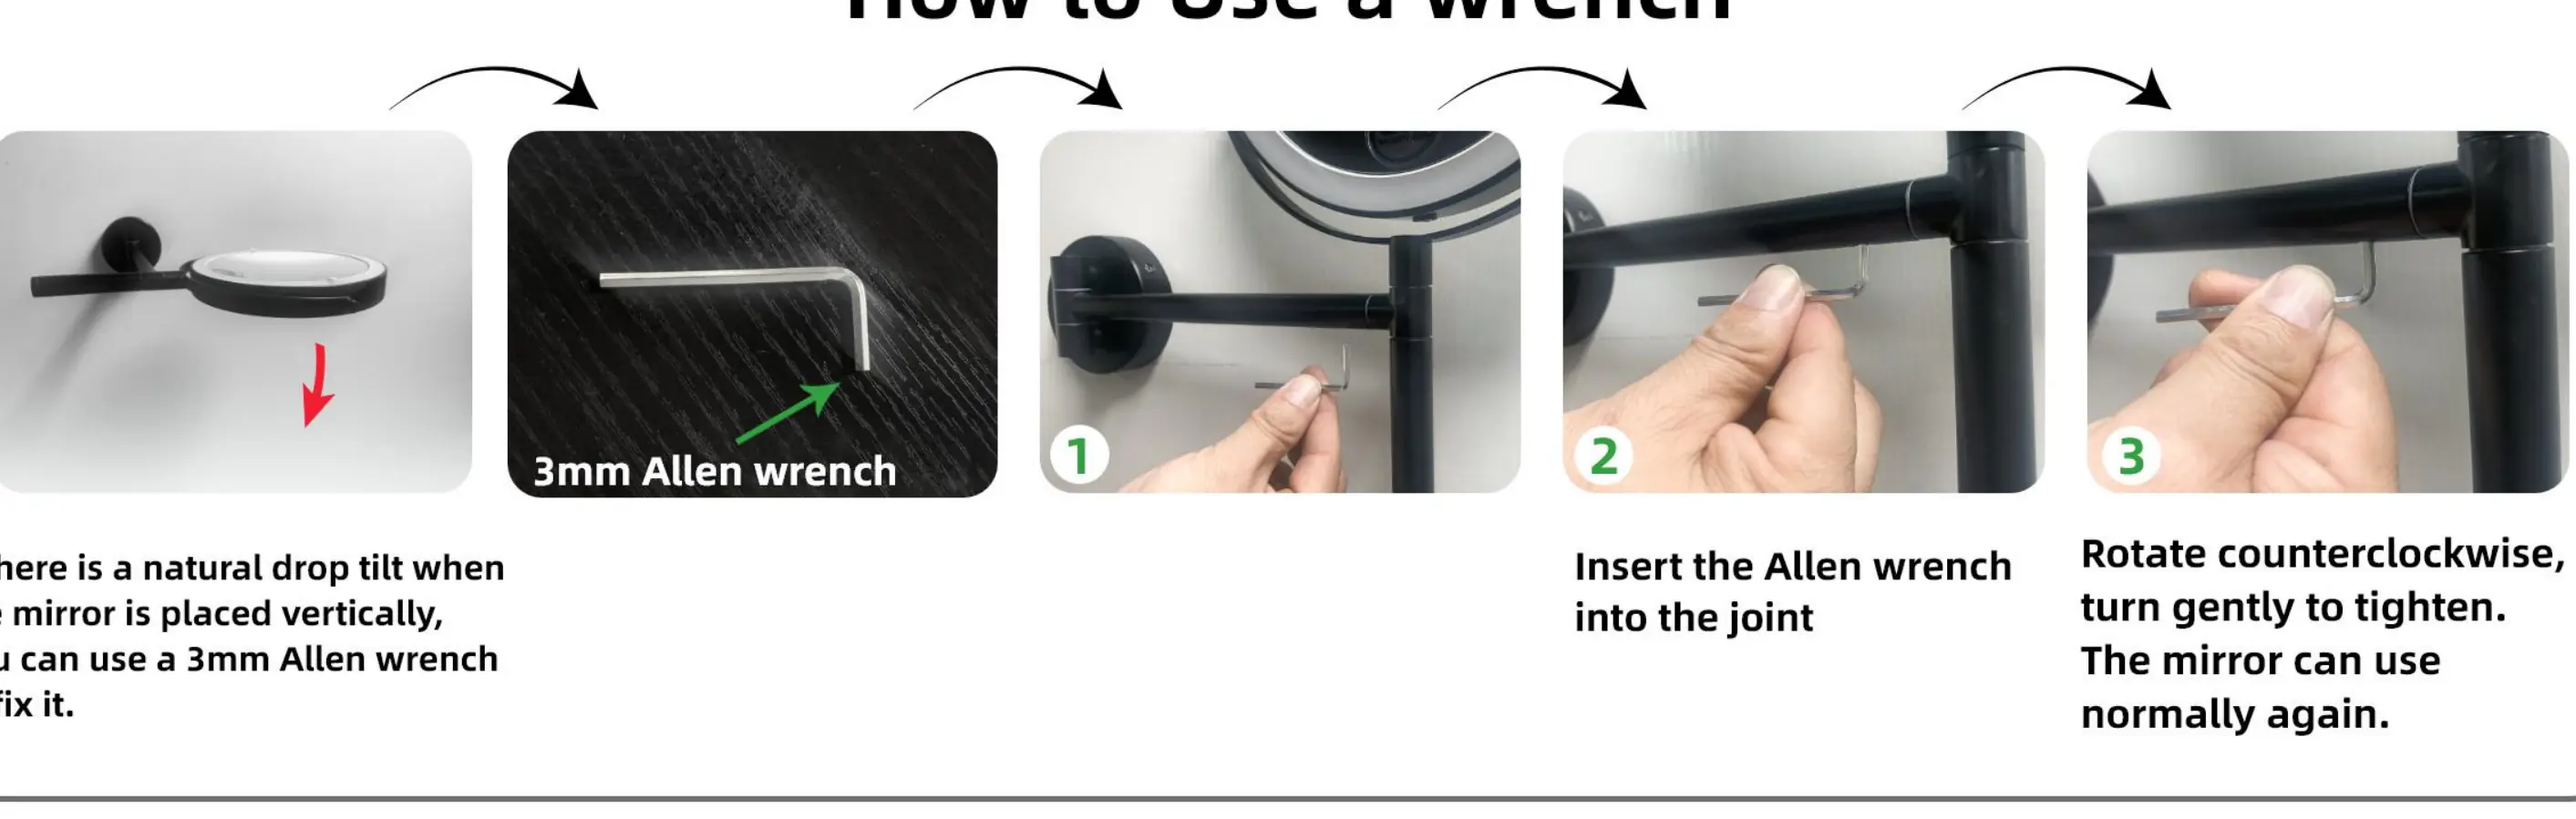
- Tighten the mirror joint using the 3mm Allen wrench if the mirror tilts unexpectedly. p. 3
First start
- Fully charge the batteries before the first use. p. 3
Problems and fixes
Mirror tilts downward
Tighten the joint with the 3mm Allen wrench.
p. 3Maintenance and reset
- If not used for 3 months, fully charge the battery before storage. p. 3
Technical specifications
| Parameter | Value | Meaning | Pages |
|---|---|---|---|
| Input Voltage | 5V | Required charging voltage | p. 1 |
| Charging Current | 250mA | Current required for charging | p. 1 |
Where to find it in the PDF
- Product Overview and Features p. 1
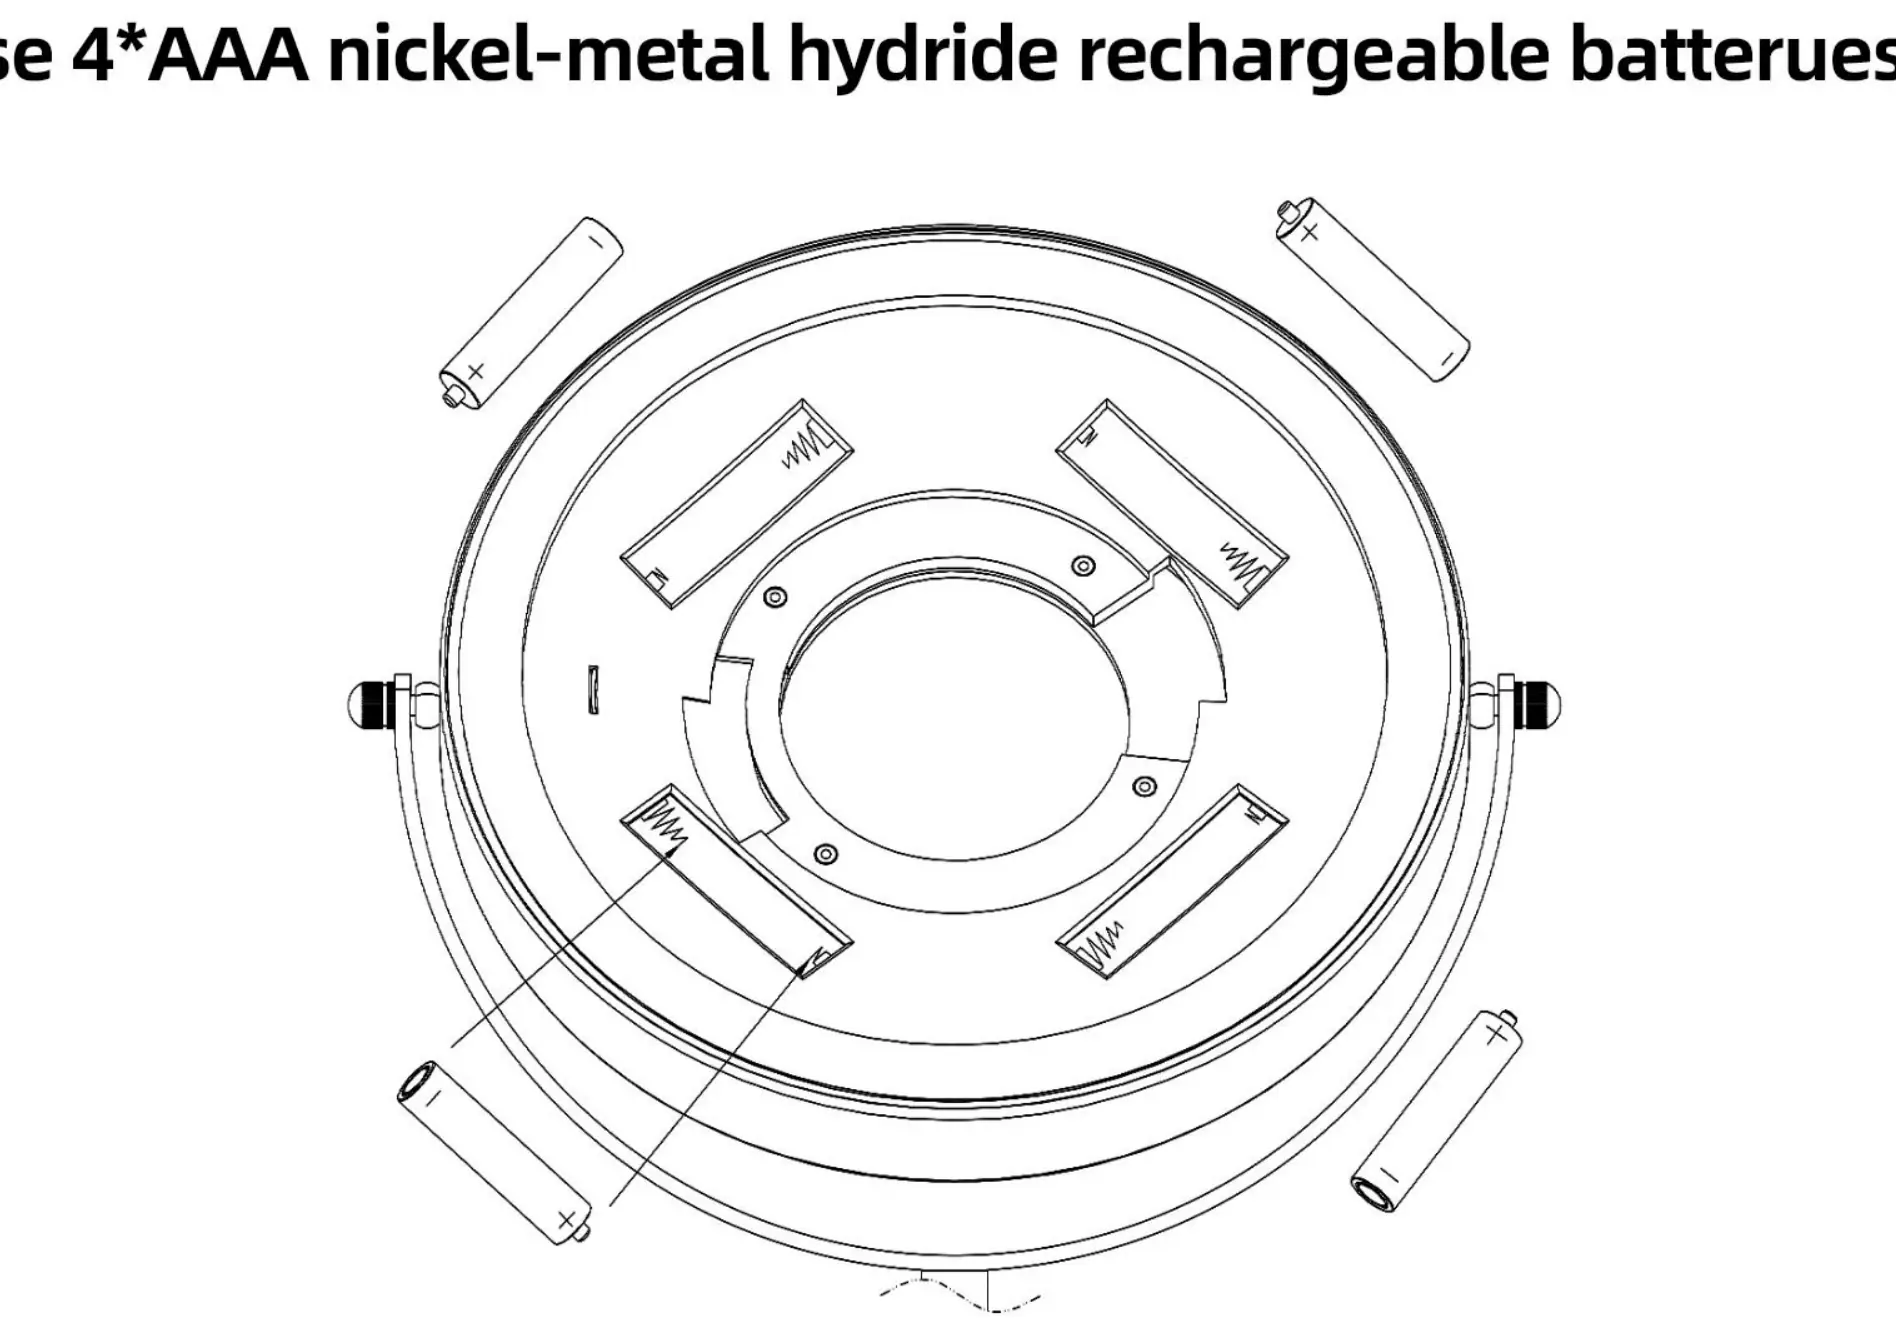
- Battery Installation p. 2
- Adjustment and Maintenance p. 3
- Installation Procedure p. 4
Table of contents
Manual images
Click an image to enlargeQuick guide from the manual
This Lansi LED Magnifying Mirror is a wall-mounted vanity mirror featuring 360-degree swivel, 3-color LED lighting, and a 10-minute intelligent light-off system. It can be powered via USB or 4x AAA Ni-MH rechargeable batteries. Ensure the mirror is installed securely on the wall and that the battery compartment is correctly accessed for charging or replacement.
Installation procedure
Follow these steps to mount the mirror to your wall:
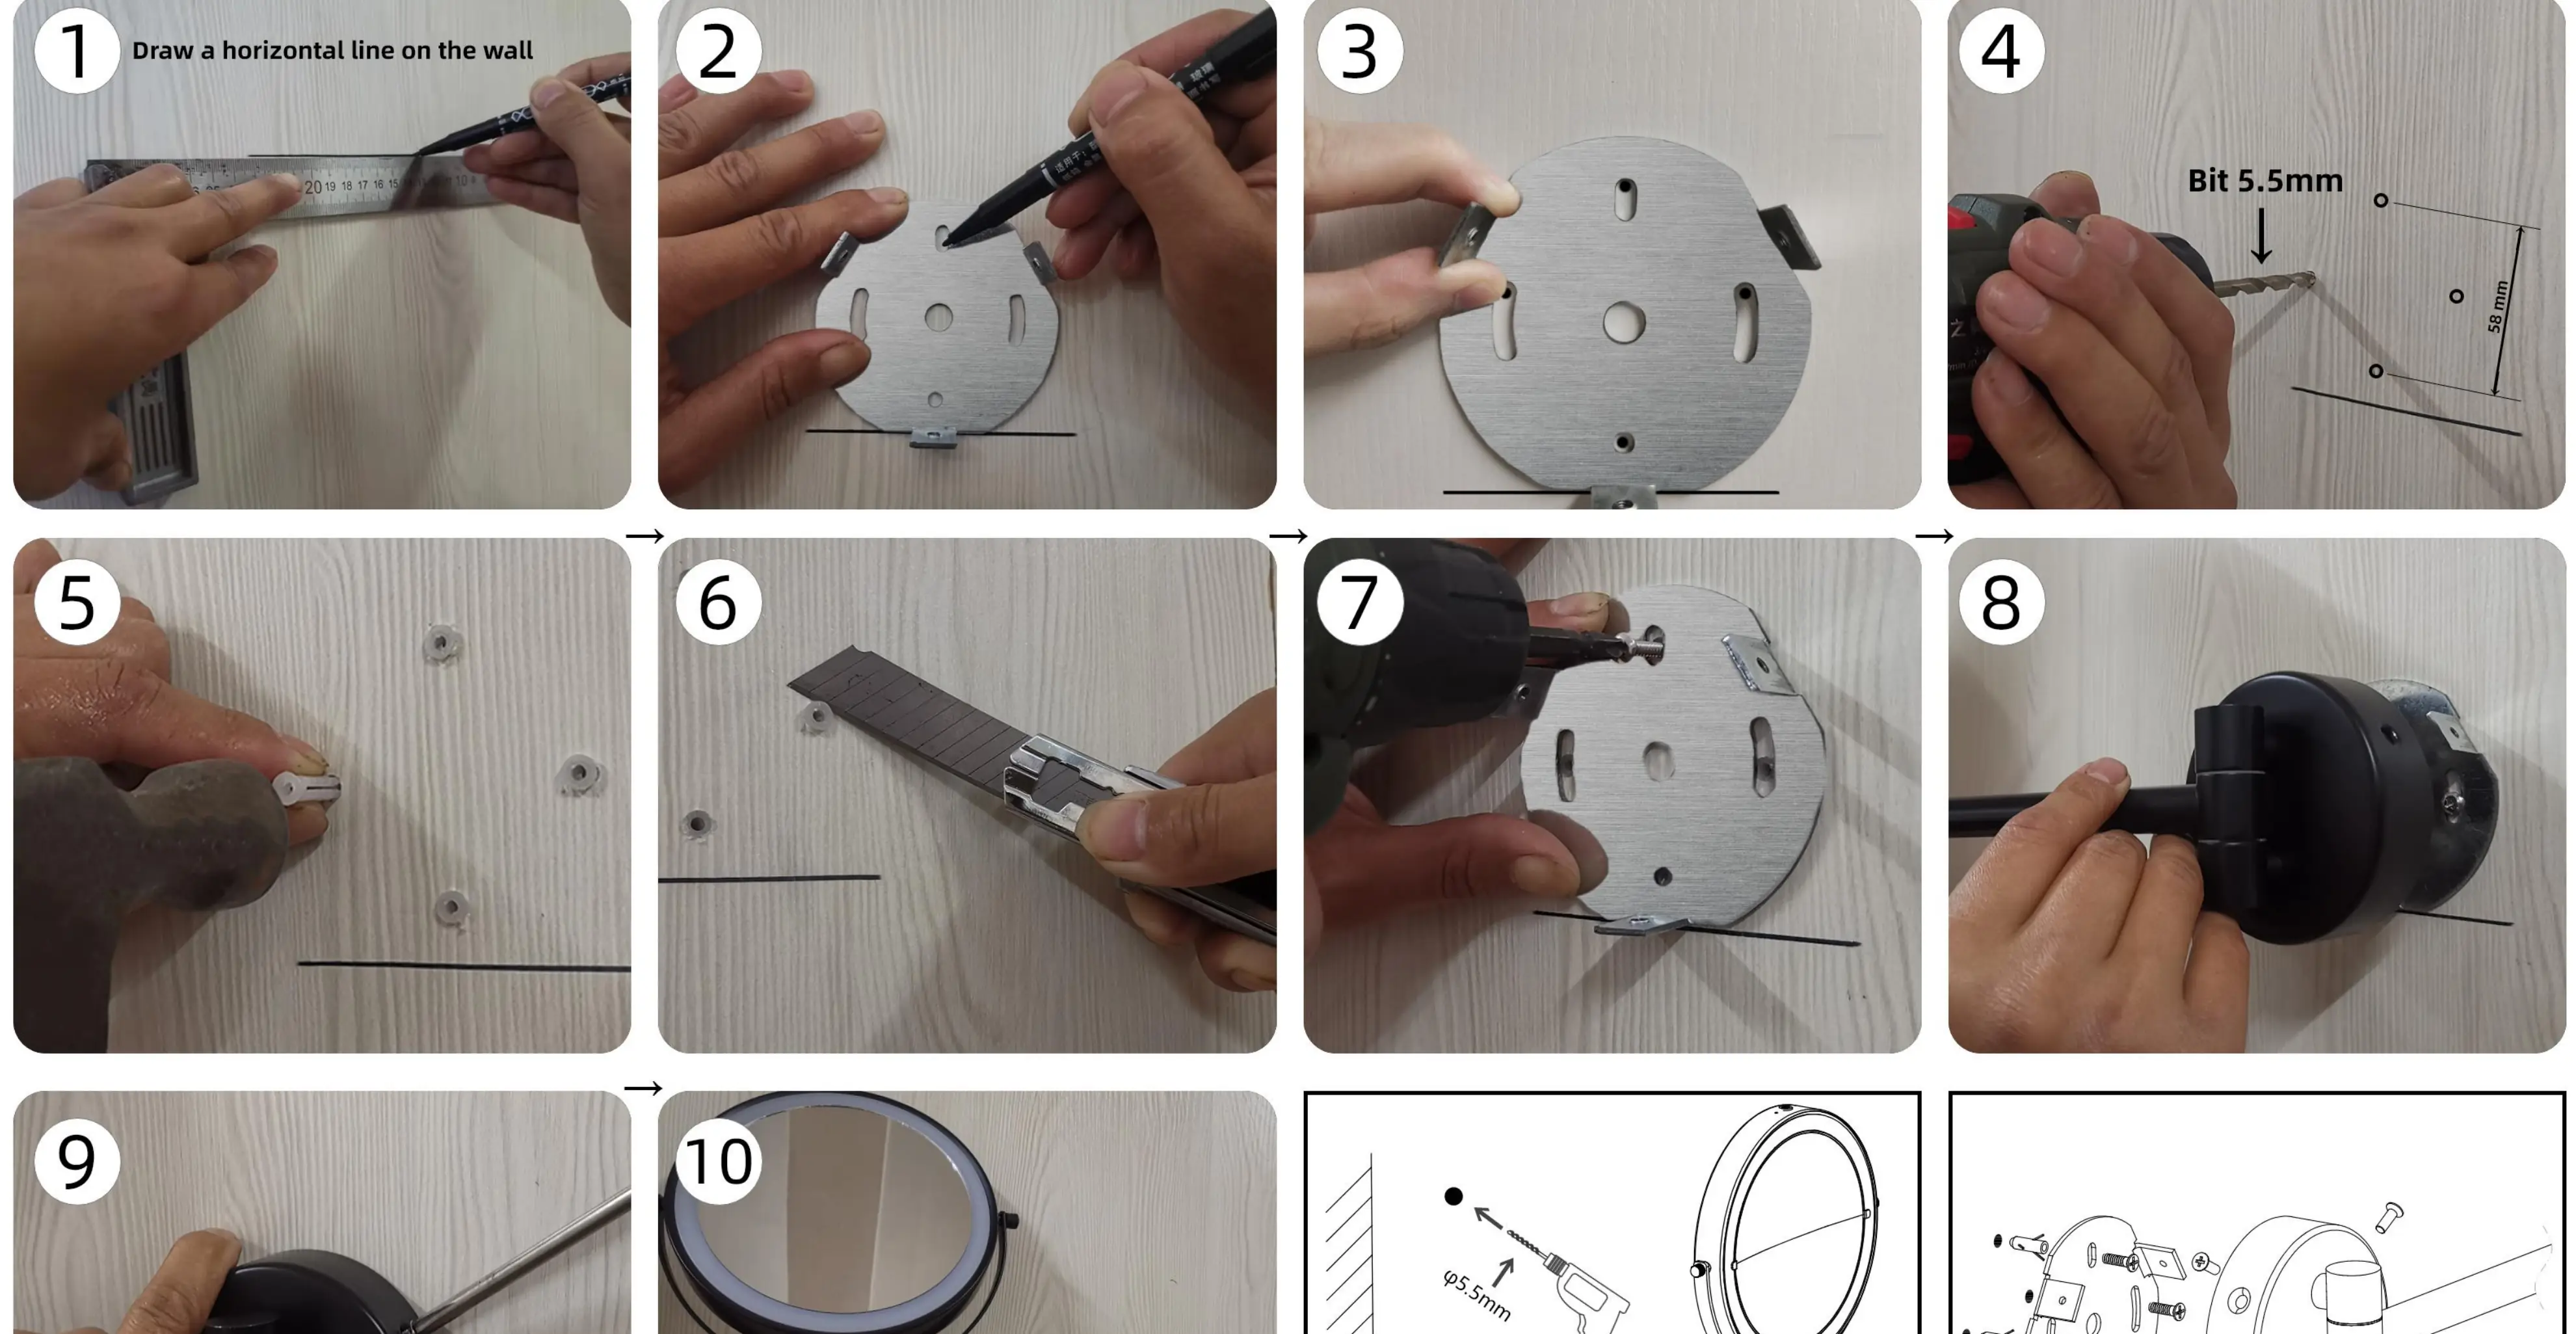
- Draw a horizontal line on the wall to mark the position.
- Mark the screw holes using the mounting bracket as a template.
- Align the bracket with the marks.
- Drill holes using a 5.5mm drill bit.
- Insert wall anchors into the holes.
- Use a utility knife to trim any excess anchor material if necessary.
- Screw the mounting bracket firmly into the wall.
- Attach the mirror arm assembly to the bracket.
- Secure the mirror assembly with the provided screws.
- Attach the mirror panel to the arm.
Note: The included drill bit is suitable for wood and soft walls. For reinforced concrete, use a professional drill.
Operation and features
The mirror features a touch screen interface to control the lighting. Tap the touch switch to turn the light on or off and cycle through the 3 color modes. The mirror also includes a 10-minute auto-off timer to save energy. The handle allows you to tilt the mirror to any angle, and the 360-degree swivel design provides flexibility for the best viewing angle.
Maintenance and battery care
If the mirror tilts naturally when placed vertically, use the provided 3mm Allen wrench to tighten the joint. Insert the wrench into the joint and rotate counterclockwise to tighten. For battery maintenance: use 4x AAA Ni-MH rechargeable batteries. If the mirror is not used for 3 months, ensure the battery is fully charged before storage. Do not charge the battery at temperatures below 0 degrees Celsius or above 45 degrees Celsius.
Safety warnings
- Do not stack heavy objects on the mirror.
- Pay attention to wire winding to avoid damage.
- Avoid collisions between the wire and the frame.
- Do not play with or swallow batteries.
Manufacturer information
The Home Depot
Practical help
Common problems
Mirror tilts downward on its own
Use the provided 3mm Allen wrench to tighten the joint by rotating it counterclockwise.
Battery not charging
Ensure the USB cable is connected properly and not twisted. Check that the batteries are Ni-MH rechargeable type.
Before use
- Ensure you have 4x AAA Ni-MH rechargeable batteries.
- Check your wall type to determine if the included drill bit is sufficient.
- Fully charge the batteries before the first use.
- Verify the mirror is securely mounted before attaching the mirror panel.
Specs in practice
- Input Voltage
- 5V DC required for charging.
- Charging Current
- 250mA.
Images and diagrams
- The installation diagram shows a 10-step process from marking the wall to final assembly.
- The wrench diagram illustrates how to insert the tool into the joint to adjust the tilt tension.
Model compatibility
- Included drill bit is for wood and soft walls only; use professional equipment for concrete.

Manual page author
Michael Turner
Technical manual editor
Reviews PDF manuals for structure, safety notes, and practical product details so readers can find the right information quickly.