Computers / Laptops
Maintenance and Service Guide for HP Chromebook 14a
Comprehensive maintenance and service guide for the HP Chromebook 14a. Includes detailed disassembly instructions, component replacement procedures, specifications, and troubleshooting steps for system recovery.
Table of contents
Manual images
Click an image to enlargeQuick guide from the manual
This guide is intended for authorized service providers to assist with the maintenance and repair of the HP Chromebook 14a. It provides detailed procedures for component removal, replacement, and system recovery. Always follow electrostatic discharge (ESD) safety precautions when working with internal components.
Product Overview
The HP Chromebook 14a is a 14-inch laptop featuring various Intel Pentium and Celeron processor configurations, onboard non-upgradeable memory, and eMMC storage. It includes multiple USB Type-C and Type-A ports, a multi-format media card reader, and optional touchscreen displays.
Safety and Handling
To prevent damage to the computer or injury:
- Always shut down the computer and disconnect the power cord before disassembly.
- Use a nonconductive, nonmarking pry tool to avoid damaging plastic parts.
- Handle drives with care and store them in static-proof bags.
- Follow ESD guidelines: use a wrist strap and grounded work surface.
- Clean surfaces using a microfiber cloth moistened with water or a 70% isopropyl alcohol solution. Do not spray liquids directly on the device.
Component Replacement Procedures
This guide covers the removal and replacement of major components, including:


- Bottom cover: Requires removing rubber strips and screw covers to access internal screws.
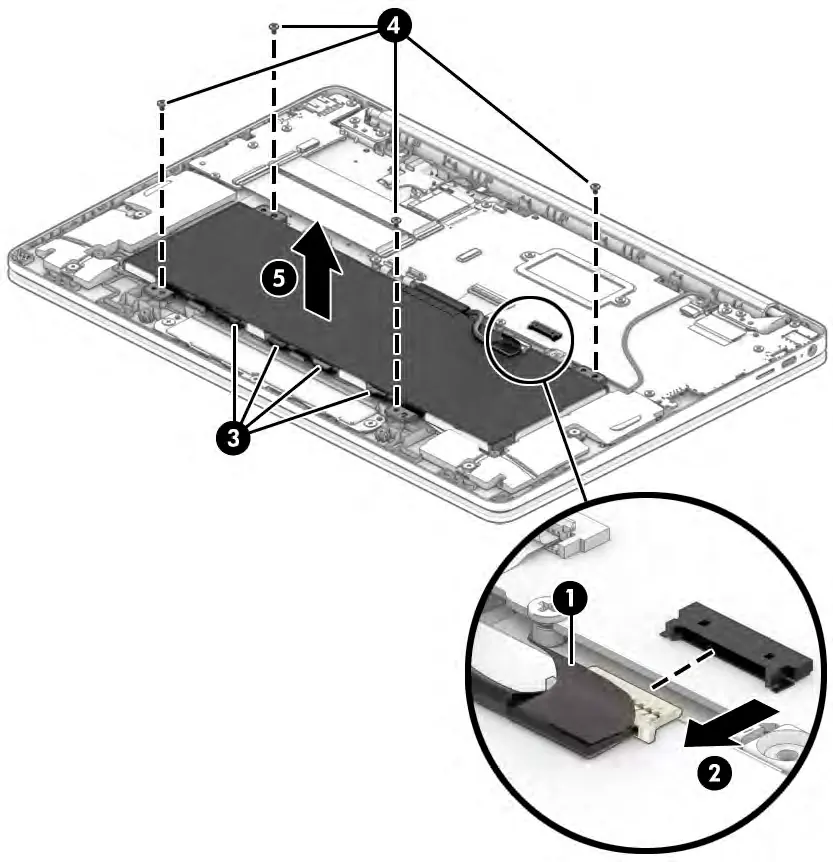
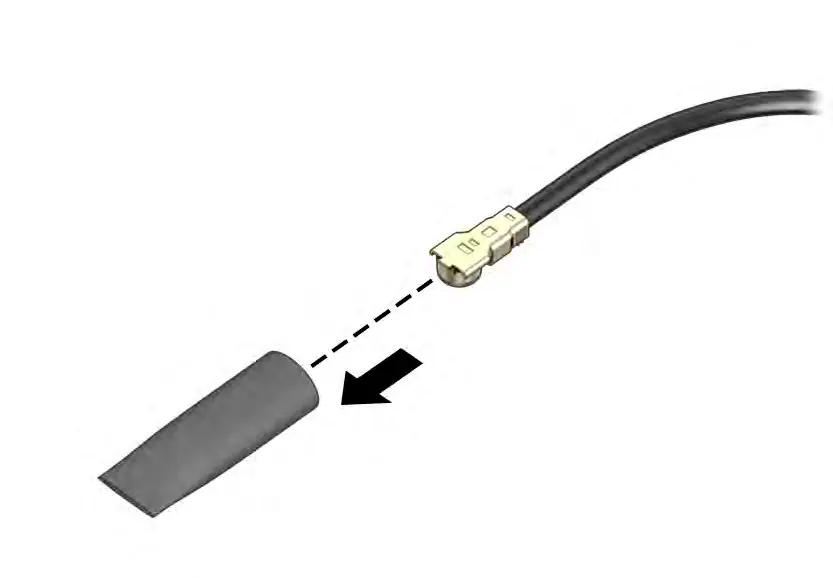
- Battery: Disconnect the battery cable from the system board before removal.
- WLAN module: Disconnect antenna cables and remove the securing screw.
- Speakers: Disconnect the cable from the system board and remove securing screws.
- Touchpad: Remove the bracket and disconnect the ZIF connector cable.
- USB board: Disconnect ribbon cables and remove securing screws.
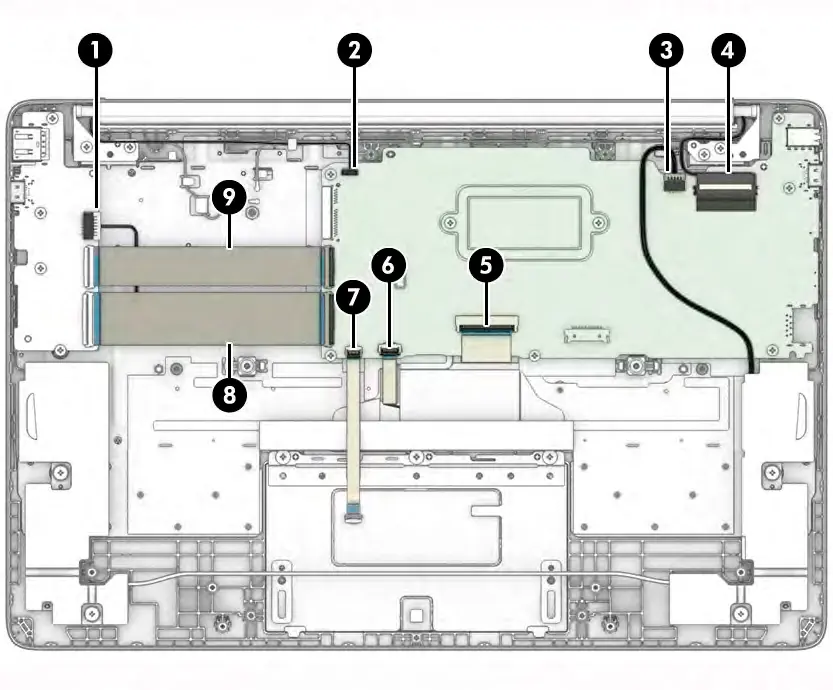
- System board: Requires disconnecting multiple cables (display, keyboard, touchpad, etc.) before removal.
- Display assembly: Involves disconnecting antenna, display, and camera cables, then removing hinge screws.
System Recovery
If the Chrome OS is not functioning correctly, you can perform a system recovery:
- Resetting: Use the Powerwash feature in Settings to erase the hard drive and reset to factory conditions.
- Recovering: Use the Chromebook Recovery Utility installed from the Chrome Web Store on a separate computer to create recovery media (USB flash drive or SD card).
- Recovery Mode: Press and hold the esc+f3 keys while pressing the power button to enter recovery mode.
Support
For technical bulletins, diagnosis information, and to locate authorized service providers, visit www.hp.com and use the Support & Troubleshooting resources. BIOS event logs can be accessed by pressing f10 during startup.
Official resources from the manual
Manufacturer information
HP Inc.
Practical help
Common problems
Computer overheating
Ensure air vents are not obstructed and the computer is placed on a hard, flat surface.
Battery not charging
Check the AC adapter light. If blinking amber, there is a battery error.
System not responding
Press and hold the power key for at least 10 seconds to force a shutdown.
Chrome OS missing or damaged
Perform a system recovery using the Chromebook Recovery Utility and recovery media.
Before use
- Shut down the computer completely.
- Disconnect the power cord and all external devices.
- Use a nonconductive, nonmarking pry tool.
- Ensure you are grounded to prevent electrostatic discharge (ESD).
- Keep screws organized by size and location during disassembly.
Images and diagrams
- Bottom cover removal: Peel rubber strips, remove screw covers, and unscrew the bottom cover.
- Battery removal: Disconnect battery cable from system board, remove screws, and lift out.
- WLAN module: Disconnect antenna cables, remove screw, and pull module from socket.
- System board removal: Disconnect all connected cables (USB, display, keyboard, etc.) before unscrewing.
Model compatibility
- Spare parts vary by model configuration (e.g., backlit vs. non-backlit keyboard).
- Display assemblies are spared only at the subcomponent level.

Manual page author
Michael Turner
Technical manual editor
Reviews PDF manuals for structure, safety notes, and practical product details so readers can find the right information quickly.