Computers / Laptops
Repair Guide for HP Envy 15T-J100 Laptop Hinge
A step-by-step guide on how to repair a broken hinge on the HP Envy 15T-J100 laptop, including tools required, disassembly procedures, and hinge adjustment techniques.
Table of contents
Manual images
Click an image to enlargeQuick guide from the manual
This document provides a user-created procedure for repairing a broken hinge on the HP Envy 15T-J100 laptop. The repair addresses a common issue where the hinge nut becomes too tight, causing the hinge to pull out of the plastic case. Warning: This procedure is performed at your own risk.
Tools and supplies
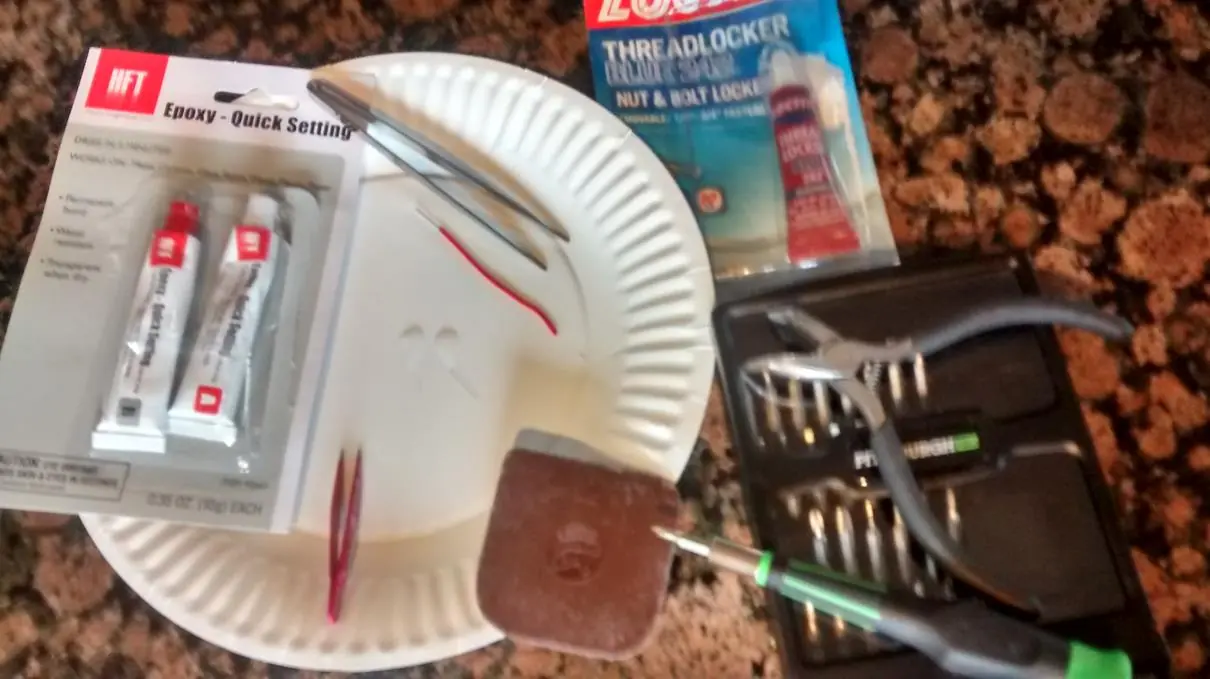
- Small electronics screwdriver set with various Phillips tips
- Epoxy (suitable for metal and plastic)
- Tweezers
- Blue Loctite (threadlocker)
- Angled needle-nose pliers
- Teflon scraper (for prying the case)
- Anti-static bag or wrist strap
Preparation
Before beginning the repair, ensure you have backed up all critical data from your hard drive. Download the official HP Service Manual for your specific model to reference official disassembly steps. Work on a stable, clean surface, preferably on a non-carpeted floor to minimize static electricity. Use a wrist strap or touch grounded metal to avoid damaging electronics.
Disassembly and repair steps
Follow the official Service Manual for initial disassembly steps, which include:
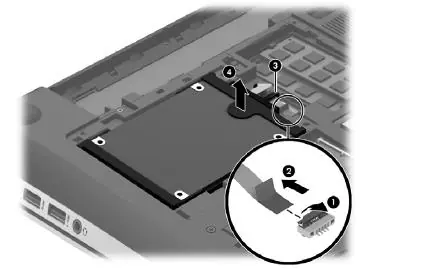
- Disconnecting power and removing the battery.
- Removing the service door.
- Removing the hard drive.
- Removing the bottom cover. Note that there are hidden screws, including one under a black circular sticker.
- Use a Teflon scraper to pry the case open to avoid scratching the plastic.
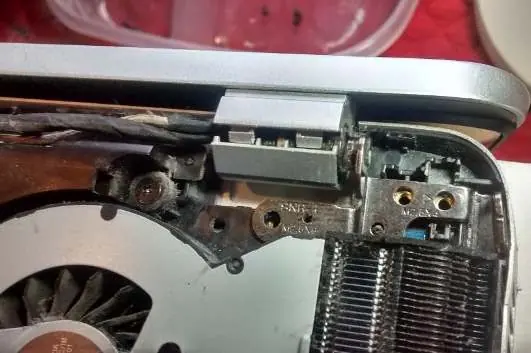
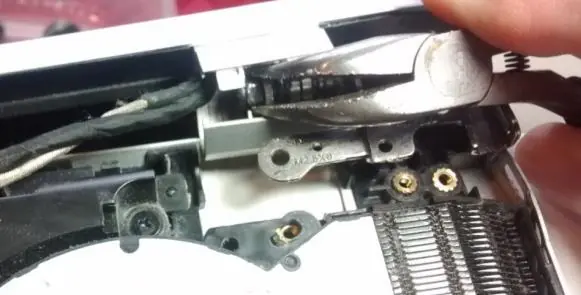
- Once the case is open, identify the loose hinge nuts.
- Use needle-nose pliers to loosen the nut on the hinge mechanism if it is too tight. Apply blue Loctite to the threads to prevent it from tightening again.
- Use epoxy to secure the star-shaped nuts back into the plastic case. Allow the epoxy to set for at least one hour (full strength in 24 hours) before reassembling.
Reassembly
Once the epoxy has cured, reposition the hinge and ensure all internal wires (for the monitor, Wi-Fi, and camera) are routed correctly. Reinstall the screws, applying blue Loctite to all threads. Reassemble the bottom cover, hard drive, service door, and battery in the reverse order of disassembly.
Manufacturer information
HP Inc.
Practical help
Common problems
Hinge is too tight and will not move
Use needle-nose pliers to loosen the nut on the hinge mechanism and apply blue Loctite to the threads to prevent it from tightening again.
Hinge nuts pulled out of the plastic case
Use epoxy suitable for metal and plastic to secure the star-shaped nuts back into the case. Ensure threads are clean before the epoxy fully dries.
Before use
- Back up all data from the hard drive
- Download the official HP Service Manual
- Prepare a clean, static-free workspace
- Use a wrist strap for grounding
- Gather required tools: Phillips screwdrivers, epoxy, tweezers, blue Loctite, needle-nose pliers, Teflon scraper
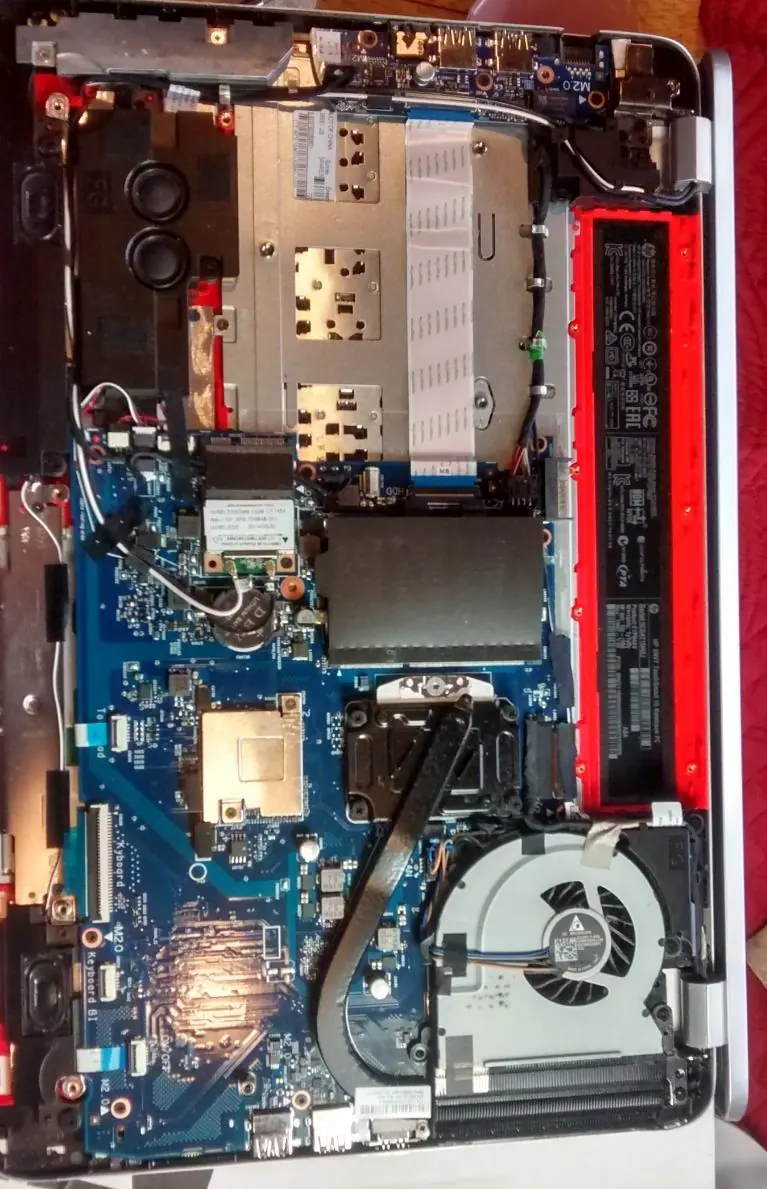
Images and diagrams
- The guide provides visual references for screw locations on the bottom cover and the internal hinge mechanism.
Model compatibility
- This guide is specific to the HP Envy 15T-J100 laptop.

Manual page author
Michael Turner
Technical manual editor
Reviews PDF manuals for structure, safety notes, and practical product details so readers can find the right information quickly.