General / Other Manuals
Maintenance and Service Guide for HP ProOne 400 G2, 460 G2, and 480 G2 All-in-One PC
Comprehensive maintenance and service guide for the HP ProOne 400 G2, 460 G2, and 480 G2 All-in-One PCs. Includes detailed disassembly, component replacement, troubleshooting, and system diagnostics.
Quick answers from the manual
Quick answer
- This manual provides comprehensive instructions for the maintenance, disassembly, and troubleshooting of the HP ProOne 400 G2, 460 G2, and 480 G2 All-in-One PCs. p. 1, 22, 85
Key actions
- Disassemble the computer p. 22, 32
- Access Computer Setup (F10) p. 71, 81
- Troubleshoot power issues p. 91, 101
First start
- Accessing BIOS/Setup p. 71, 81
Problems and fixes
Power LED flashes red
Refer to POST error codes on page 131.
p. 131Maintenance and reset
- Resetting the password jumper p. 138, 149
- Clearing and resetting the BIOS p. 140, 150
Technical specifications
| Parameter | Value | Meaning | Pages |
|---|---|---|---|
| Memory | 32 GB | Maximum supported memory | p. 48 |
| Power Supply | 90W / 120W | Power supply options | p. 19, 154 |
Where to find it in the PDF
- Product Features p. 1, 11
- Removal and Replacement p. 22, 32
- Troubleshooting p. 85, 95
Table of contents
Manual images
Click an image to enlargeQuick guide from the manual
This document provides essential service and maintenance information for the HP ProOne 400 G2, 460 G2, and 480 G2 All-in-One PCs. Before performing any service, ensure the computer is shut down, disconnected from power, and all peripheral cables are removed. Always follow electrostatic discharge (ESD) precautions to prevent damage to sensitive components.
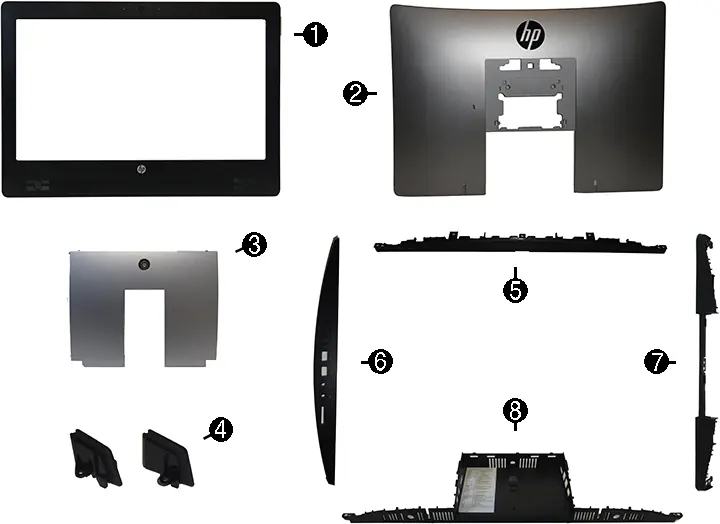
Product Overview
The HP ProOne All-in-One PC features various components accessible for service, including the hard drive, optical drive, memory modules, WLAN module, and system board. The system includes multiple stand options (recline, adjustable-height, easel) and a main rear access panel for internal component maintenance.
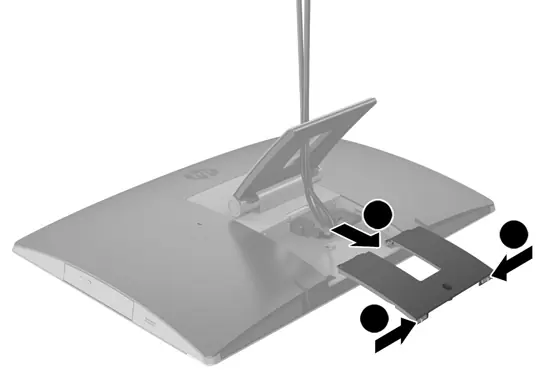
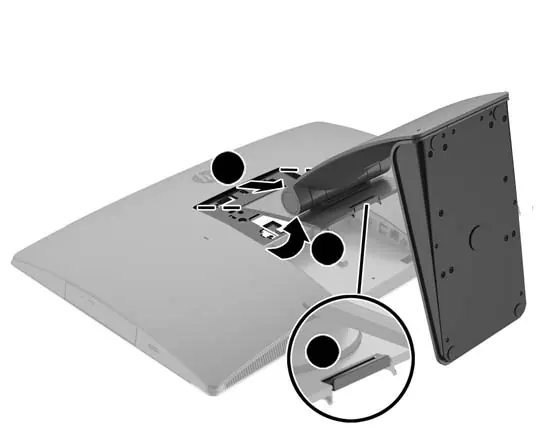
Disassembly and Component Replacement
To access internal components, you must first prepare the computer by shutting it down and disconnecting all cables. The rear port cover and stand must be removed before the main access panel can be opened. Detailed procedures are provided for replacing the following components:
- Drives: Hard disk drive and optical drive replacement.
- Memory: SODIMM module installation and removal.
- System Board: Removal and replacement, including updating SMBIOS information.
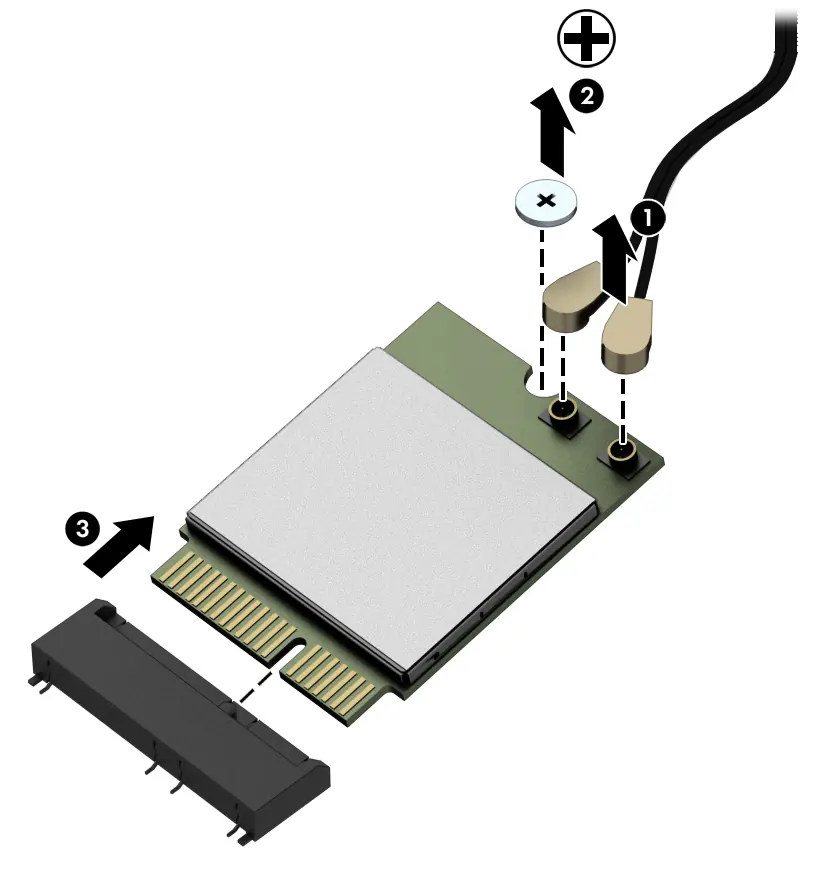
- Webcam and Antennas: Removal and routing procedures.
- Cooling: Heat sink and fan assembly maintenance.
- Power: Power connector and battery replacement.
Troubleshooting
The manual includes extensive troubleshooting tables for various issues, including power failures, display problems, audio issues, network connectivity, and hardware installation errors. Many issues can be diagnosed using the front panel LED error codes and audible beeps. If the computer fails to boot, check the POST error messages and diagnostic codes provided in the appendix.
System Setup and Diagnostics
The Computer Setup (F10) Utility allows you to configure system settings, boot order, and security features. HP PC Hardware Diagnostics (UEFI) can be used to test hardware functionality outside of the operating system. If configuration settings are lost, they can be recovered using saved settings on a USB flash drive.
Maintenance and Safety
Regular maintenance includes cleaning air vents to prevent overheating and using appropriate cleaning materials for the screen and case. Always use safety glasses when cleaning under keyboard keys. The system includes a lithium coin cell battery for the real-time clock, which should be replaced with an equivalent HP spare part.
Manufacturer information
HP Inc.
Practical help
Common problems
Computer won't power on
Check power cable, ensure voltage selector is correct, check for error codes (flashing LEDs).
Blank screen
Check monitor connections, ensure monitor is on, check for POST error codes.
No sound
Check volume settings in OS, ensure speakers are connected to the correct jack (green).
Keyboard/mouse not working
Reconnect to back of computer, check for USB 3.0 interference.
Before use
- Shut down the computer.
- Disconnect all power and peripheral cables.
- Place the computer face down on a soft, flat surface.
- Use an anti-static wrist strap or touch a grounded metal object to prevent ESD damage.
Specs in practice
- Power Supply
- Available in 90W or 120W configurations.
Images and diagrams
- Front components show webcam, microphone, and speakers.
- Side components show power button, USB ports, and optical drive.
- Rear components show I/O ports including DisplayPort and Ethernet.
Model compatibility
- Supports Windows 7, 8.1, and 10.
- Requires specific HP-approved spare parts for components like the display panel and converter board.

Manual page author
Michael Turner
Technical manual editor
Reviews PDF manuals for structure, safety notes, and practical product details so readers can find the right information quickly.