Tools / Positioning Tools
Operating Instructions for IGM 18BX Bandsaw
Comprehensive user manual for the IGM 18BX bandsaw. Includes assembly, blade installation, tracking, tensioning, maintenance, and troubleshooting procedures.
Table of contents
Manual images
Click an image to enlargeQuick guide from the manual
This manual provides essential instructions for the setup, operation, and maintenance of the IGM 18BX bandsaw. Before using the machine, ensure it is properly grounded, all guards are installed, and you are wearing appropriate safety gear, including eye and hearing protection. Always disconnect the power before performing any maintenance or changing blades.
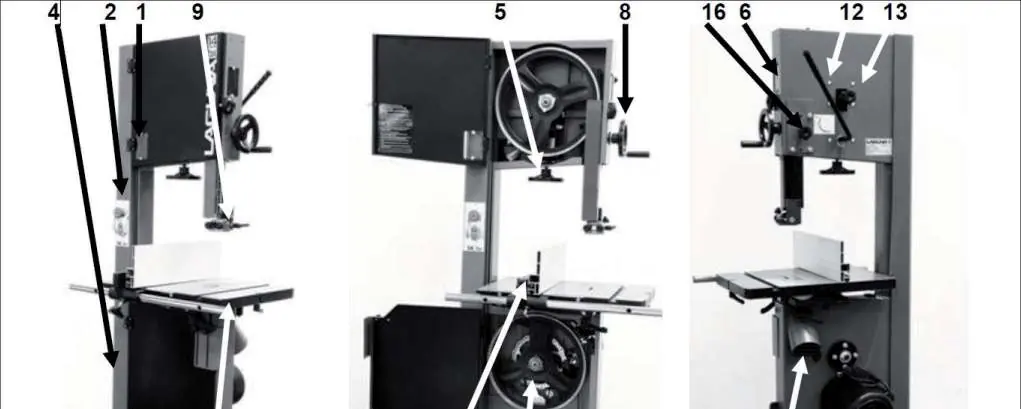
Description of the machine
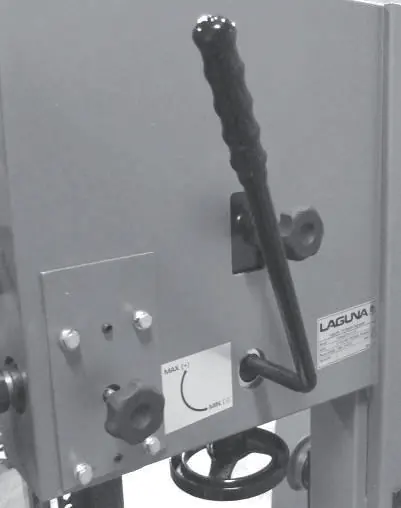
The 18BX is a professional-grade bandsaw featuring a 2.2kW, 400V motor. Key components include a cast iron table, ceramic blade guides, a quick-release blade tension lever, and a foot-operated brake system. The machine is designed for precision cutting and requires specific setup procedures for optimal performance.
Assembly and set up
The bandsaw requires assembly of several components upon delivery:
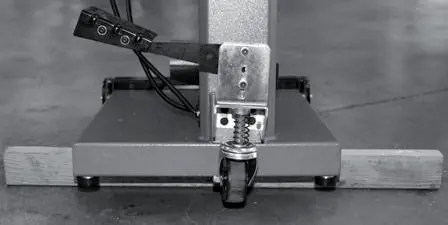
- Rubber feet: Install prior to removing from the pallet or by supporting the machine on wooden blocks.
- Mobility kit: Optional kit consisting of two fixed wheels and one swivel wheel activated by a foot lever.
- Table: Attach to the trunnions; ensure the reference stop bolt is correctly aligned for tilting.
- Fence: Assemble the fence bar, support, and rule. The fence can be used in high or low positions.
- Light: Optional lighting can be installed using pre-drilled holes and connected to the provided 220V socket.
Electrical connection
The bandsaw is pre-wired with a 400V/16A plug. It is recommended to connect the machine to a three-pole 16-amp breaker with class C tripping characteristics.
Fitting a blade to the bandsaw
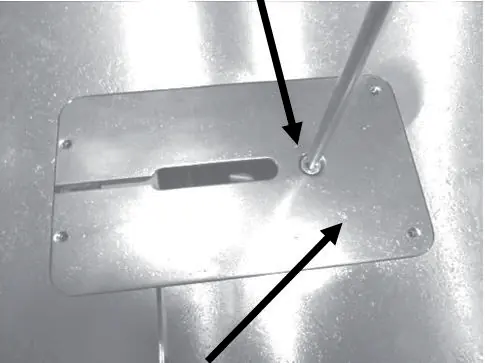
- Disconnect power and remove the throat plate and table split clamp.
- Adjust side and back guides to their outermost positions.
- Uncoil the blade (wear gloves) and slide it through the table split.
- Feed the blade over the top flywheel and through the slot in the vertical column.
- Deactivate the quick-action tension lever to fit the blade over the lower flywheel.
- Re-activate the tension lever and apply light tension.
Tensioning the blade
The machine features a tension indicator on the upper flywheel. Tension the blade until it cuts straight and true with minimal tension. Never bottom out the tension spring. If the machine will not be used for extended periods, remove tension to prolong the life of the tires and bearings.
Adjusting the blade guides
The 18BX uses a ceramic guide system. Guides should be adjusted so they are just behind the gullet of the teeth and parallel to the blade. Ensure there is minimal clearance between the blade and the ceramic blocks. Rotate the back guide by 15 degrees every 8 hours of use to even out wear.
Maintenance
Regular maintenance is required for safe operation:
- Cleanliness: Keep tires clean of compressed sawdust; use a brush or sand with 100-grit sandpaper if necessary.
- Drive belt: Inspect regularly for cracks or wear; replace if damaged.
- Rust prevention: Coat non-painted surfaces with wax if the machine is not in constant use.
- Lubrication: Use only Teflon-based lubricants on moving parts.
Troubleshooting
If the machine fails to start, check the emergency stop button, safety plug, and power supply. If the motor overheats, it will shut down automatically; wait for it to cool before restarting. If the blade slows during a cut, check the drive belt tension or feed rate.
Manufacturer information
IGM Tools & Machinery
Practical help
Common problems
Bandsaw will not start
Check that the start switch is fully pulled out, the yellow safety plug is engaged, the power cord is connected, and the electrical breaker is reset.
Motor tries to start but will not turn
Disconnect power, open doors, and check for jammed wood or guides that are set too tight.
Blade slows down during a cut
Check for a loose drive belt, a dull blade, or feeding the wood too fast. Ensure the blade has the correct set.
Machine vibrates
Ensure the machine is level on the floor and check the drive belt for damage.
Before use
- Ensure the machine is properly grounded.
- Check that all guards are in place and functional.
- Verify that the saw blade teeth point downward.
- Ensure all adjusting and locking handles are tight.
- Check that the machine is clear of tools and loose objects.
- Adjust the upper blade guard to just clear the material.
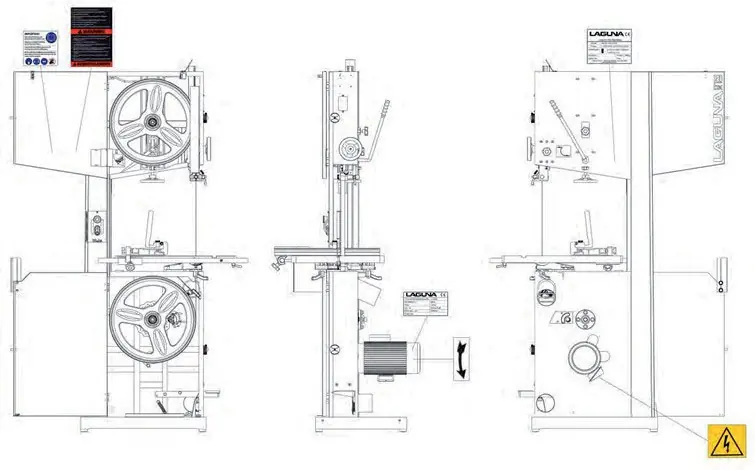
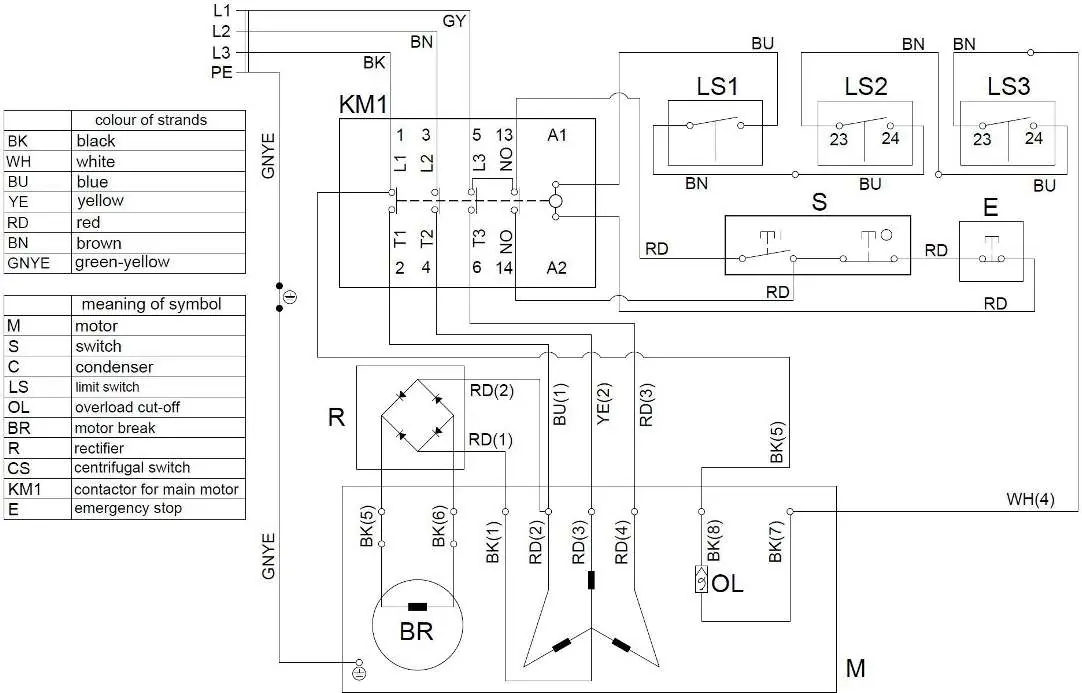
Images and diagrams
- Wiring diagram provided for electrical troubleshooting.
- Exploded views show assembly of upper/lower wheels and table/fence components.
Model compatibility
- Requires 400V power supply.
- Dust extraction capacity: minimum 1699 m3/h.

Manual page author
Michael Turner
Technical manual editor
Reviews PDF manuals for structure, safety notes, and practical product details so readers can find the right information quickly.