Plumbing / Showers & Tubs
Installation Manual for Insignia 1200R ECOnomy Shower
Complete installation guide for the Insignia 1200R ECOnomy Shower. Includes assembly steps, water pressure requirements, tool list, and safety instructions.
Table of contents
Manual images
Click an image to enlargeQuick guide from the manual
This manual provides instructions for the DIY installation of the Insignia 1200R ECOnomy Shower. Before beginning, ensure you have checked all contents against the box list. Do not book a tradesman until all parts have arrived and been checked. The shower requires a water pressure between 2.5 and 3.4 BAR. If you have a gravity-fed system, you will likely need a pump. Always use flexible braided water inlet pipes (not supplied) and never use rigid pipes or glue for waste connections.
Installation Preparation
Before starting the build, ensure you have the following tools: Philips screwdriver, electric drill, spirit level, tape measure, scissors, knife, safety gloves, and safety glasses. You will also need to purchase flexible braided hoses and isolation valves for the hot and cold water supply.


Assembly Steps
The assembly process follows these key stages:
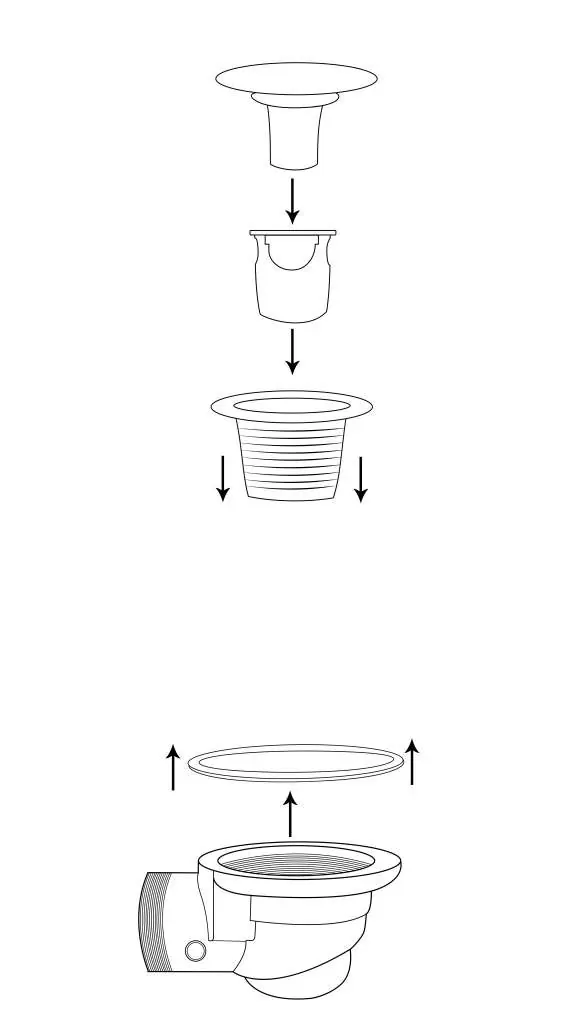
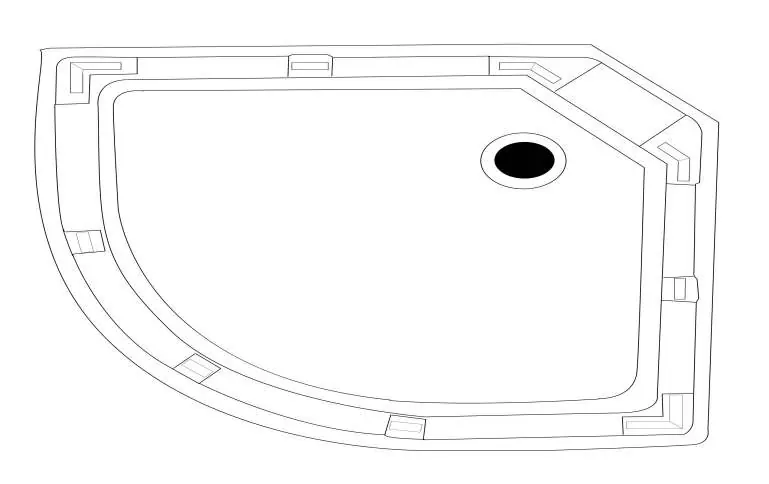
- Tray and Waste: Level the tray and connect the waste using a 40mm compression joint. Do not use glued joints.
- Framework: Connect the framework using the provided securing clips. Ensure the wider rail is on top and the narrow rail is at the bottom.
- Sealing: Apply the supplied RubberGum to the raised sections of the tray. Press the frame firmly onto the RubberGum.
- Panels and Column: Connect the back panels and the column. Do not screw the back panels directly to the tray.
- Glass and Roof: Install the fixed glass panels, glass seals, and the roof.
- Doors: Fit the door wheels and handles.
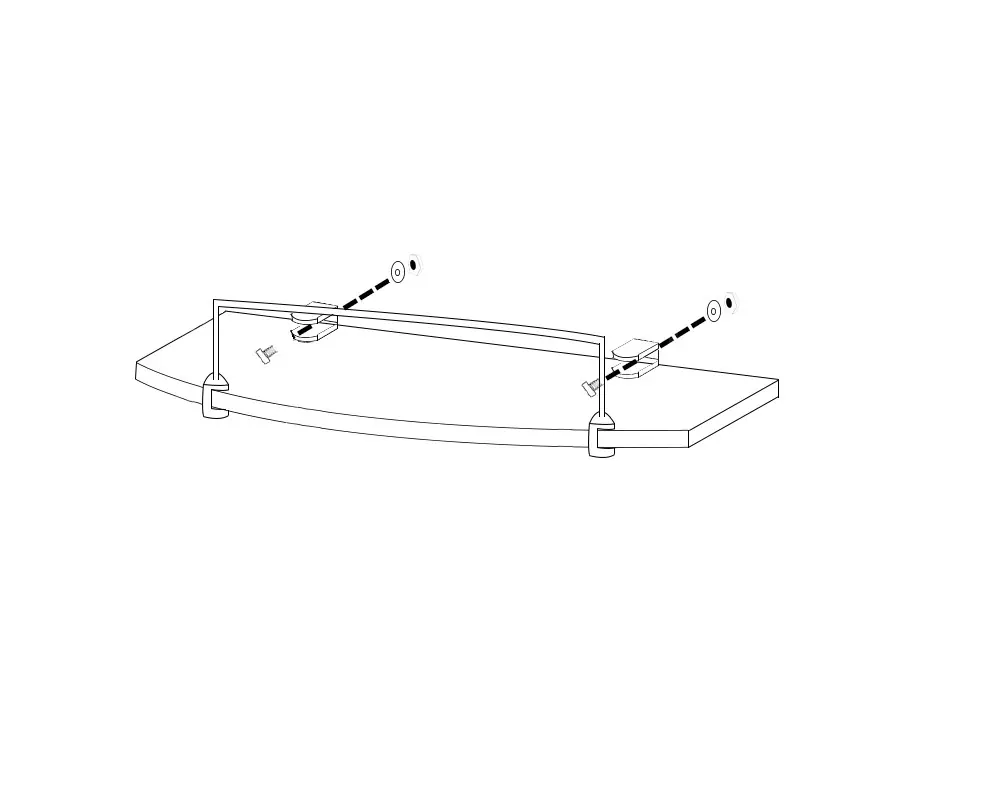
- Accessories: Install the hand shower and shelf.
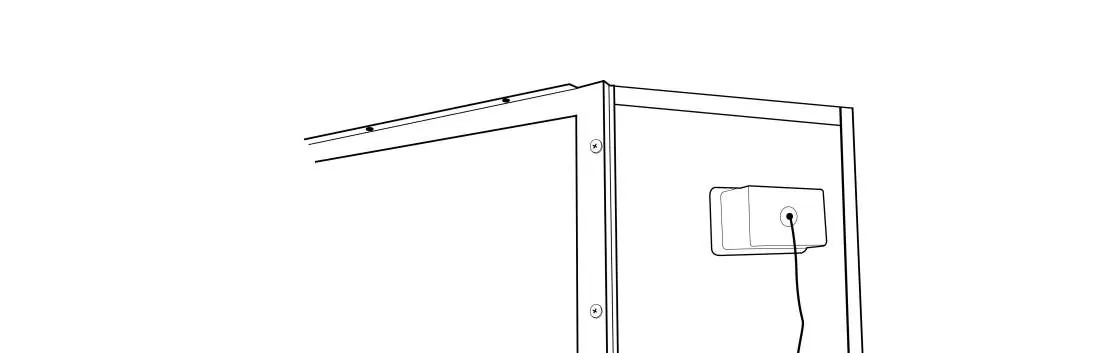
Water Connections
Connect the hot and cold water supplies to the valve. Ensure all connections are watertight. If you have a steam version, ensure the steam generator connection is secure. Use the provided washers on the back of the valve.
Signing off your shower
Once assembled, perform the following checks:
- Ensure all connections are watertight, including waste, body jets, and hoses.
- Test shower functions by switching on the overhead shower, then the hand shower, and finally the body jets.
- Check for leaks while the water is running.
- Visually verify water flow to the waste and adjust tray feet if necessary.
- Cut off any excess RubberGum that has squeezed out using a sharp knife.
- Push the shower into its final position. Never push the glass or frame.
Safety Guide
Never leave children unattended in the shower. The steam function is for adults only. If you feel dizzy or faint, exit the steam room immediately. Consult a GP before use if you are pregnant, have heart conditions, high/low blood pressure, or are on medication. Always turn off the power and water supply after use.
Practical help
Common problems
Water leaks
Check all connections, including internal/external hoses and body jets. Ensure RubberGum is applied correctly and not contaminated with silicone.
Low water pressure
Ensure pressure is between 2.5 and 3.4 BAR. Gravity-fed systems may require a pump.
RubberGum failure
Ensure no silicone comes into contact with RubberGum, as it will cause it to fail.
Before use
- Check all contents before starting the build.
- Ensure water pressure is between 2.5 and 3.4 BAR.
- Have required tools: Screwdriver, Drill, Spirit Level, Tape Measure, Scissors, Knife, Safety Gear.
- Purchase flexible braided water inlet pipes (not supplied).
- Install isolation valves on hot and cold supply.
- Register your shower within 90 days for the 5-year warranty.
Specs in practice
- Waste connection
- 40mm compression joint (do not use glue).
Images and diagrams
- Step 1: Tray leveling and waste connection.
- Step 2: Framework assembly using securing clips.
- Step 16: Valve and water connection diagram.
Model compatibility
- Not suitable for glued waste joints.
- Requires flexible braided hoses (not central heating plastic type).

Manual page author
David Miller
Documentation analyst
Organizes user manual content into clear summaries, with attention to model details, product context, and everyday usability.