Furniture / Bathroom Furniture
User Manual for Better Bathrooms Lomax L Shape 6mm Bath Screen
Quick guide for the Better Bathrooms Lomax L Shape 6mm Bath Screen. Includes installation steps, component list, safety warnings, and maintenance instructions.
Table of contents
Manual images
Click an image to enlargeImportant Information
Before beginning the installation, please read these instructions thoroughly and retain them for future reference. Always check for hidden pipes and cables before drilling into walls. Inspect the product for any damage prior to installation, as damage reported after installation is not covered.
Note: This product requires multi-person assembly. We strongly recommend using professional tradespeople to install your product.
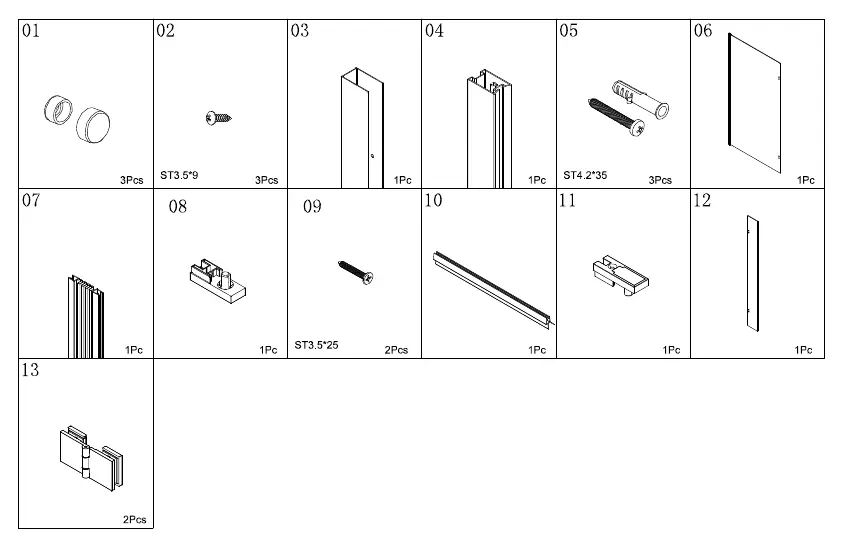
Component Listing
Ensure all parts are present before starting assembly. The kit includes various screws, wall profiles, glass panels, hinges, and seals. Refer to the technical drawing and component list on page 4 of the manual to identify parts 01 through 13.
Installation Instructions
The installation process involves the following steps:
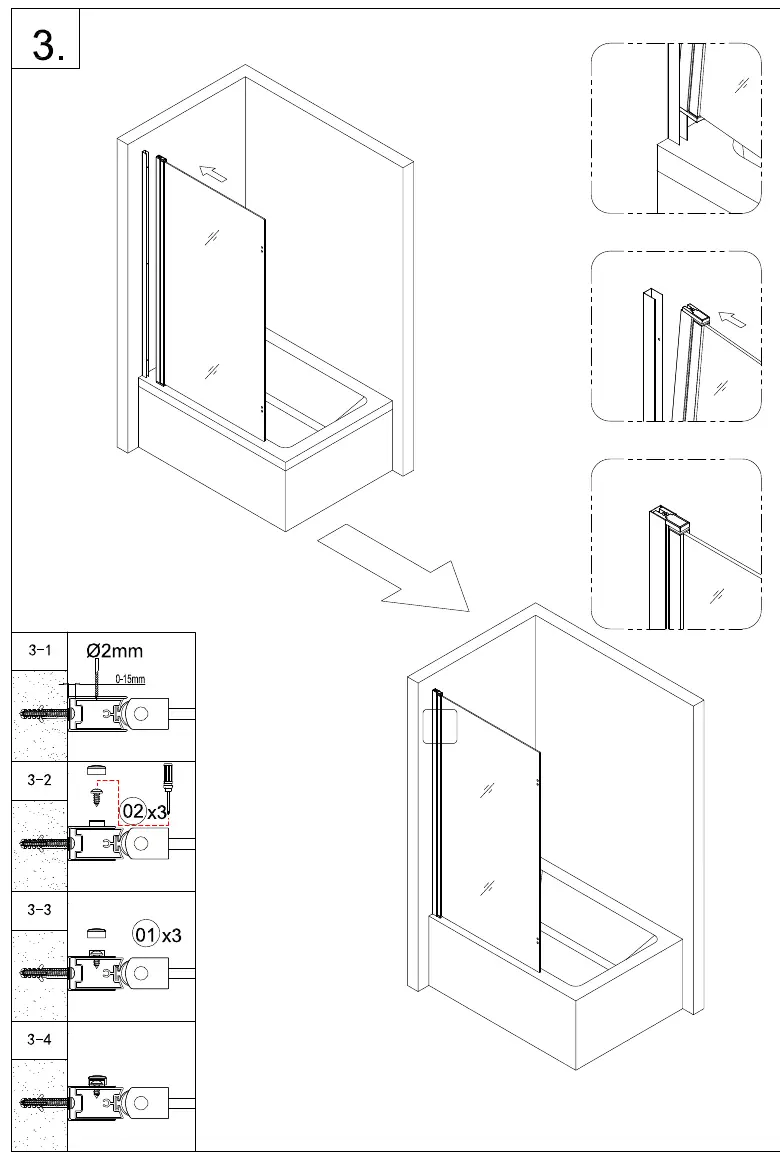


- Step 1: Prepare the wall profile. Mark the position, drill holes (6mm), insert wall plugs (05), and secure the profile to the wall.
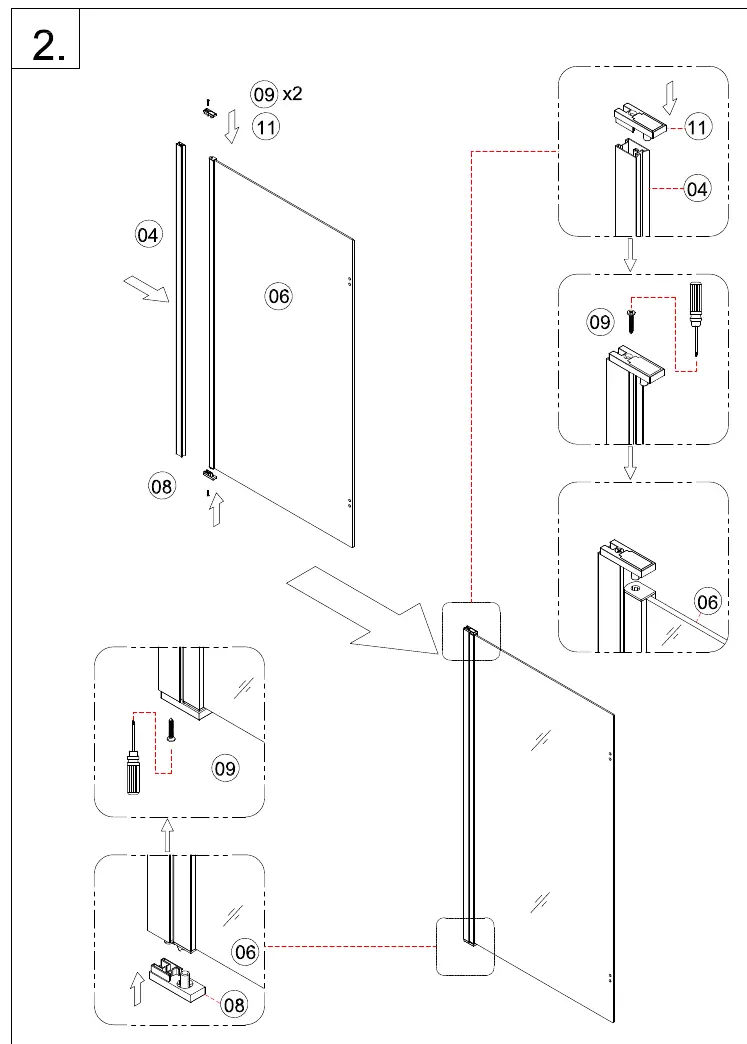
- Step 2: Assemble the frame. Attach the top and bottom brackets (08, 11) to the glass panel (06) using the provided screws (09).
- Step 3: Mount the screen. Insert the screen into the wall profile and secure it using the provided screws (02) and covers (01).
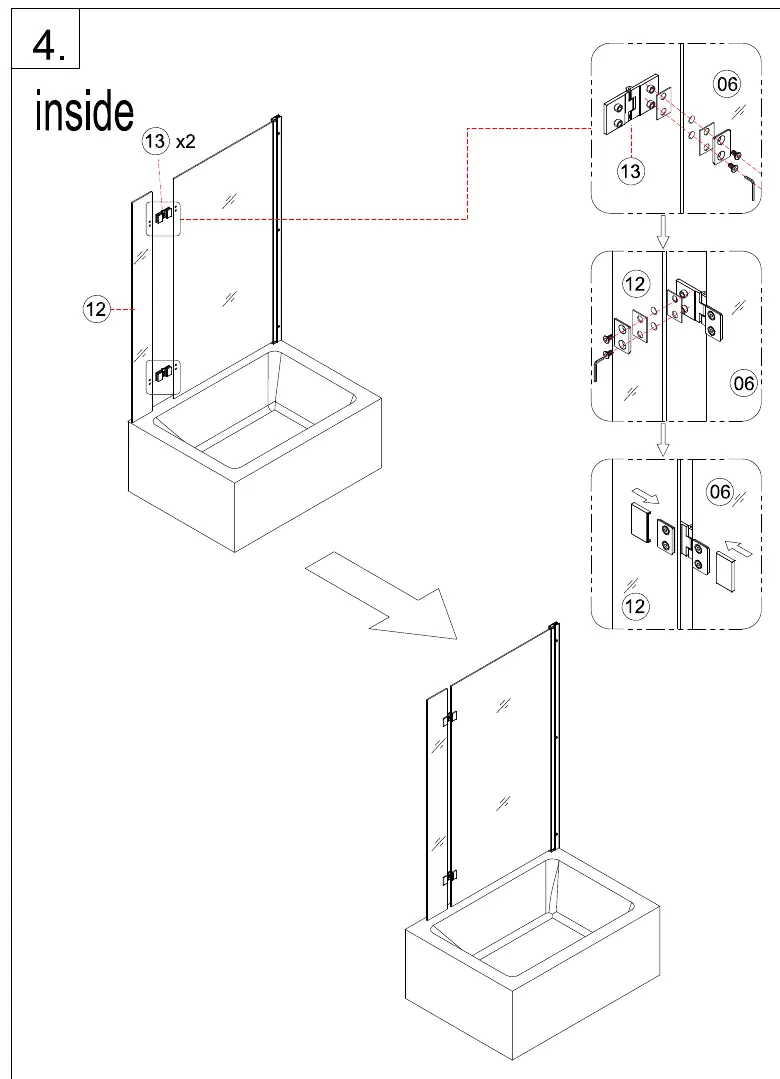
- Step 4: Attach the return panel. Use the hinges (13) to connect the return panel (12) to the main glass panel (06).
- Step 5: Apply seals. Cut the seals (07) to size and attach them to the glass edges to ensure a watertight fit.
- Step 6: Final sealing. Apply silicone sealant along the wall profile and base. Do not use the shower enclosure within 24 hours of assembly to allow the sealant to cure properly.
Care and Cleaning
To maintain the appearance and longevity of your shower screen:
- Clean all parts with a cloth soaked in neutral detergent and soapy water.
- Do not use sharp tools, such as blades, to clean the shower door.
- Avoid using strong detergents, alcohol, or abrasive cleaning substances.
- If stains are serious, a low concentration of vinegar may be used, but the surface must be rinsed with clean water immediately afterward.
Contact Information
For further assistance, you can visit betterbathrooms.com, email [email protected], call 0330 390 3062, or write to Trident Business Park, Neptune Way, Huddersfield, HD2 1UA.
Official resources from the manual
Manufacturer information
Better Bathrooms
Practical help
Common problems
Damage found after installation
Reporting damage after installation is not covered. Always check for damage prior to installation.
Drilling hazards
Always check for hidden electrical wires, cables, or water supply pipes before drilling into walls.
Shower usage after assembly
Do not use the shower enclosure within 24 hours of assembly to allow sealant to cure.
Before use
- Check for damage prior to installation
- Ensure you have all components listed in the component listing
- Check for hidden pipes and cables before drilling
- Ensure you have a second person to assist with assembly
- Gather required tools: drill, level, pencil, hammer, screwdriver, scissors, 6mm drill bit
Specs in practice
- Glass thickness
- 6mm
Images and diagrams
- Technical drawing shows the assembly of the frame and glass panels
- Installation steps guide you through drilling, fixing the wall profile, and attaching the screen
Model compatibility
- Designed for L-shape bath configurations

Manual page author
David Miller
Documentation analyst
Organizes user manual content into clear summaries, with attention to model details, product context, and everyday usability.