General / Other Manuals
Kidzone 060ROT01L Licensed Lamborghini SIAN Ride-On Car Instruction Manual
Quick guide for the Kidzone 060ROT01L Lamborghini SIAN ride-on car. Includes assembly steps, charging instructions, remote control pairing, safety warnings, and troubleshooting.
Table of contents
Manual images
Jump to the sectionQuick guide from the manual
This document provides essential safety, assembly, and operating instructions for the Kidzone 060ROT01L Licensed Lamborghini SIAN ride-on car. Important: The vehicle is shipped with the battery disconnected; you must connect it before the first use. Adult assembly and supervision are mandatory at all times.
Safety instructions
- Not intended for children under 36 months or over 72 months.
- Maximum weight capacity: 55.12 lb (25 kg).
- Only one rider allowed at a time.
- Always wear a helmet and shoes while operating.
- Do not use on public roads, near motor vehicles, steep inclines, steps, or swimming pools.
- Operate only during daylight or in well-lit areas.
- Keep hands, hair, and clothing away from moving parts.
- Do not modify the electrical system or wiring.
Assembly instructions
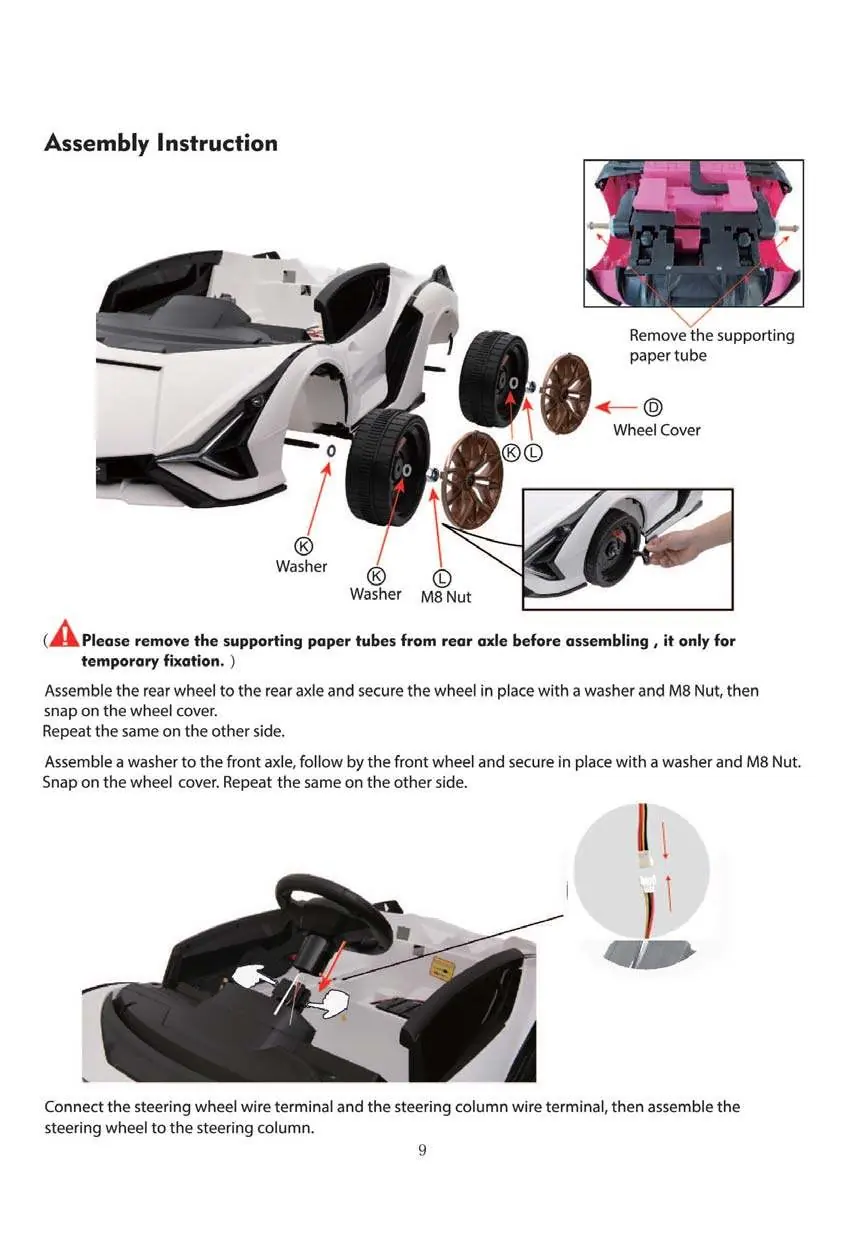

- Wheels: Remove the temporary paper tubes from the rear axle. Assemble the rear wheels using washers and M8 nuts, then snap on the wheel covers. Repeat for the front wheels.
- Steering Wheel: Connect the steering wheel wire terminal to the steering column terminal, then attach the steering wheel to the column.
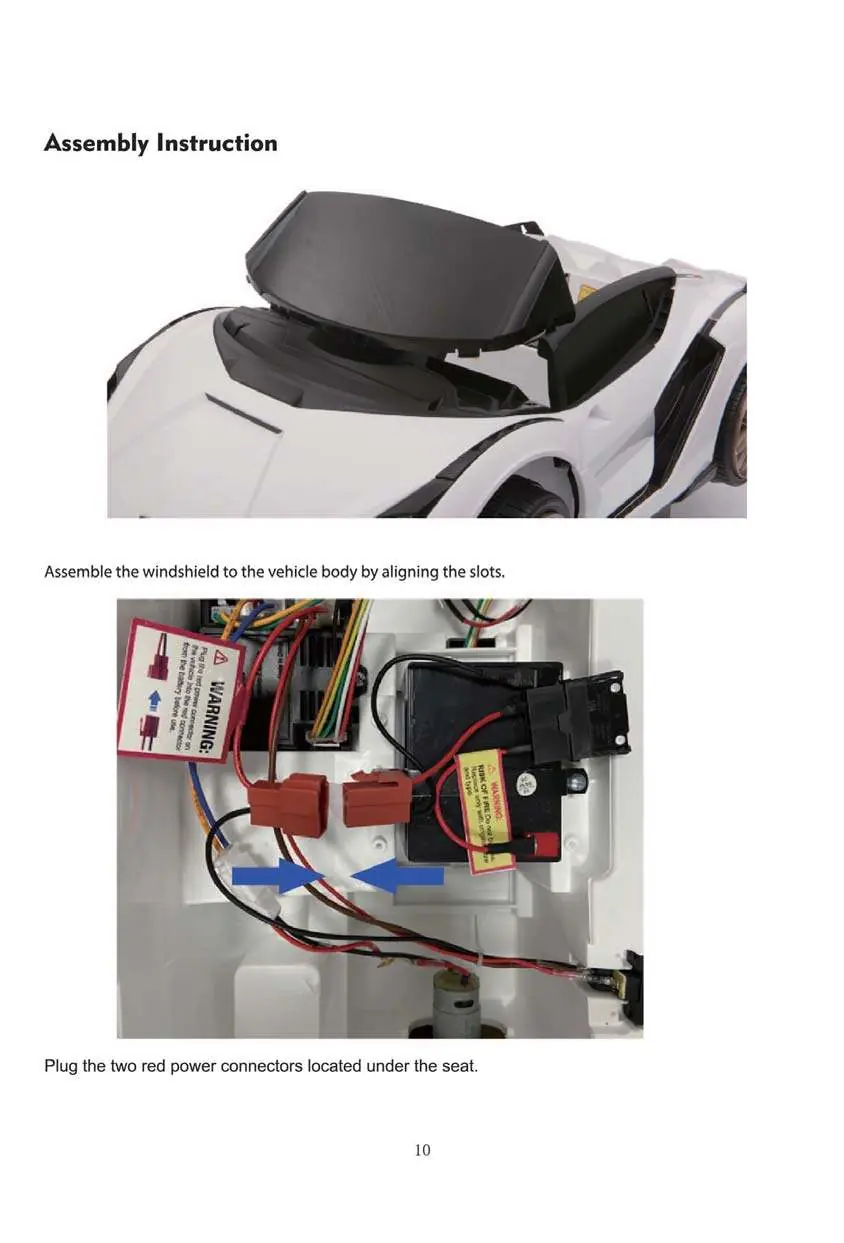
- Windshield: Align the windshield with the slots on the vehicle body and press into place.
- Power: Connect the two red power connectors located under the seat.
- Seat: Align the seat with the body and secure it using the provided screws.
- Mirrors: Insert the rear-view mirrors into the sides of the vehicle body.
Operation and remote control
The vehicle features a dashboard with a power switch, light switch, speed switch (fast/low), and media controls (MP3, Bluetooth, FM). To move the vehicle, use the foot pedal or the remote control.
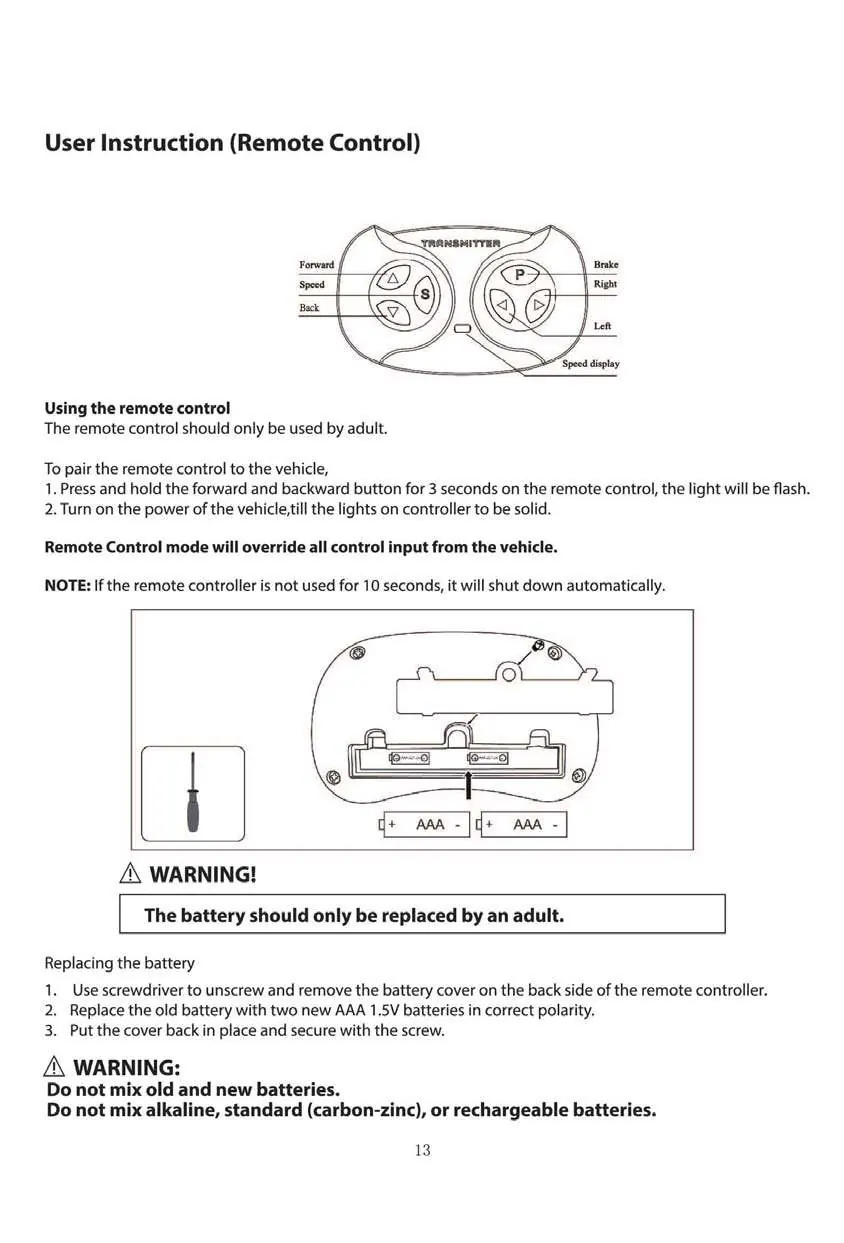
Remote Control Pairing:
- Press and hold the forward and backward buttons on the remote for 3 seconds until the light flashes.
- Turn on the vehicle power; the remote light should become solid.
- Remote control mode overrides all manual input from the vehicle.
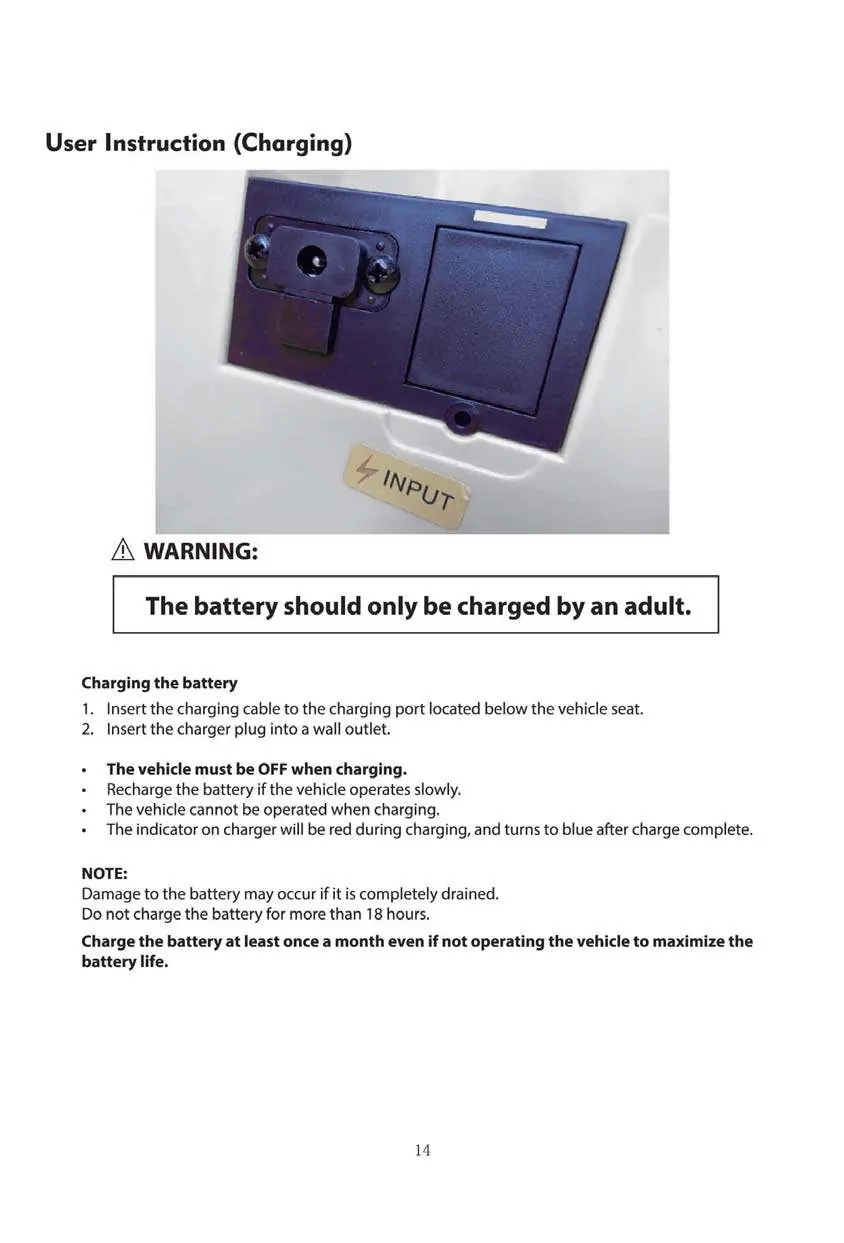
Charging
- The vehicle must be turned OFF during charging.
- Insert the charging cable into the port located under the seat and plug the charger into a wall outlet.
- Charging time: 8-10 hours (do not exceed 18 hours).
- Charge at least once a month to maintain battery health.
Care and maintenance
- Regularly check for loose parts and tighten if necessary.
- Clean with a cloth; do not use a hose or immerse in water.
- Store in a dry area away from heat.
- Use lightweight oil to lubricate moving parts occasionally.
Manufacturer information
Kidzone Toys
Practical help
Common problems
Vehicle does not move
Check battery charge, ensure battery is connected, or wait 10 seconds for the automatic fuse reset if overloaded.
Vehicle runs very slow
Charge the battery, replace an old battery, ensure the user weight is under 55.12 lb, or move to a smoother surface.
Battery does not charge
Check if battery connectors are firm, ensure the charger is plugged into a power source, or contact customer service if the charger is faulty.
Before use
- Remove temporary paper tubes from the rear axle.
- Connect the red power connectors under the seat.
- Fully charge the battery for 8-10 hours.
- Ensure the seat is securely screwed in.
- Verify all wheels are secured with washers and M8 nuts.
- Check that the child is wearing a helmet.
Specs in practice
- Operation time
- 40-50 minutes per full charge.
Images and diagrams
- Dashboard layout showing power, light, speed, and media controls.
- Remote control button functions for steering and speed.
- Battery charging port location under the seat.
- Wiring diagram for connecting the main power connectors.
Model compatibility
- Only use the supplied charger and battery.
- Do not mix old and new batteries in the remote.
- Flash drive music support limited to MP3 format and max 16 GB capacity.

Manual page author
David Miller
Documentation analyst
Organizes user manual content into clear summaries, with attention to model details, product context, and everyday usability.