Toys / Games
Kidzone 060-ROT-15 Ride On Tractor Instruction Manual
Quick guide for the Kidzone 060-ROT-15 Ride On Tractor, covering assembly, battery charging, remote control operation, and safety guidelines.
Table of contents
Manual images
Jump to the sectionQuick guide from the manual
This document provides essential instructions for the assembly, safe operation, and maintenance of the Kidzone 060-ROT-15 Ride On Tractor. The vehicle is intended for children aged 3+ years with a maximum weight capacity of 66 lb (30 kg). Adult assembly and constant supervision are mandatory.
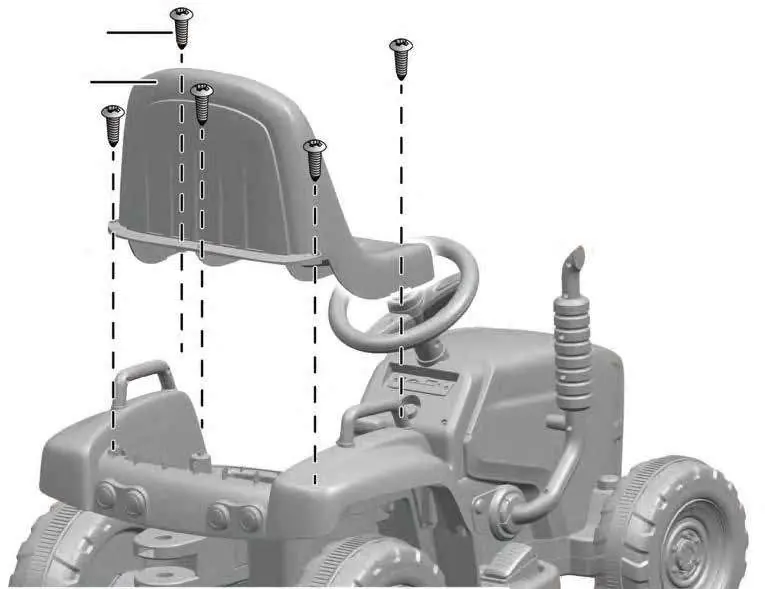
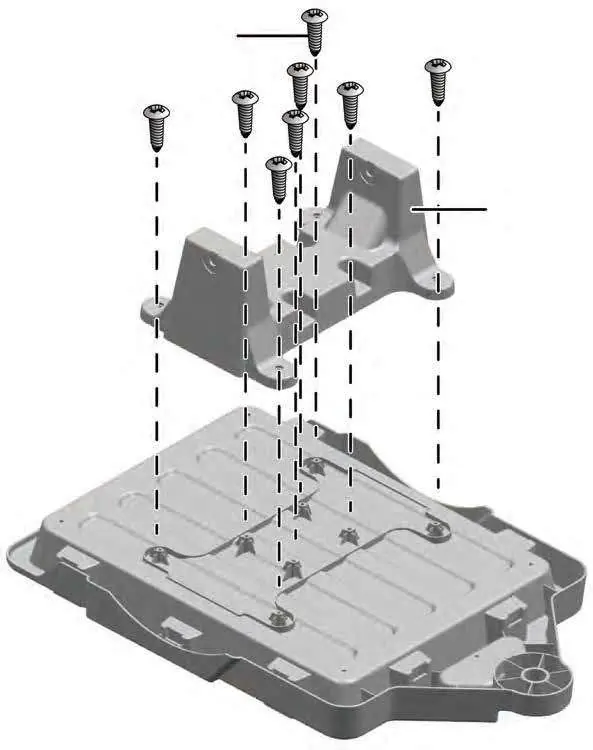
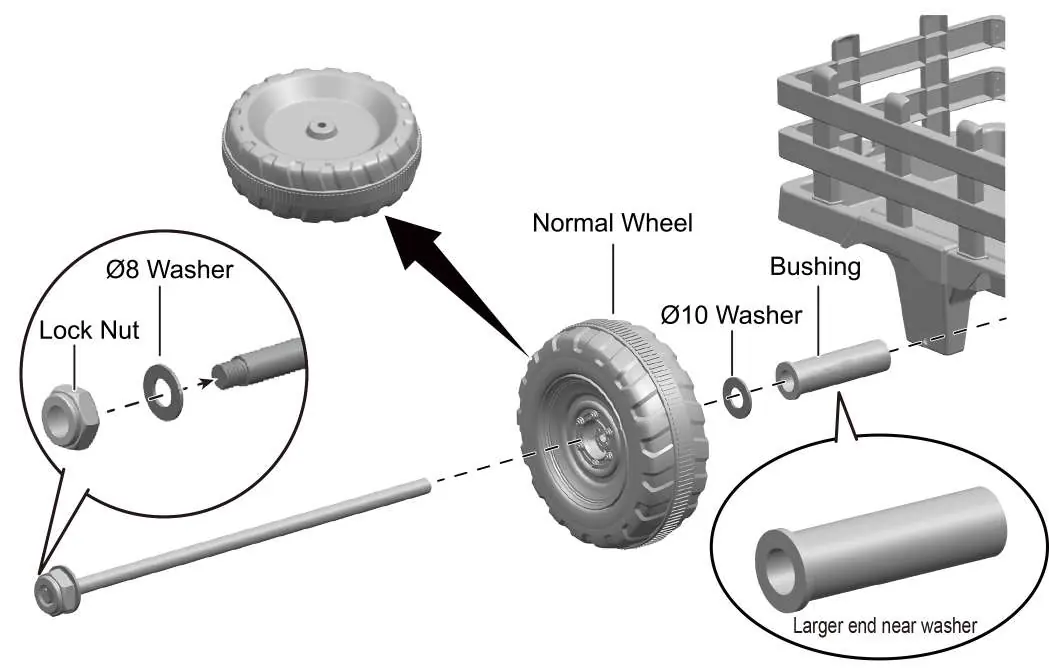
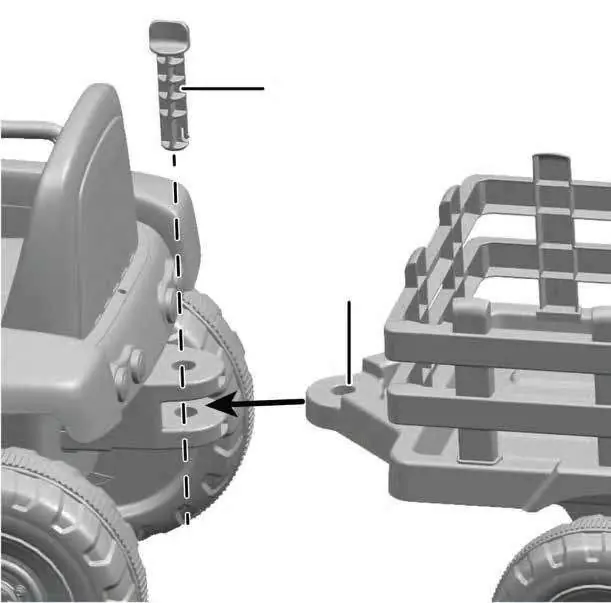
Assembly
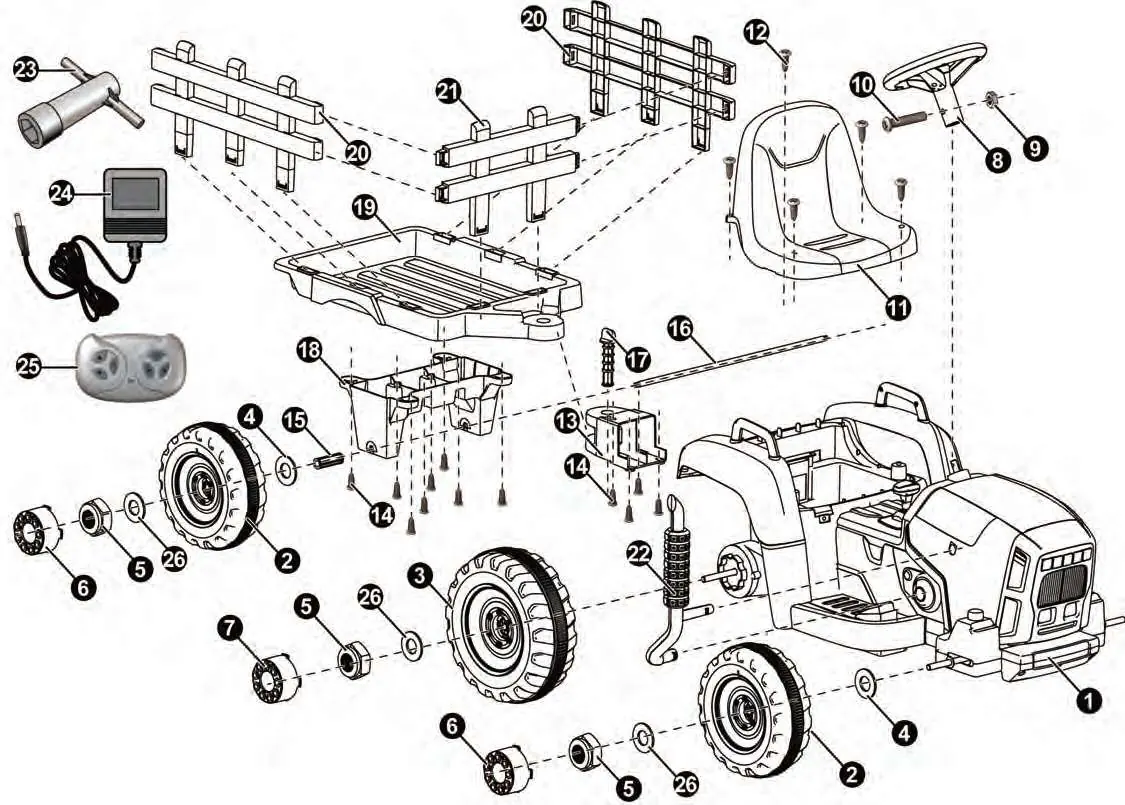
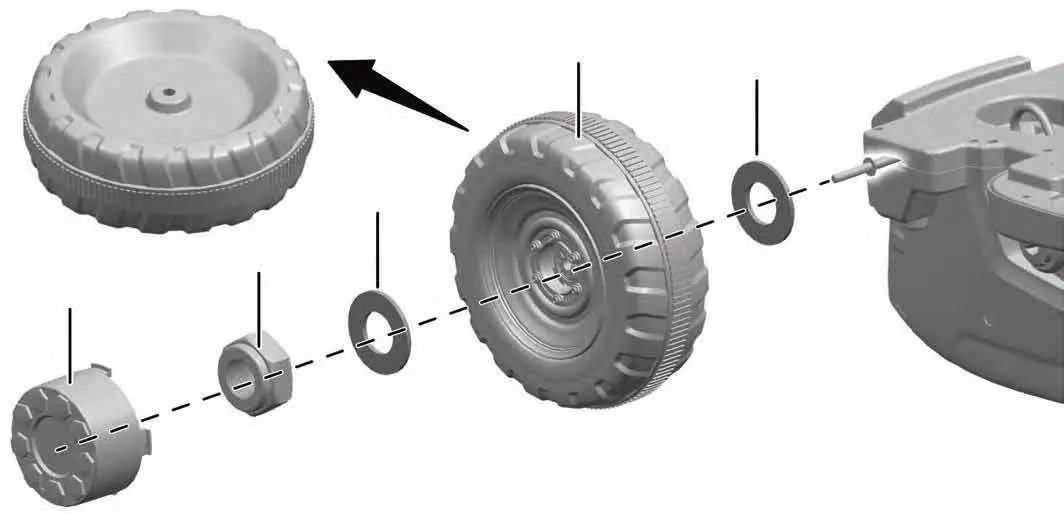
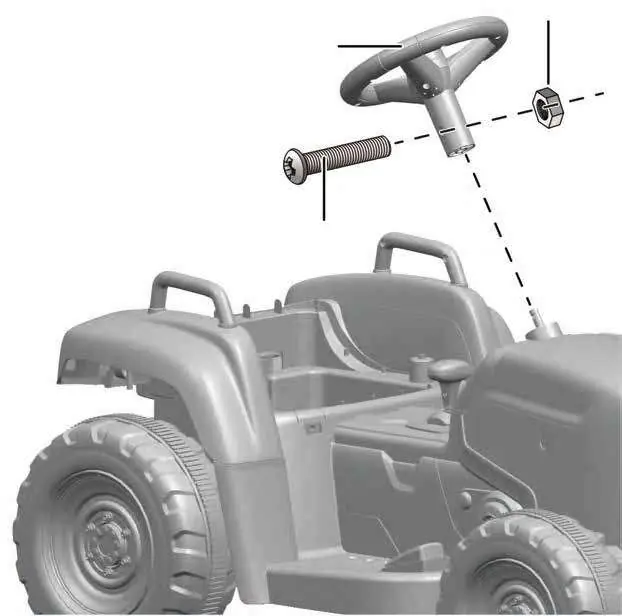
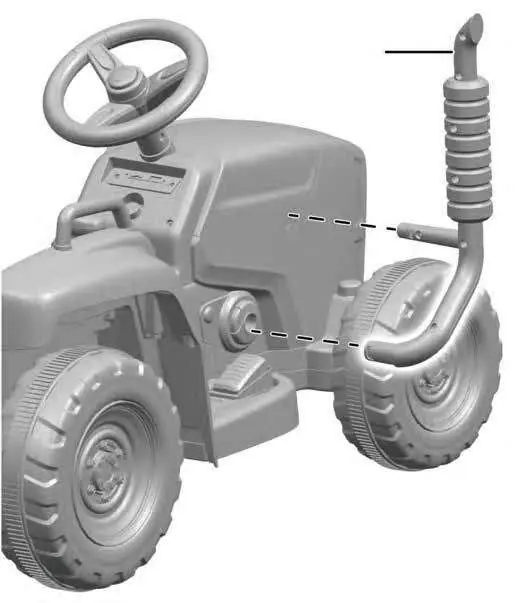
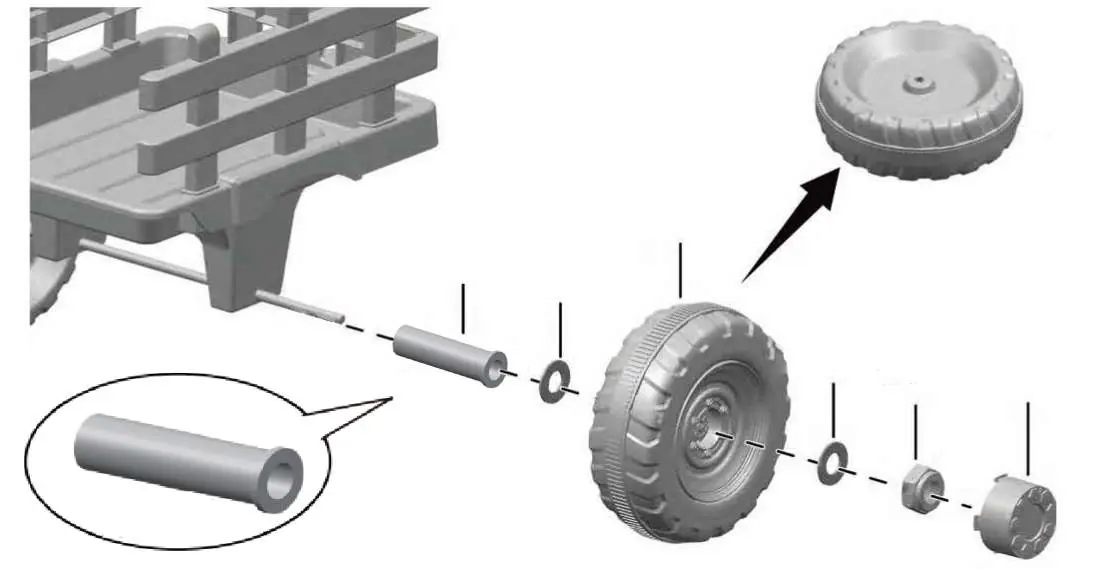
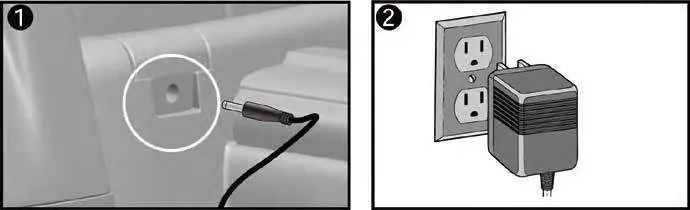
The estimated assembly time is 40 minutes. You will need a screwdriver (not included). Ensure all small parts are kept away from children during assembly. Follow the steps to attach the trailer linkage, wheels, steering wheel, exhaust, and seat. Connect the red battery connector to socket B before first use.

Operation
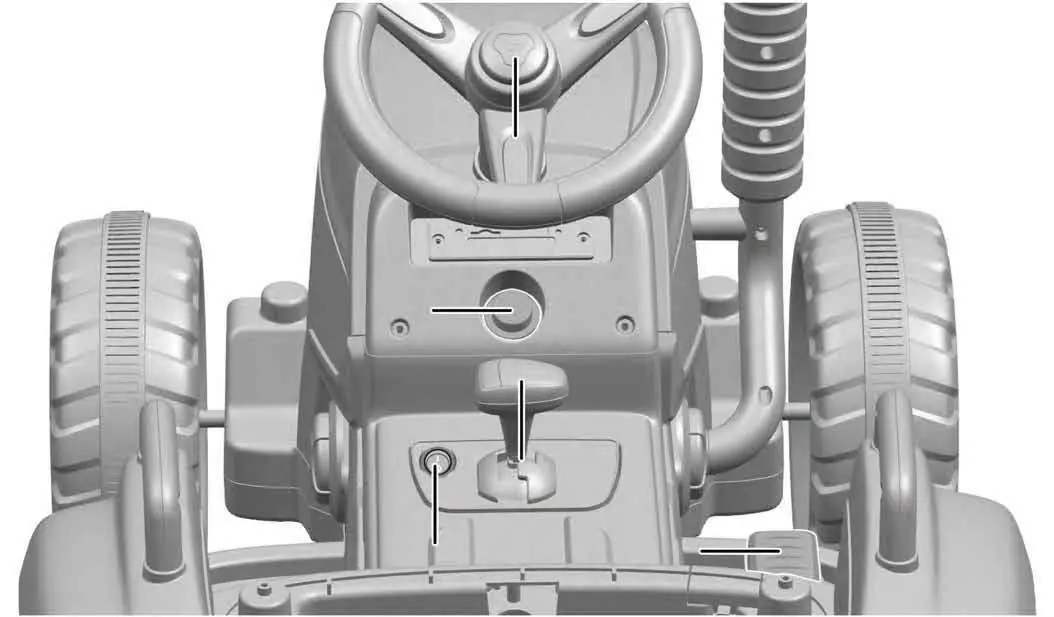
The vehicle is controlled via a start button, shift lever (forward/reverse/speed selection), and a foot pedal. The music player supports MP3 files via a flash drive (up to 15 GB). The remote control allows an adult to operate the vehicle; to connect, press and hold the forward and reverse buttons for 3 seconds until the speed indicator flashes.
Charging
The battery must be charged by an adult. Before the first use, charge for 4-6 hours. Subsequent charges take 8-12 hours. Do not charge for more than 20 hours to prevent overheating. Always turn the vehicle off during charging and charge at least once a month to maintain battery health.
Safety and Maintenance
Never use the vehicle near streets, roads, swimming pools, or on steep inclines. Always wear shoes and a helmet. The trailer is for decoration only; do not allow passengers or loading. Regularly check for loose parts or damaged wiring. Clean with a cloth and non-wax furniture polish; do not immerse in water.
Manufacturer information
Kidzone Toys
Practical help
Common problems
Vehicle does not move
Check battery charge, ensure battery is connected, or wait 10 seconds for the fuse to reset automatically.
Vehicle runs very slow
Charge the battery, check if the battery is old, ensure the user weight is under 66 lb, or avoid harsh terrain.
Battery does not charge
Ensure the charger is firmly plugged into the wall and the vehicle port, or contact customer service if the charger is faulty.
Vehicle needs a push to go forward
Check battery wire connections or contact customer service for potential motor issues.
Before use
- Ensure the battery is fully charged (4-6 hours for first use).
- Verify all parts are assembled correctly and screws are tightened.
- Check that the battery connector is securely plugged into socket B.
- Ensure the child is wearing a helmet and shoes.
- Confirm the seatbelt is fastened.
- Clear the riding area of obstacles and hazards.
Specs in practice
- Maximum User Weight
- 66 lb / 30 kg; exceeding this may damage the motor or reduce performance.
- Battery Charge Time
- 8-12 hours; do not exceed 20 hours to avoid fire or damage.
- Suitable Age
- 3+ years; contains small parts that are a choking hazard for children under 3.
Images and diagrams
- The exploded view diagram on page 10 identifies all components and hardware for assembly.
- Page 13 shows the critical step of connecting the red battery connector to socket B.
- Page 17 illustrates the control layout including the start button, shift lever, and foot pedal.
- Page 20 provides a visual guide for connecting the charging cable to the vehicle and wall outlet.
Model compatibility
- Trailer is for decoration only; do not use for passengers or cargo.
- Music player supports MP3 format; flash drives over 15 GB may not work correctly.
- Remote control requires two AAA (LR03) batteries.

Manual page author
Michael Turner
Technical manual editor
Reviews PDF manuals for structure, safety notes, and practical product details so readers can find the right information quickly.