Toys / Games
Owner's Manual for Kidzone 060-ROT-05 Ride On SUV
Quick guide for the Kidzone 060-ROT-05 12V Ride On SUV, covering assembly, charging, remote control pairing, and troubleshooting.
Table of contents
Manual images
Jump to the sectionQuick guide from the manual
This document provides essential instructions for the assembly, operation, and maintenance of the Kidzone 060-ROT-05 12V Ride On SUV. The vehicle is designed for children aged 37-96 months with a maximum weight capacity of 110 lb (50 kg). Assembly must be performed by an adult. Always ensure the child wears protective equipment, such as a helmet, and is supervised at all times.
Assembly Instruction
The vehicle requires assembly by an adult. Key steps include:
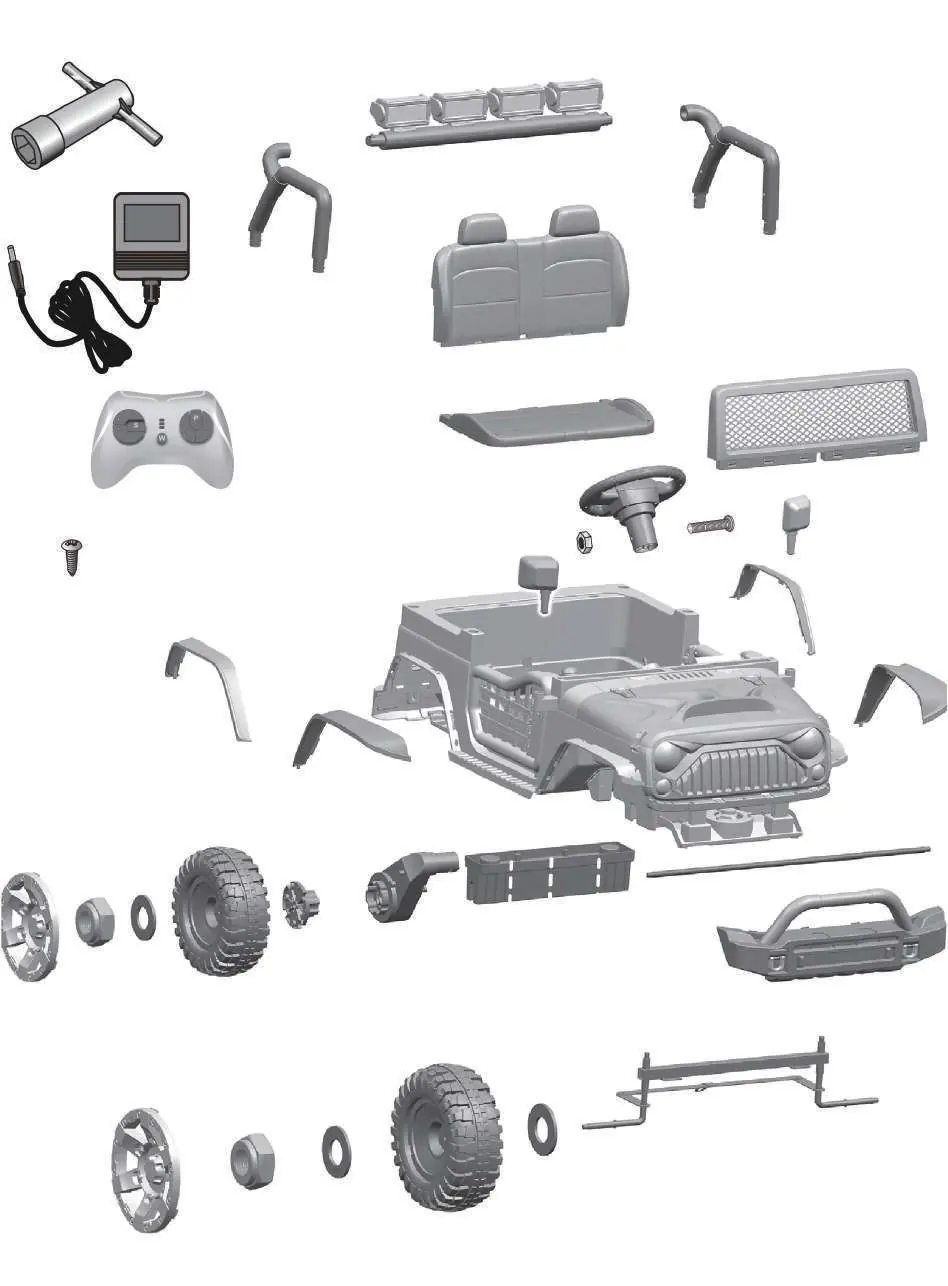
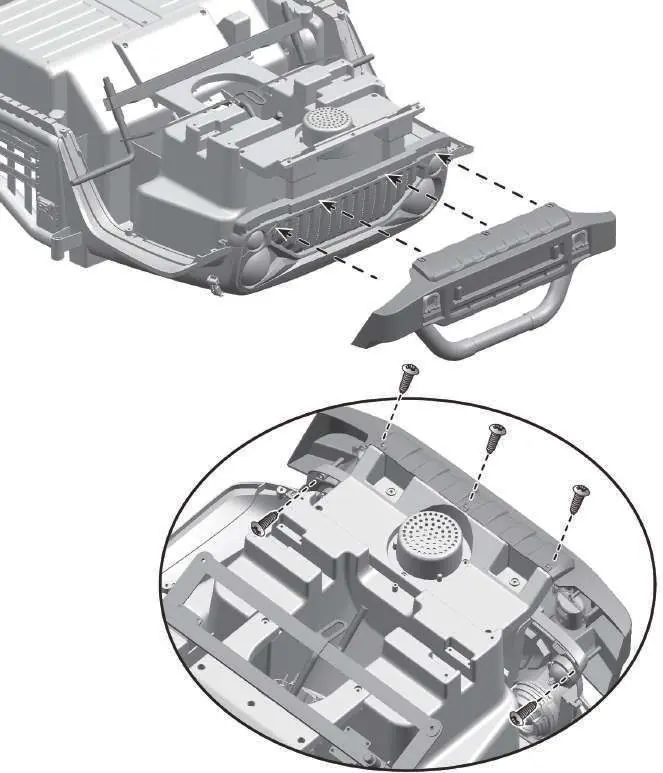
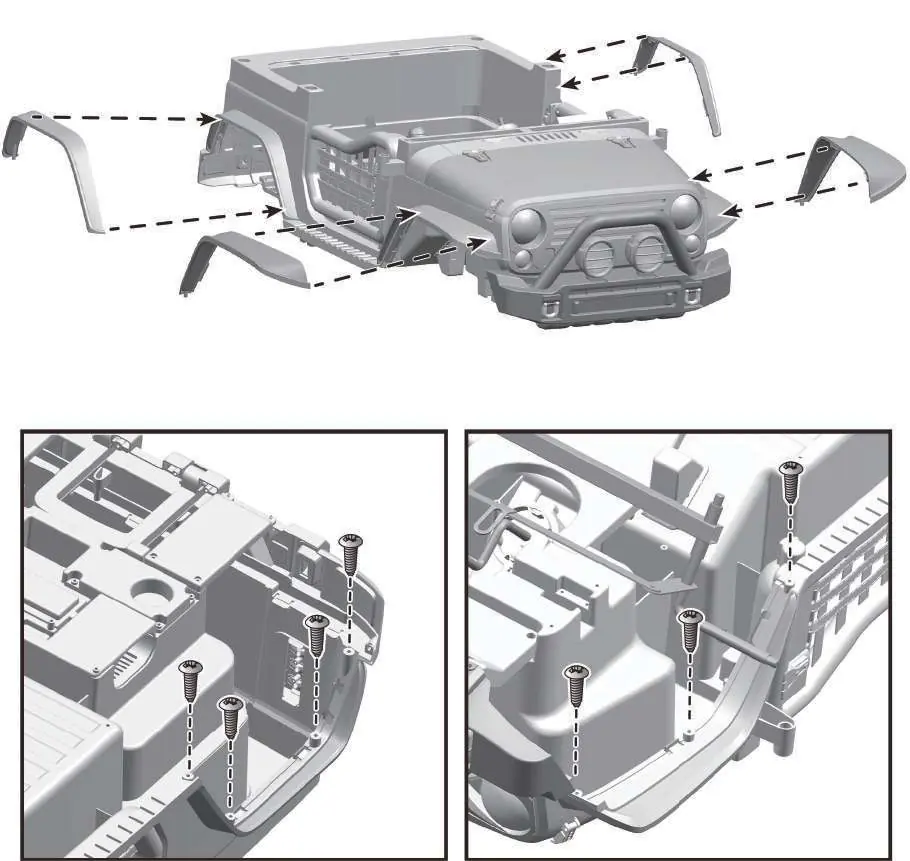
- Bumper and Fenders: Attach the front bumper and front/rear fenders to the vehicle body using the provided screws.
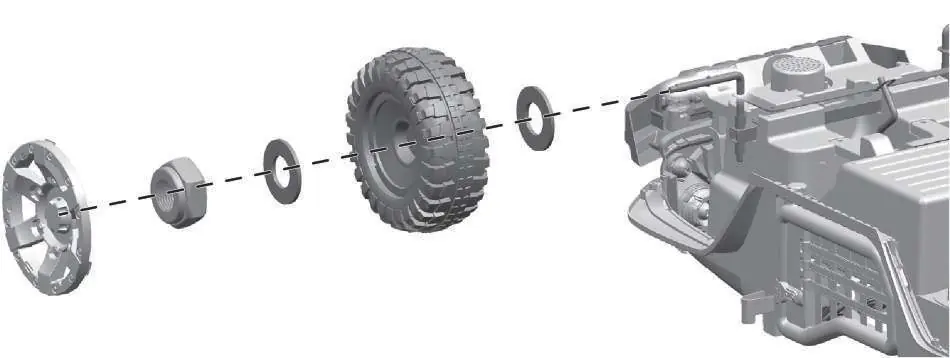
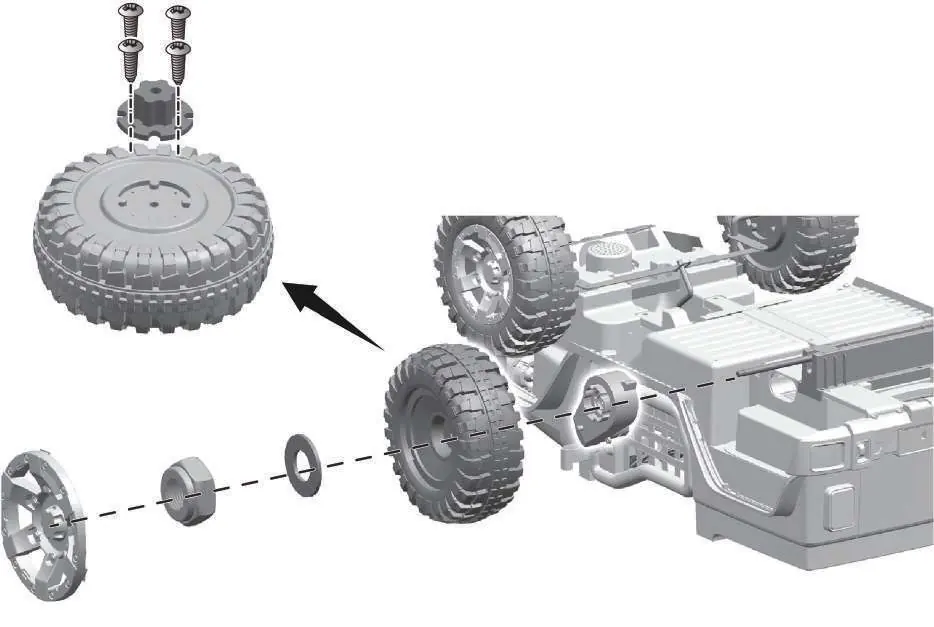
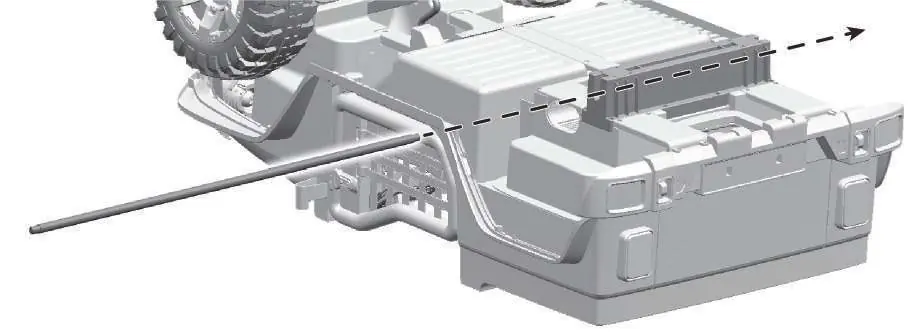
- Axles and Wheels: Install the front axle, then slide on washers and wheels, securing them with lock nuts. Assemble the rear axle housing and rear axle, then attach the rear wheels.
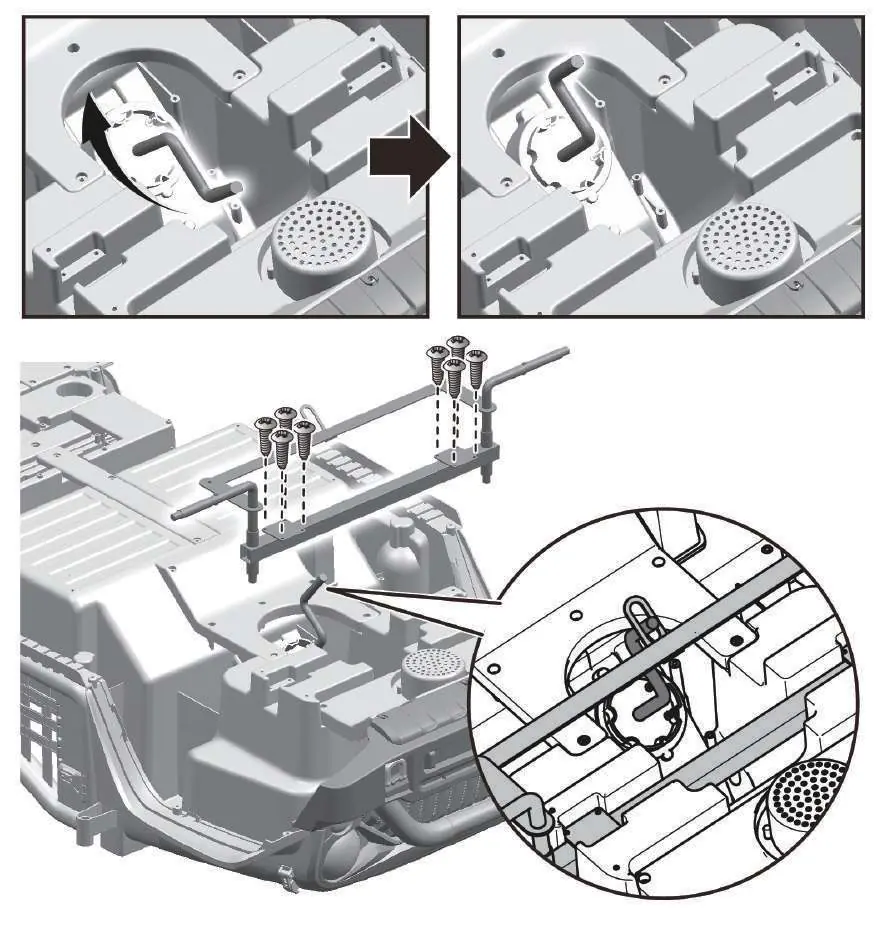
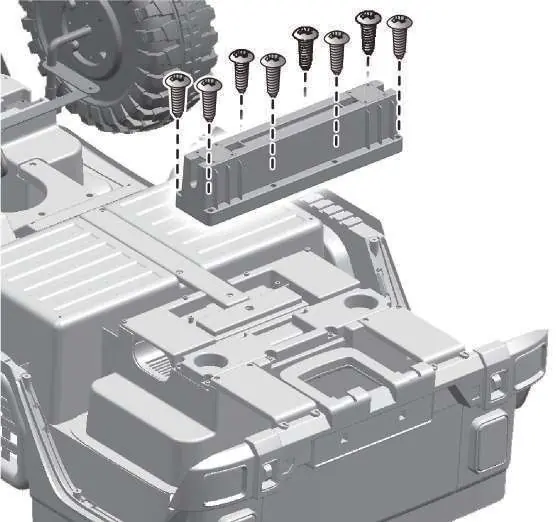
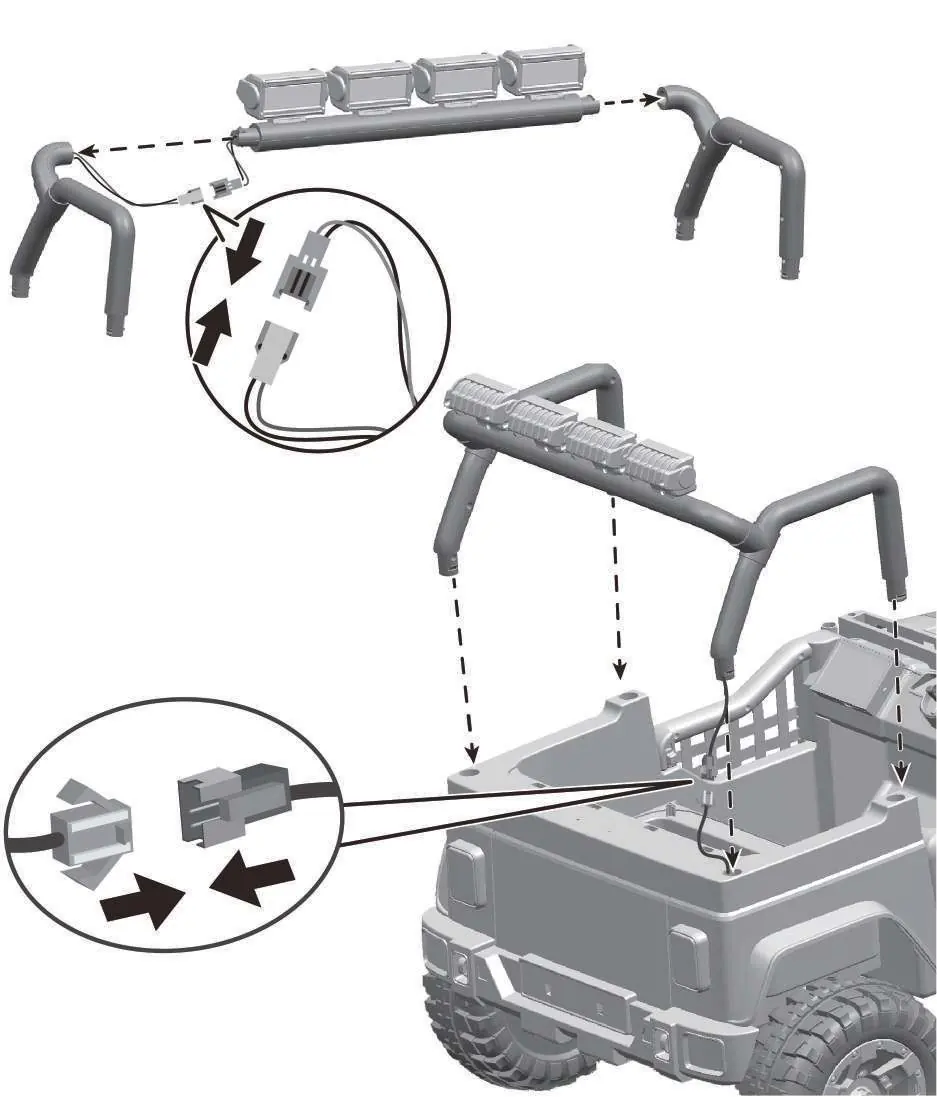
- Light Bar: Connect the light bar cables and mount the assembly onto the vehicle body.
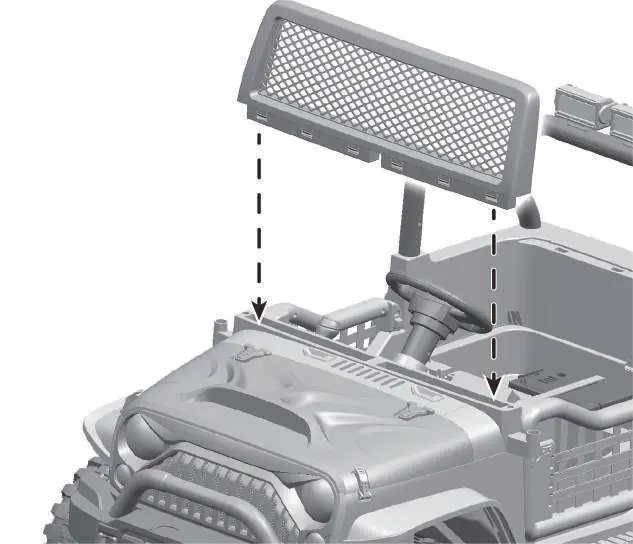
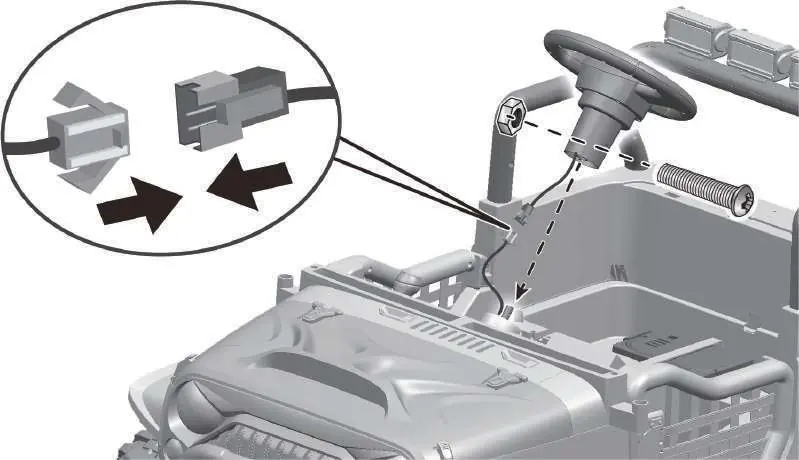
- Steering and Windshield: Connect the steering wheel cable, secure the wheel to the column with a screw and nut, and attach the windshield.
- Final Connections: Insert side mirrors and connect the battery and motor cables (Red to Red, White to White) located under the seat.
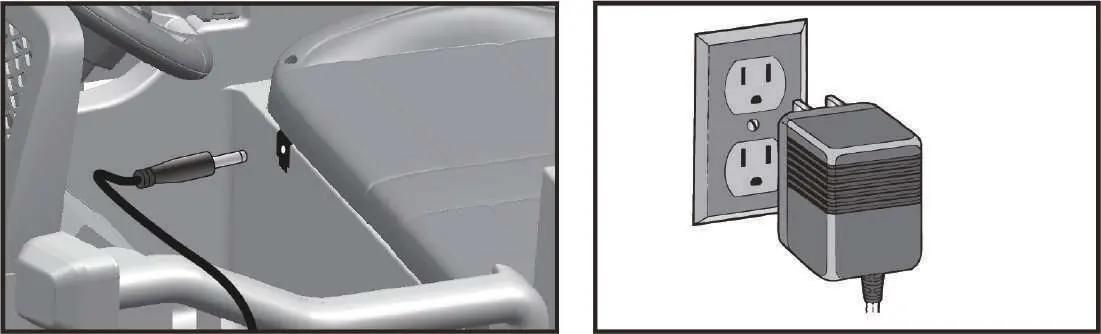
Charging
The battery must be charged by an adult. Connect the charger to the charging port on the vehicle and then to a wall outlet. The vehicle must be turned OFF during charging. A full charge takes 8-12 hours. Do not charge for more than 20 hours. Charge the battery at least once a month even if the vehicle is not in use.
Remote Control
The remote control requires 2 AAA 1.5V batteries (not included). To pair: insert batteries, press the connection button for 3 seconds until the low-speed indicator flashes, then turn on the vehicle. The indicator should turn solid once paired.
Care and Maintenance
Regularly check for loose parts or cracked plastic. Clean the vehicle with a cloth and non-wax furniture polish. Do not use a hose or immerse the vehicle in water. Store away from heat sources and direct sunlight. The vehicle features a thermal fuse that resets automatically after 20 seconds if overloaded.
Manufacturer information
Kidzone Toys
Practical help
Common problems
Vehicle does not move
Check battery charge, ensure battery is connected, or wait 20 seconds for the thermal fuse to reset.
Vehicle runs very slow
Charge the battery, check if the battery is old/damaged, or ensure the user weight is under 110 lb.
Battery does not charge
Ensure the charger is firmly plugged into the power source and the vehicle's charging port.
Loud grinding or clicking sound
This indicates a damaged motor or gear box; contact customer service.
Before use
- Ensure all parts are assembled correctly and screws are tightened.
- Check that the battery is fully charged (8-12 hours).
- Verify the child is within the age (37-96 months) and weight (max 110 lb) limits.
- Ensure the child is wearing a helmet and seatbelt.
- Check that the area is flat, smooth, and free of hazards.
- Confirm the battery is connected (Red to Red, White to White).
Images and diagrams
- The manual includes detailed exploded views of the vehicle parts and assembly steps.
- Specific diagrams show the wiring connections for the light bar, steering wheel, and battery.
- The remote control diagram identifies the speed selection, emergency brake, and directional buttons.
Model compatibility
- Only use the charger and battery provided or recommended by the manufacturer.
- Remote control requires 2 AAA 1.5V batteries (not included).
- Product is intended for residential use only.

Manual page author
David Miller
Documentation analyst
Organizes user manual content into clear summaries, with attention to model details, product context, and everyday usability.