Power / EV Chargers
User Manual for Lectron 15A Level 1 Smart Portable EV Charger
Quick guide for the Lectron 15A Level 1 Smart Portable EV Charger. Learn how to install, connect to the Lectron App, adjust charging current, interpret LED indicators, and troubleshoot common charging issues.
Table of contents
Manual images
Click an image to enlargeQuick Start Guide
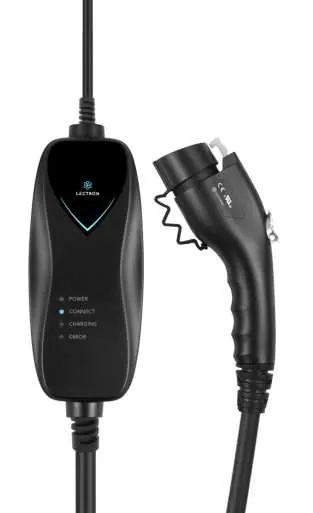
The Lectron 15A Level 1 Smart Portable EV Charger is designed for charging J1772 electric vehicles using a standard NEMA 5-15 (120V) outlet. The device features WiFi connectivity for app-based control and monitoring.
Safety Instructions
- Installation should be performed by a licensed and qualified electrician in compliance with the National Electric Code (NEC) and local codes.
- The product must be properly grounded.
- Do not drop the charger or handle.
- Do not attempt to repair the cable yourself if the output plug is separated from the module or handle.
- Never use non-approved power adapters.
Adjusting Charging Current
You can adjust the charging current using the Lectron App:
- Ensure the charger is powered on and active.
- Open the Lectron App.
- Select the desired charging current: 8A, 12A, or 15A.
- The default setting is 15A.
LED Status Indicators
The charger features four LED indicators (Power, Connect, Charging, Error) to communicate status:
- Power (Red): Indicates the device is powered on.
- Connect (Blue): Indicates the vehicle is connected.
- Charging (Green): Indicates active charging.
- Error (Yellow): Indicates a fault or protection trigger.
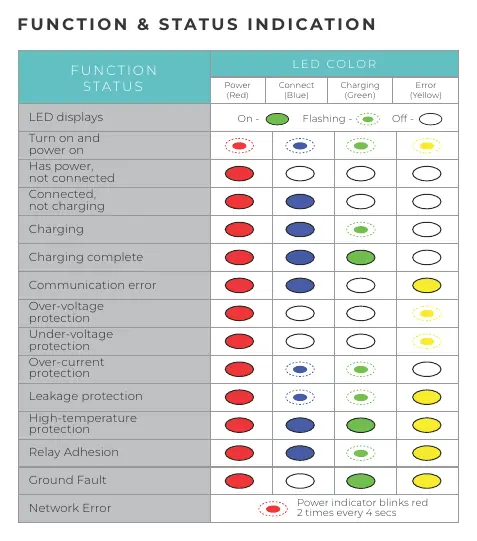
Refer to the LED status table in the manual for specific blink patterns corresponding to over-voltage, under-voltage, over-current, leakage, high-temperature, and ground fault protections.
App Setup and Connectivity
- Enable Bluetooth permissions on your smartphone.
- Download the Lectron App via the QR code provided in the manual.
- Register an account using email, Google, or Apple login.
- Tap 'My Chargers' and 'Add Charger' while the device is powered on.
- Follow the on-screen prompts to input WiFi credentials and complete the setup.
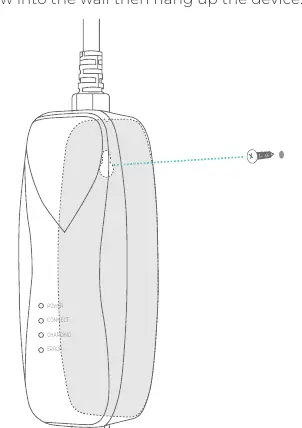
Installation and Charging
Installation: Insert a screw into the wall and hang the device module securely.
Charging Steps:
- Insert the charger into a NEMA 5-15 wall outlet. The Power and Connect lights will turn solid.
- Plug the charging handle into the vehicle's charging port until it clicks.
- Charging begins automatically. The Charging indicator will blink while charging.
- When fully charged, the Charging indicator will stay solid.
- Press the release button on the handle to disconnect.
Resetting the Charger
If the charger cannot be found in the app, perform a reset:
- Disconnect from the WiFi network.
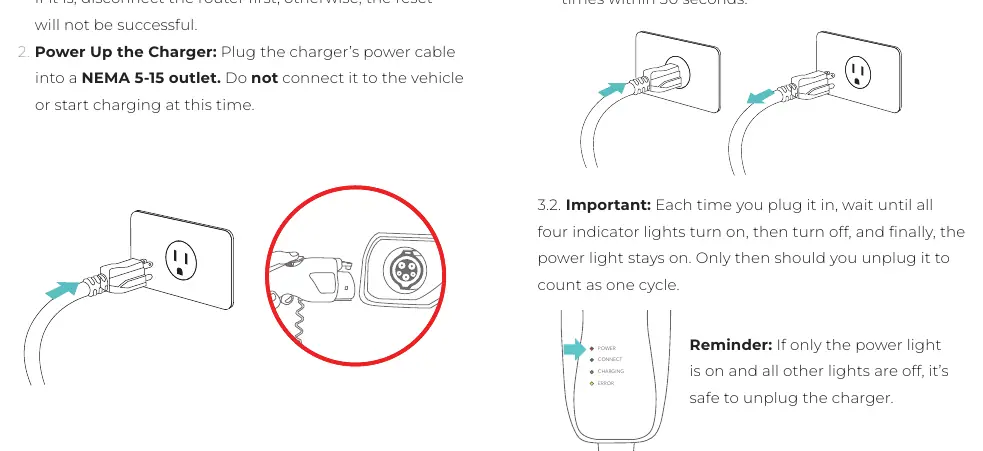
- Plug the charger into a NEMA 5-15 outlet.
- Plug and unplug the power cord at least seven times within 30 seconds.
- Wait for the power indicator to blink red twice every four seconds, indicating WiFi setup mode.
Specifications
- Max Current: 15A
- Input/Output: 120V AC
- Cable Length: 16 ft
- Connector: SAE J1772
- Water Resistance: IP65 (Control box), Type 3R (Handle)
- Operating Temp: -22 °F to 122 °F (-30 °C to 50 °C)
Practical help
Common problems
Charging indicator does not illuminate
Check the circuit breaker, try a different wall outlet, and ensure the charger module is fully inserted.
Vehicle will not charge
Inspect the charging handle for proper insertion, verify the vehicle's charge timer settings, or check if the charger is overheating.
Error indicator is blinking rapidly
This indicates a utility fault. Disconnect the charger, wait, and reconnect. If it persists, have a qualified electrician inspect the ground circuit.
Before use
- Ensure the wall outlet is installed by a licensed electrician.
- Verify the outlet is a NEMA 5-15 (120V) type.
- Download the Lectron App.
- Enable Bluetooth on your smartphone.
- Ensure the vehicle is parked and turned off before connecting.
Images and diagrams
- The LED status table helps identify specific faults like over-voltage or ground faults based on which lights are solid or flashing.
- The reset sequence requires a specific rhythm of plugging and unplugging the device 7 times within 30 seconds.
Model compatibility
- Compatible with all J1772 electric vehicles.
- Requires 120V AC split-phase power supply.

Manual page author
Michael Turner
Technical manual editor
Reviews PDF manuals for structure, safety notes, and practical product details so readers can find the right information quickly.