Automotive / Utility Vehicle Accessories
Leitner 00-GRLBA-1761 Grenadier Roof Light Bracket Installation Manual
Quick installation guide for the Leitner 00-GRLBA-1761 Grenadier Roof Light Bracket. Includes tool requirements, step-by-step mounting instructions, hardware list, and safety guidelines.
Table of contents
Manual images
Click an image to enlargeQuick guide from the manual
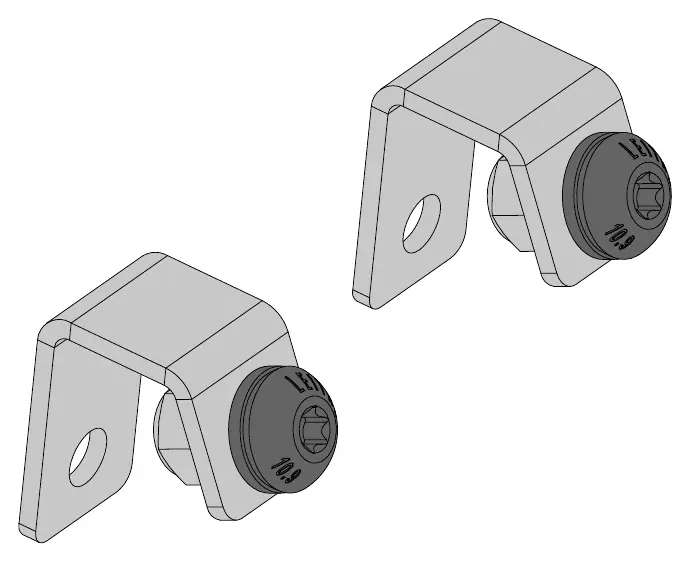
This document provides instructions for installing the Leitner Grenadier Roof Light Bracket (Part Number 00-GRLBA-1761). This bracket is designed to mount auxiliary lighting to the vehicle's roof rack system.
Tools required
- T40 Torx wrench
Hardware included
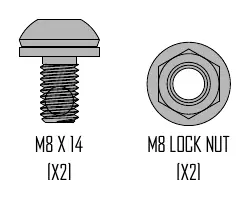
- M8 x 14 bolt (x2)
- M8 lock nut (x2)
Installation steps
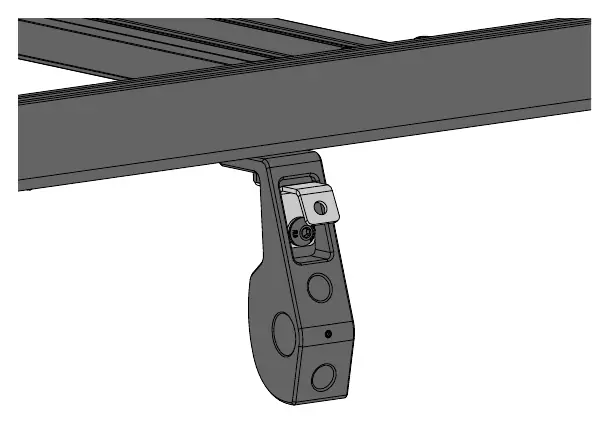
- Remove the existing M8 bolt from the roof rack using a T40 Torx wrench.
- Install the bracket using the bolt removed in the previous step.
- Install your light using the supplied M8 bolt and lock nut.
Important guidelines
- Do not over-tighten bolts: The torque specification for all 8mm bolts is 14ft-lb.
- Periodically inspect all knobs, bolts, screws, and locks for signs of wear, corrosion, and fatigue.
- Ensure all fasteners are tight before every trip.
- Never drive with any lock, knob, or rack in an open or unlocked position.
Load limits
- Maximum load is 250 lbs off-road and 500 lbs on-road.
- Note that vehicle manufacturer load limits always take precedence; the lower limit applies.
Warranty
This product includes a two-year warranty from the date of purchase covering defects in material and workmanship under normal use. For warranty claims, contact Leitner Designs at 949-395-3049 or email [email protected].
Practical help
Common problems
Bolt over-tightening
Do not exceed 14ft-lb torque for 8mm bolts to prevent damage.
Loose hardware during travel
Periodically inspect all knobs, bolts, and locks for wear and ensure they are tightened before every trip.
Before use
- Ensure a T40 Torx wrench is available.
- Verify all hardware (M8 bolts and lock nuts) is present.
- Check that the vehicle roof rack is clear for installation.
- Verify the weight of the light does not exceed rack load limits.
Specs in practice
- Off-road load limit
- 250 lbs.
- On-road load limit
- 500 lbs.
Images and diagrams
- The bracket mounts to the existing roof rack bolt location.
- The light attaches to the bracket using the provided M8 hardware.
Model compatibility
- Designed specifically for the Ineos Grenadier roof rack system.

Manual page author
David Miller
Documentation analyst
Organizes user manual content into clear summaries, with attention to model details, product context, and everyday usability.