Automotive / Utility Vehicle Accessories
User Manual for Master 50 Gallon UTV Sprayer 12VUTV-M
Get started with your Master 50 Gallon UTV Sprayer (12VUTV-M). This guide covers assembly, safe operation, chemical handling, cleaning, storage, and troubleshooting.
Table of contents
Manual images
Click an image to enlargeQuick guide from the manual
This manual provides instructions for the assembly, operation, and maintenance of the Master 50 Gallon UTV Sprayer. Key requirements include using fresh water to test for leaks before adding chemicals, wearing appropriate personal protective equipment (PPE), and never using flammable or corrosive chemicals (such as bleach or diesel) which can damage the unit and void the warranty. The sprayer is not certified for potable water.
Assembly
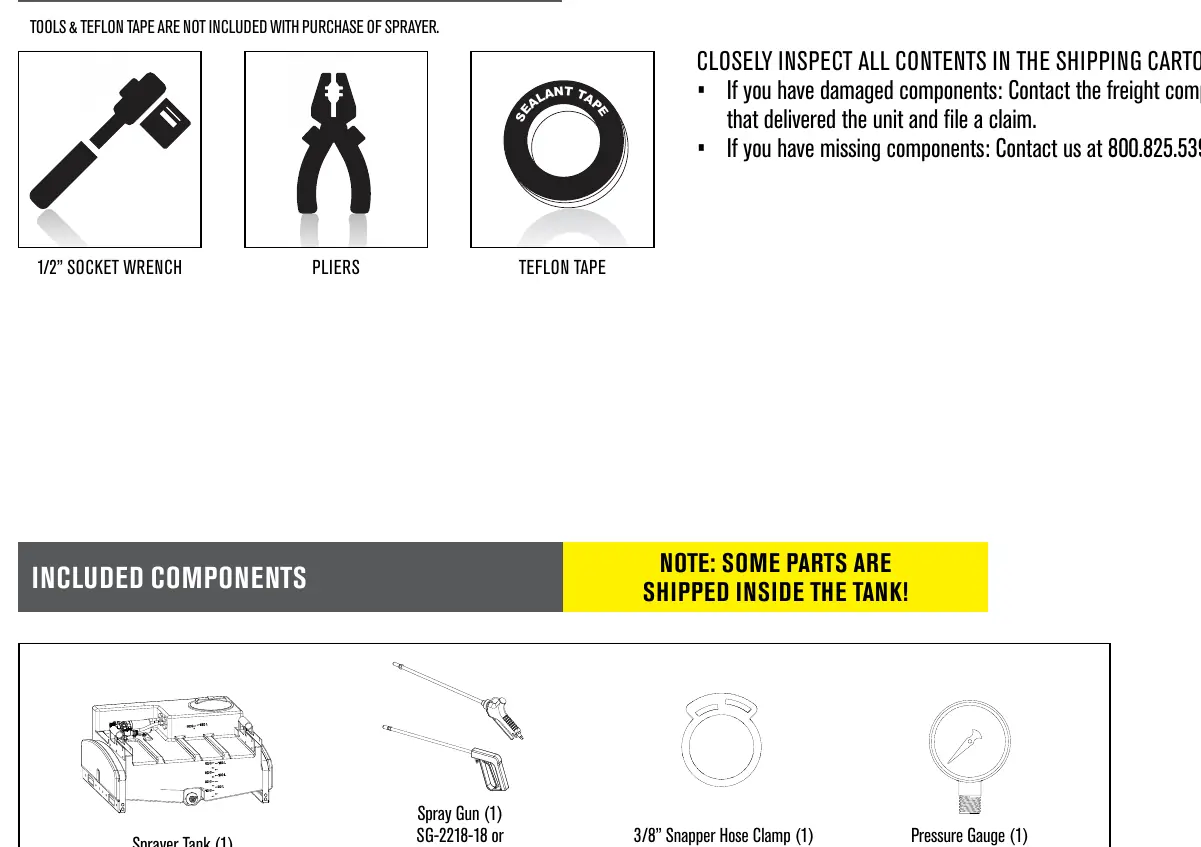
The assembly process requires a 1/2 inch socket wrench, pliers, and Teflon tape. Ensure all components are inspected upon arrival.
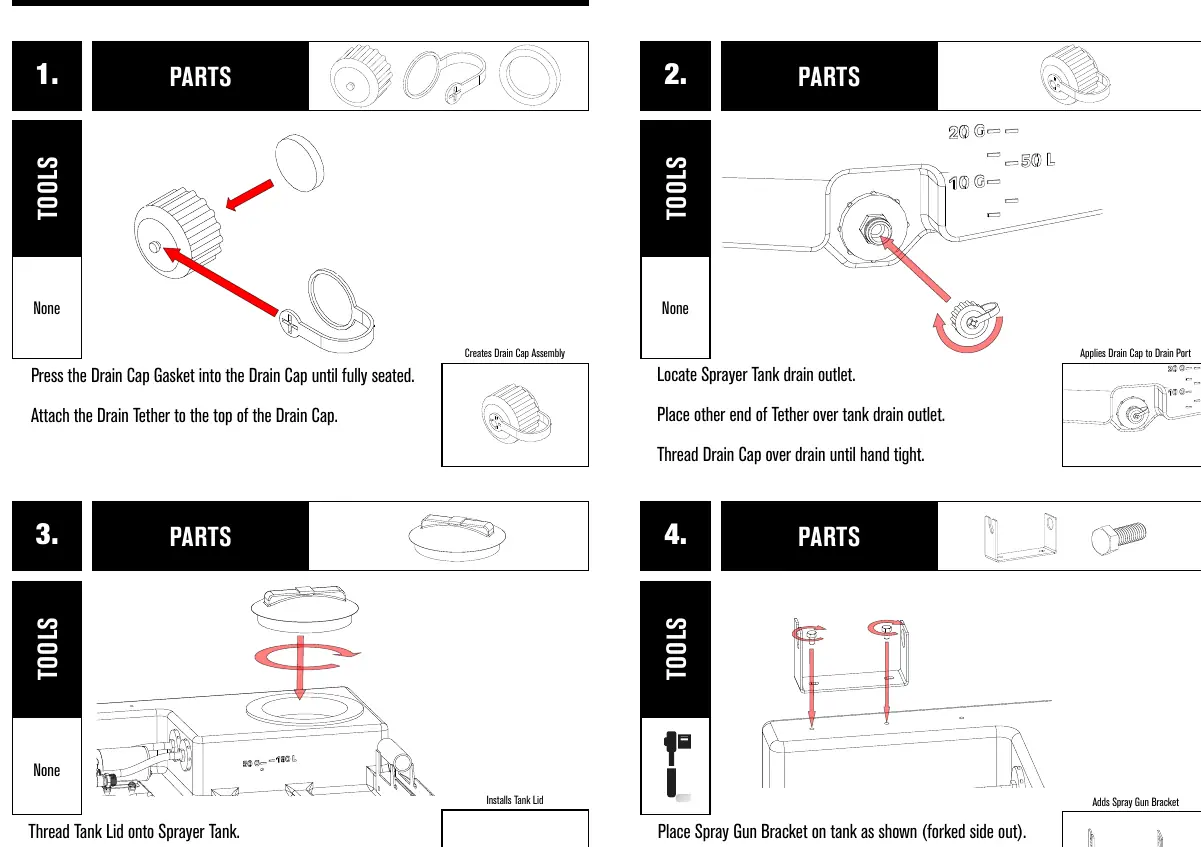

- Drain Assembly: Press the drain cap gasket into the cap, attach the tether, and thread onto the tank drain outlet.
- Tank Setup: Thread the tank lid onto the tank.
- Spray Gun Bracket: Attach the bracket to the tank using the provided 1/2 inch bolts.
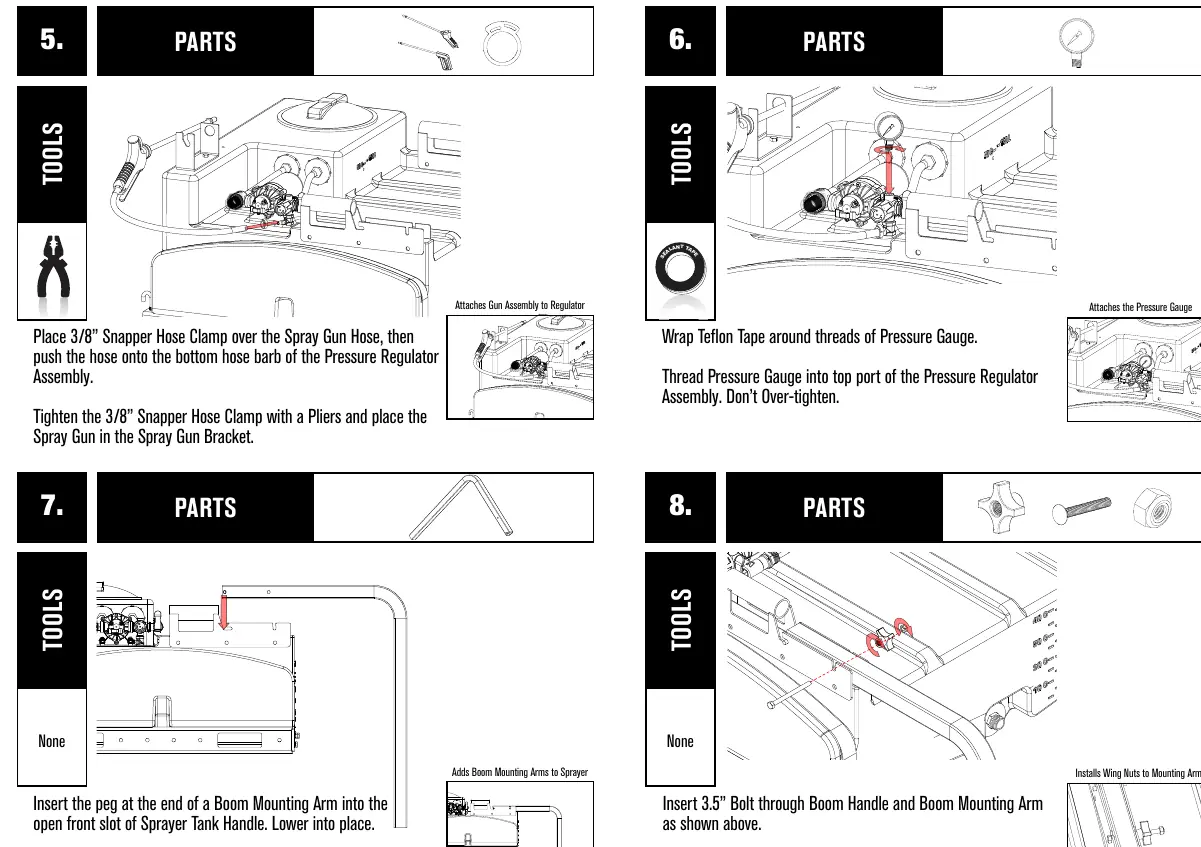
- Hose and Gauge: Secure the spray gun hose to the pressure regulator using the snapper hose clamp. Wrap Teflon tape around the pressure gauge threads and install it into the regulator.
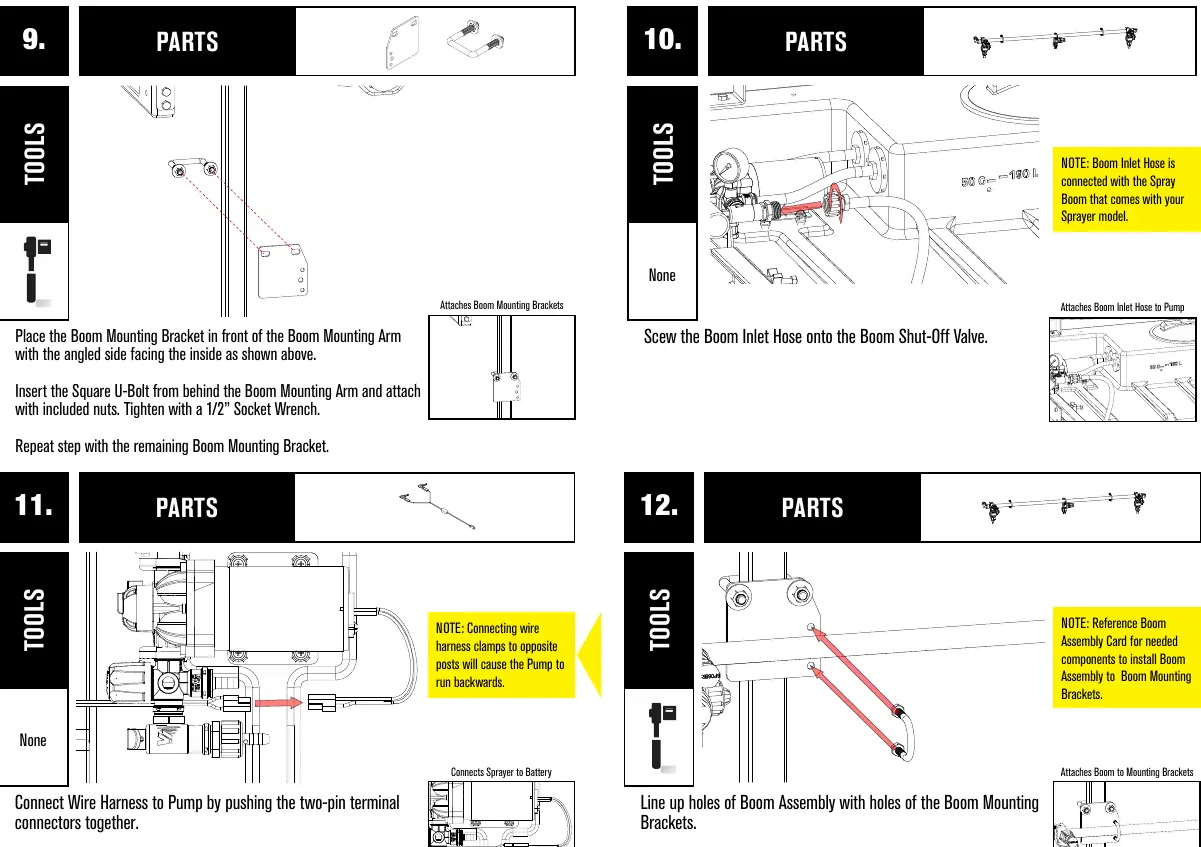
- Boom Mounting: Insert boom mounting arms into the tank handle slots. Secure with 3.5 inch bolts, wing nuts, and hex nuts. Attach boom mounting brackets using square U-bolts.
- Final Connections: Connect the boom inlet hose to the shut-off valve. Connect the wire harness to the pump and the vehicle battery (red to positive, black to negative). Attach the boom assembly to the mounting brackets.
Safety Information
Safety is paramount when handling pesticides. Always follow these guidelines:
- Operator Age: Must be 16 years or older.
- Wind Conditions: Do not spray if wind speed exceeds 4 MPH to prevent drift.
- Chemical Handling: Always read and follow the chemical manufacturer's label. Never eat, drink, or smoke while handling chemicals.
- Emergency: In case of spills or exposure, follow the first aid instructions on the chemical label.
Operation
Before each use, inspect the sprayer for cracks or leaks and test with fresh water. Ensure the drain cap is tight.
- Spot Spraying: Pull the gun trigger and point the nozzle at the target vegetation. Twist the nozzle to adjust the spray pattern.
- Broadcast Spraying: Open the boom valve to allow flow. Ensure the boom nozzle is pointed straight down. Turn the remote switch to the ON position to begin.
Cleaning and Storage
Proper maintenance prevents damage and ensures longevity.
- Cleaning: Drain excess pesticide into a suitable container. Flush the system with fresh water. Decontaminate yourself and wash clothing separately.
- Winterization: To prevent freezing damage, run one gallon of RV anti-freeze through the system. Drain the anti-freeze before storing.
Troubleshooting
If the pump fails to operate, check the battery connections, fuse, and voltage. If the pump runs but does not prime, check for air leaks in the inlet or obstructions in the tubes. Always relieve system pressure before attempting repairs.
Parts Breakdown
Refer to the parts list in the manual for specific part numbers when ordering replacements, such as the pump (EF3000-QA / EF5500-QA), spray gun, or pressure gauge.
Practical help
Common problems
Pump will not turn on
Check battery connections, replace blown fuse, check wire condition, or check voltage.
Pump will not prime
Check for inlet air leaks, remove obstructions in tubes or intake valve, or check voltage.
Low pressure or flow
Replace worn spray gun or boom nozzle, replace pressure switch, or tighten fittings.
Pump leaks
Tighten fasteners or replace pump head assembly/diaphragm.
Before use
- Inspect tank and components for cracks or leaks.
- Test sprayer with fresh water.
- Ensure drain cap is securely tightened.
- Verify wind speed is below 4 MPH.
- Wear appropriate protective equipment (gloves, eye protection).
- Ensure power is off before filling.
Images and diagrams
- Assembly diagrams illustrate the step-by-step installation of the drain cap, spray gun bracket, boom arms, and wiring harness.
- The parts breakdown diagram identifies all components by ID number for easy replacement part ordering.
Model compatibility
- Not certified for potable water or consumable liquids.
- Do not use flammable chemicals (e.g., diesel).
- Do not use corrosive chemicals (e.g., bleach) as they can damage the sprayer.

Manual page author
David Miller
Documentation analyst
Organizes user manual content into clear summaries, with attention to model details, product context, and everyday usability.