Electronics / RFID Barcode Scanners
User Manual for Netum 1D/2D Wired Desktop Barcode Scanner
Quick guide for the Netum 1D/2D Wired Desktop Barcode Scanner. Learn how to connect via USB, configure communication ports, set keyboard languages, adjust beep volume, and troubleshoot common scanning issues.
Quick answers from the manual
Quick answer
- Connect the scanner via USB. Once the power-on beep sounds, it is ready to scan. The default mode is auto-sensing. p. 3
Key actions
- Change communication mode p. 4
- Restore factory settings p. 7
First start
- Plug the USB cable into the host device and wait for the power-on beep. p. 3
Problems and fixes
Barcode not reading
Clean the barcode or check if the barcode type is enabled.
p. 8Maintenance and reset
- Scan the 'Restore Factory Settings' barcode. p. 7
Where to find it in the PDF
- Operation p. 3
- Communication Ports p. 4
- Keyboard Language p. 5
- Terminator Settings p. 6
- Factory Reset p. 7
Table of contents
Manual images
Click an image to enlargeQuick guide from the manual
This document provides instructions for setting up and configuring the Netum 1D/2D Wired Desktop Barcode Scanner. The scanner is plug-and-play via USB, with default settings optimized for most common terminal and communication requirements. Configuration is performed by scanning specific barcodes provided in this manual.
Operation
To start using the scanner:
- Connect the scanner to your host device using the USB cable.
- Wait for the power-on beep sound, which indicates the device is ready for data reading and transmission.
- By default, the scanner is set to auto-sensing mode. Barcodes passing through the scan window will be decoded and uploaded automatically.
Configuration
You can customize the scanner's behavior by scanning the configuration barcodes found in the manual:


- Communication Ports: Switch between USB-HID (default), USB-COM port emulation, TTL-232, and HID&TTL modes. Note that USB-COM emulation may require drivers on the host device.
- Trigger Modes: Toggle between Auto-sensing (default) and Continuous mode.
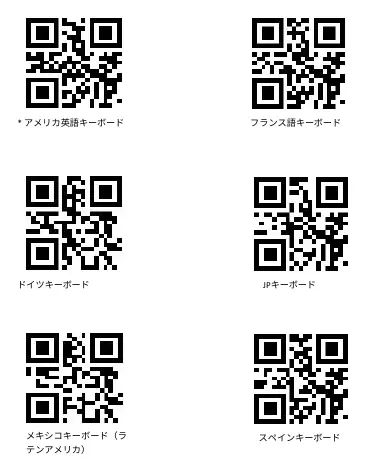
- Keyboard Language: Select the appropriate keyboard layout (e.g., American English, French, German, Japanese, Spanish, etc.) to ensure correct data output.
- Terminator: Configure the suffix character (None, CR, TAB, or CR&LF).
- Beep Volume: Adjust the scanner's beep volume (Enable/Disable, Volume Up/Down).
Maintenance
If you need to revert the scanner to its original state, scan the Restore Factory Settings barcode. You can also scan the Firmware Version barcode to display the current firmware information.

Troubleshooting
If you encounter issues, refer to the FAQ section:
- Barcode not reading: Ensure the barcode is clean and not damaged. Check if the specific barcode type is enabled in the scanner settings.
- Data output errors: If characters are incorrect, ensure the correct keyboard language is selected.
- Specific codes not reading: For codes like Code32 or Add-on codes, ensure the corresponding feature is enabled via the configuration barcodes.
Practical help
Common problems
Barcode not scanning
Ensure the barcode is clean and not damaged. Verify that the specific barcode type is enabled in the scanner settings.
Incorrect characters in output
Check the keyboard language setting and ensure it matches your host system's keyboard layout.
Scanner not reading Code32 or Add-on codes
Scan the specific configuration barcode to enable the required code type.
Before use
- Connect the USB cable to the host device.
- Wait for the power-on beep to confirm the device is ready.
- Ensure the cursor is placed in the data entry field on your computer.
- Verify the barcode is clean and legible.
Images and diagrams
- Page 4: Barcodes to switch between USB-HID, COM, TTL-232, and HID&TTL communication modes.
- Page 4: Barcodes to switch between Auto-sensing and Continuous trigger modes.
- Page 5: Barcodes to set the keyboard language layout.
- Page 6: Barcodes to set the terminator suffix (CR, TAB, CR&LF).
- Page 7: Barcode to restore factory default settings.
Model compatibility
- Supports USB-HID and USB-COM emulation.
- USB-COM emulation may require additional drivers on the host computer.

Manual page author
Michael Turner
Technical manual editor
Reviews PDF manuals for structure, safety notes, and practical product details so readers can find the right information quickly.