Electronics / RFID Barcode Scanners
User Manual for Tera 1500C / 2500C CCD 1D Barcode Scanner
Quick guide for the Tera 1500C and 2500C CCD 1D Barcode Scanner. Learn how to configure scan modes, communication settings, data editing, and symbology options using the provided programming barcodes.
Table of contents
Manual images
Click an image to enlargeQuick guide from the manual
This document serves as a programming guide for the Tera 1500C and 2500C CCD 1D Barcode Scanners. Configuration is performed by scanning the specific barcodes provided in this manual. To apply a setting, simply scan the corresponding barcode. The scanner will typically emit a beep to confirm the setting has been accepted.
General Settings
You can reset the scanner to its original state or customize its behavior:
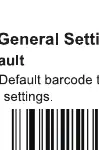
- Factory Default: Scan the 'Factory Default' barcode to reset all settings to the manufacturer's original configuration.
- Custom Factory Default: You can save your own custom settings as the new default. Scan 'Set Custom Defaults', configure your desired settings, and then scan 'Save Custom Defaults'.
- Beeper Settings: Adjust the beeper sound (On/Off) and volume (Up/Down) to suit your environment.
Communication Settings
The scanner supports different communication interfaces:
- USB Keyboard Interface (USB-KBW): The default mode. The scanner acts as a standard USB keyboard.
- USB-COM Virtual Serial Port: Allows the scanner to function as a serial device. Note that this requires a driver to be installed on the host device.
- USB Transfer Speed: You can toggle 'USB Fast Transfer On' or 'Off' depending on your host system's requirements.
- Intercharacter Delay: Adjustable from 0 to 30ms (default is 4ms) to optimize data transfer speed.
Scan Modes
Choose the scanning behavior that fits your workflow:

- Manual Trigger Mode: The scanner only reads when the trigger is pressed.
- Continuous Scan Mode: The scanner remains active and reads barcodes automatically. It will not read the same barcode twice while it remains in the read range.
- Sensor-activated Mode: The scanner detects objects and activates scanning automatically. Note: Switch to Manual Trigger Mode first before enabling this.
Data Editing
You can modify the output data format before it is sent to the host:

- Prefix/Suffix: You can add custom characters to the beginning or end of the scanned data. Scan the 'Add Prefix/Suffix' barcode, then scan the characters from the 'Character Chart' in the appendix, and finish by scanning 'Save and Exit'.
- Hiding Characters: You can hide specific digits from the output (e.g., first, last, or middle digits) to format the data as needed.
- Terminators: Configure the scanner to send specific terminators like CR, LF, or HT after the data.
Symbology Configuration
The scanner supports a wide range of 1D symbologies, including UPC-A, UPC-E, EAN-8, EAN-13, Code 128, Code 39, Code 93, Code 11, Codabar, Interleaved 2 of 5, Matrix 2 of 5, Industrial 2 of 5, Standard 2 of 5, MSI, Plessey, China Post, and GS1 DataBar. Each symbology can be enabled or disabled, and specific parameters like 'Transmit Check Character' or 'Transmit Leading Characters' can be toggled.
Support
If you require technical assistance, please contact the support team via email. Include your Amazon Order Number and Product Order Number in your correspondence. Email addresses: [email protected], [email protected], [email protected].
Practical help
Common problems
Scanner is not reading barcodes
Ensure the specific symbology is enabled in the 'Symbology' chapter. Check if the barcode is damaged or if the scanner is in the correct scan mode.
Data format is incorrect
Check if any Prefix, Suffix, or 'Hiding Characters' settings have been accidentally enabled. Scan 'Factory Default' to reset.
Scanner not recognized as a keyboard
Scan the 'USB Keyboard Interface' barcode to ensure it is set to the correct mode.
Need to use as a Serial Port
Scan the 'USB-COM' barcode. Ensure the necessary driver is installed on your computer.
Before use
- Connect the scanner to the host device via the USB cable.
- Determine if you need standard keyboard emulation or serial port communication.
- Identify the required scan mode (Manual, Continuous, or Sensor).
- Locate the corresponding programming barcode in the manual.
- Scan the barcode to apply the desired setting.
Specs in practice
- Intercharacter Delay
- The time interval between characters sent to the host; adjust if data transmission errors occur.
Model compatibility
- Supports 1D barcodes: UPC-A, UPC-E, EAN-8, EAN-13, Code 128, Code 39, Code 93, Code 11, Codabar, Interleaved 2 of 5, Matrix 2 of 5, Industrial 2 of 5, Standard 2 of 5, MSI, Plessey, China Post, GS1 DataBar.

Manual page author
David Miller
Documentation analyst
Organizes user manual content into clear summaries, with attention to model details, product context, and everyday usability.