Lighting / Smart Lighting
User manual for Philips Hue Phoenix 31153/31/PH ceiling light
Get started with your Philips Hue Phoenix 31153/31/PH ceiling light. This guide covers installation, wiring, and safety instructions to help you set up your smart lighting.
Table of contents
Manual images
Click an image to enlargeImportant information
This manual provides installation instructions for the Philips Hue Phoenix ceiling light. Before beginning, ensure you have the necessary tools, including a drill and screwdrivers. Always disconnect the main power supply before starting any electrical work to prevent electric shock.
Installation
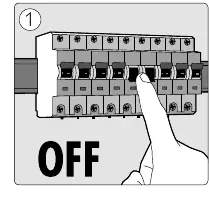
- Power Off: Turn off the main power supply at the circuit breaker.
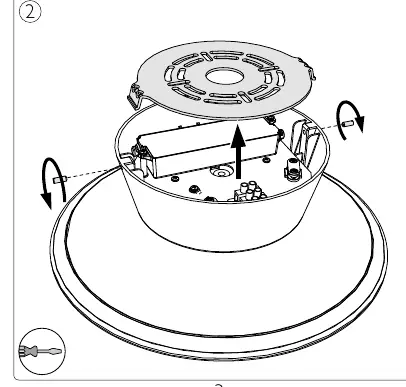
- Prepare: Remove the mounting bracket from the light fixture by unscrewing the side screws.
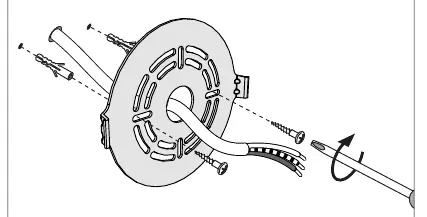
- Mounting: Drill holes in the ceiling at the desired location. Insert wall plugs and secure the mounting bracket to the ceiling using the provided screws.
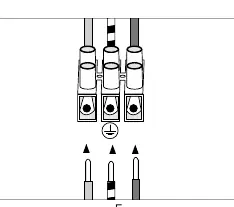
- Wiring: Connect the electrical wires from the ceiling to the terminal block on the mounting bracket, ensuring proper connection to the ground terminal.
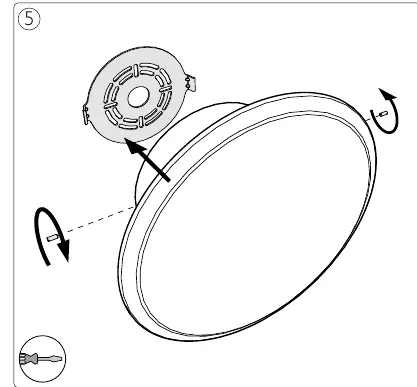
- Assembly: Align the light fixture with the mounting bracket and secure it in place using the side screws.
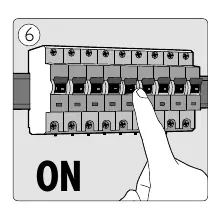
- Power On: Restore power at the circuit breaker to activate the light.
Safety and Technical Specifications
- IP20: The device is protected against solid objects larger than 12mm but is not waterproof.
- LED: This fixture uses an integrated LED light source.
- Indoor Use: This product is designed for indoor use only.
- Maintenance: Use the provided gloves and cloth during installation to keep the fixture clean.
Manufacturer information
Philips
Practical help
Common problems
Light does not turn on after installation
Check if the circuit breaker is switched to the ON position and verify that all wire connections in the terminal block are secure.
Difficulty mounting the bracket
Ensure the ceiling surface is stable and capable of supporting the weight of the fixture. Use appropriate screws and anchors for your ceiling type.
Before use
- Turn off the main power supply at the circuit breaker.
- Ensure you have a drill and both flat-head and cross-head screwdrivers.
- Verify that the mounting surface is suitable for the fixture.
- Check that all electrical wires are correctly stripped (approx. 8mm).
- Ensure the area is dry and suitable for an IP20 rated device.
Images and diagrams
- Step 1: Shows the circuit breaker being switched to the OFF position.
- Step 3a/3b: Illustrates the process of drilling holes and screwing the mounting bracket into the ceiling.
- Step 4: Details the wiring connection to the terminal block.
- Step 5: Shows the final assembly of the light fixture onto the bracket.
Model compatibility
- Designed for indoor use only.
- Not suitable for damp or wet environments.

Manual page author
David Miller
Documentation analyst
Organizes user manual content into clear summaries, with attention to model details, product context, and everyday usability.