Electronics / Security Cameras
Installation Guide for GE Cync Hexagon Panels
Step-by-step installation guide for GE Cync Hexagon Panels. Learn how to prepare your wall, connect panels, use the Cync app, and safely mount or reposition your smart lighting system.
Table of contents
Manual images
Click an image to enlargeQuick Guide
This guide covers the installation of GE Cync Hexagon Panels. Key requirements include downloading the Cync App, cleaning the wall surface thoroughly, and ensuring you do not exceed 20 panels per power adapter. Panels are connected in series using linking cables, following specific Input and Output port directions.
What's Included
Depending on your pack size (10 Pack, 7 Pack, or 5 Pack Expansion), the kit includes:
- Hexagon Panels
- Control Box
- Power Supply with Plug
- Linking Cables
- Adhesive Strips
- Traceless Nails
- Control Box Mounting Screws
- Layout Templates
- Cleaning Wipe
- Level
- Orientation Tool
- Panel Remover Tool
Before You Get Started
Properly connecting your panels is critical for operation. Each panel has Input and Output ports.

- Input Ports: Marked with an arrow. Power enters the panel here. Connect the control box or the linking cable from the previous panel into this port.
- Output Ports: Power leaves the panel here. Connect the linking cable to the next panel in the sequence.
- Daisy Chaining: Panels are connected in series. Do not use more than one Output Port on any single Hexagon Panel.
- Power Limit: One power adapter can support up to 20 Hexagon Panels.
App Setup and First Panel
- Download the Cync App.
- Connect the control box and power adapter to the first Hexagon Panel using the Input Port.
- Align the tab with the indentation on the cable and press the connector downwards to snap into the mounting bracket.
- Power on the panel. Keep lights on during installation to verify connections.
- Complete setup within the Cync App.
Wall Preparation
- Clean the wall with the provided cleaning wipe and let it dry.
- Select a pattern in the Cync App or create your own.
- Use the layout templates to create your design on the wall. Peel the backing off the adhesive and stick the template to the wall.
- Ensure each layout template touches at least one flat side of another template.
- Adjust until satisfied with the design.
Installing Panels
Installing the First Panel:
- Ensure the control box is connected.
- Determine the Output Port to connect to the next panel.
- Insert the linking cable into the desired Output Port BEFORE mounting to the wall.
- Stick the panel to the wall using adhesive pads. Press and hold for 30 seconds.
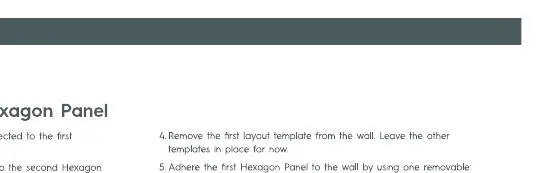
Installing Middle and Final Panels:
- Rotate the panel so the Input Port aligns with the Output Port of the previous panel.
- Insert the linking cable into the Output Port of the previous panel and the Input Port of the new panel.
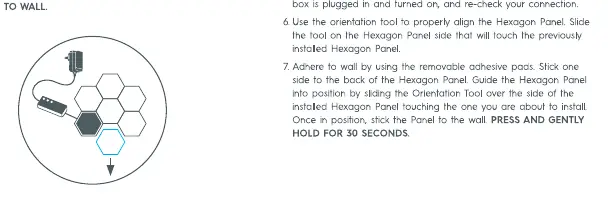
- Use the orientation tool to align the panel correctly.
- Stick the panel to the wall using adhesive pads. Press and hold for 30 seconds.
Optional Mounting with Nails
If adhesive pads are not suitable (e.g., wallpaper, brick, textured surfaces), use the provided traceless nails.
- Disconnect the panel from power and use the removal tool to separate it from the bracket.
- Place the mounting bracket on the wall with Input/Output ports facing away from the wall.
- Hammer the traceless nails into the provided holes.
- Orient the panel so the arrows align with the bracket and press until it clicks into place.
- Reconnect power.
Maintenance and Removal
Using the Panel Remover Tool: Insert the tool between the panel and the mounting bracket to unlatch it. Repeat on each side of the bracket.

Removing and Repositioning:
- Unplug power.
- Use the removal tool to separate the panel from the bracket.
- Pull the tab to stretch the adhesive strip slowly against the wall to remove the bracket.
- Adhesive strips are not reusable; purchase new ones for reinstallation.
Support
For further assistance, visit cyncsupportgelighting.com or call 844-302-2943.
Official resources from the manual
Practical help
Common problems
Panel does not light up
Ensure the control box is plugged in and turned on. Verify that linking cables are securely connected to the correct Input/Output ports.
Adhesive not sticking
Ensure the wall was cleaned with the provided wipe. Note that adhesive pads may not adhere to wallpaper, brick, or textured/porous surfaces.
Difficulty removing panels
Use the provided Panel Remover Tool to gently unlatch the bracket. Do not pull the panel from two sides at once to avoid damage.
Before use
- Download the Cync App.
- Clean the wall surface thoroughly with the provided wipe.
- Plan your layout using the provided templates.
- Verify you have enough power (max 20 panels per adapter).
- Check if your wall surface is compatible with adhesive pads.
Specs in practice
- Daisy Chaining
- Connecting panels in series; do not use more than one output port on any single panel.
Images and diagrams
- Arrows on the panel indicate the direction of power flow.
- Linking cables connect the Output Port of one panel to the Input Port of the next.
Model compatibility
- Adhesive pads are not suitable for wallpaper, brick, or textured/porous surfaces.
- One power adapter supports up to 20 Hexagon Panels.

Manual page author
David Miller
Documentation analyst
Organizes user manual content into clear summaries, with attention to model details, product context, and everyday usability.