Lighting / Stage Lighting
User Manual for QTX Recharge Performer LED PAR Bar 151546UK
Quick guide for the QTX Recharge Performer LED PAR Bar (151546UK). Learn how to set up the tripod, use DMX controls, operate the remote, and troubleshoot common issues.
Table of contents
Manual images
Click an image to enlargeQuick Guide
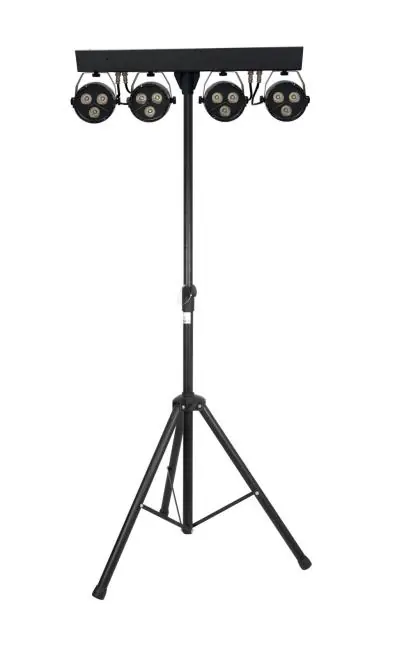
The QTX Recharge Performer is a portable lighting set featuring 4 RGBW PAR lights mounted on a T-bar. It includes an internal lithium battery providing up to 6 hours of operation. The unit can be controlled via DMX, the included infra-red remote, or built-in auto and sound-activated programs.
Setup and Placement
- Tripod Assembly: Open the tripod legs on a flat, stable surface away from walkways. Ensure all thumbscrews are tightened.
- Mounting: Attach the T-bar to the top of the stand and tighten the thumbscrew securely.
- Environment: Keep the unit away from damp or dusty environments. Ensure adequate air-flow around the fixture housings.
- Safety: Do not aim LED or laser output directly into the line of sight to prevent eye injury.
Control Panel and Menu
The rear panel features a display and four buttons: MENU, UP, DOWN, and ENTER.

- Press MENU to enter the settings menu.
- Use UP and DOWN to navigate functions.
- Press ENTER to confirm settings.
Key menu functions include:
- d001–d512: DMX address setting.
- IP.01–IP.64: IP mode.
- A1.01–A1.18: Static Colour selection.
- A2.01–A2.32: Colour Jump (speed adjustment).
- A3.01–A3.19: Multi Colour selection.
- A4.01–A4.04: Sound to Light function.
- A5.01–A5.32: Strobe function.
- r/G/b/u: Individual colour intensity adjustment (000-255).
DMX Operation
To use DMX mode, connect the DMX signal source to the DMX input using a balanced XLR lead. You can daisy-chain extra fixtures via the DMX output.
- Select A001 from the menu to enter DMX mode.
- Confirm the start address using the UP/DOWN and ENTER buttons.
- The 'A' on the LED display will flash when a DMX signal is received.
- The unit utilizes 8 DMX channels for control over macros, speed, master dimmer, and individual RGBW dimming.
Remote Control
The included remote allows for quick adjustments without accessing the rear panel. Functions include:

- Blackout: On/off.
- Modes: Colour jump, strobe, sound active, and colour gradual change.
- Adjustments: Colour adjust, speed adjust, DMX channel selection, and running effect adjustment.
Cleaning and Maintenance
- Use a soft cloth with a neutral detergent to clean the casing.
- Use a vacuum cleaner to clear dust or debris from ventilation grilles.
- Do not use strong solvents.
- The unit is not serviceable by the end user; refer to qualified personnel for repairs.
Troubleshooting
- No power: Check battery charge, mains voltage, and the IEC lead/fuse.
- No light output: Check control panel mode settings and DIN connections for each fixture.
- Unresponsive to DMX: Ensure the unit is in DMX mode, the 'd' on the display is flashing, the controller is not set to black out, and the DMX address is correct.
- Overheating: Ensure adequate ventilation and keep the unit away from heat sources.
Specifications
- Power supply: 100-240Vac, 50/60Hz
- Battery: 12V 7200mAh lithium (up to 6 hours)
- Effects: 4x RGBW LED PAR
- Modes: Auto, sound, master/slave, DMX512
- DMX Channels: 8CH
- Height adjustment: 1.8m to 2.3m
- Weight: Stand 1.3kg, Effects bar 3.7kg
Practical help
Common problems
No power
Check if the unit has sufficient battery charge, verify mains voltage, and inspect the IEC lead and fuse.
No light output
Check control panel mode settings and verify DIN connections for each fixture.
Unresponsive to DMX
Ensure the unit is in DMX mode (look for flashing 'd'), check that the controller is not in black-out mode, verify the DMX address, and check connections.
Overheating/cutting out
Ensure adequate ventilation around the unit and keep it away from external heat sources.
Before use
- Ensure tripod legs are stable and thumbscrews are tightened.
- Attach the T-bar securely to the stand.
- Charge the internal battery fully before first use.
- Verify the unit is placed away from damp or dusty environments.
- Check that the mains voltage is correct if using a power source.
Specs in practice
- DMX Channels
- 8 channels used for controlling macros, dimming, and speed.
- Height adjustment
- The stand can be adjusted between 1.8m and 2.3m.
Images and diagrams
- The rear panel diagram identifies the power switch, IEC input, DMX ports, control buttons, and microphone.
- The remote control diagram illustrates buttons for blackout, strobe, sound mode, and various colour/speed adjustments.
Model compatibility
- Compatible with standard DMX512 controllers.
- Requires balanced XLR leads for DMX signal connection.

Manual page author
Michael Turner
Technical manual editor
Reviews PDF manuals for structure, safety notes, and practical product details so readers can find the right information quickly.