Electronics / Security Cameras
User Manual for Ring Floodlight Cam Wired Pro
Quick setup and installation guide for the Ring Floodlight Cam Wired Pro. Includes wiring instructions, mounting steps, safety warnings, and technical specifications.
Table of contents
Manual images
Click an image to enlargeQuick guide from the manual
This document provides essential installation and setup instructions for the Ring Floodlight Cam Wired Pro. Before beginning, ensure you have a 4-inch round UL-listed weatherproof electrical box. If you are inexperienced with electrical wiring, it is strongly recommended to hire a licensed electrician.
Safety information
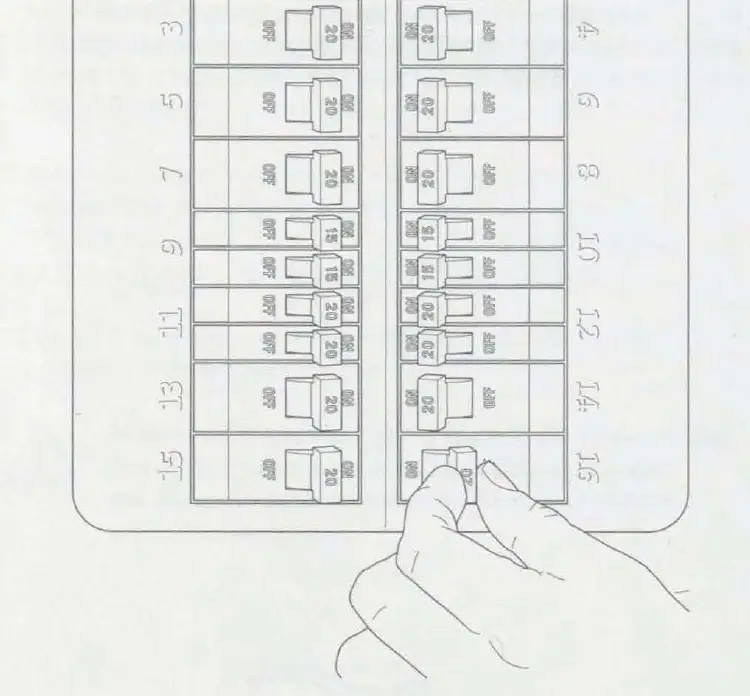
Warning: Risk of electrical shock. Always disconnect power at the fuse or circuit breaker before starting any installation work. Do not install the device if you are unsure about the wiring or if the device appears damaged.
- Do not install near combustible or flammable surfaces.
- Do not connect this light fixture to a dimmer switch or timer.
- Do not install on the ground; mount to a wall or eave.
- Do not install when it is raining.
- Do not stare directly at the LEDs for more than a few seconds.
Installation preparation
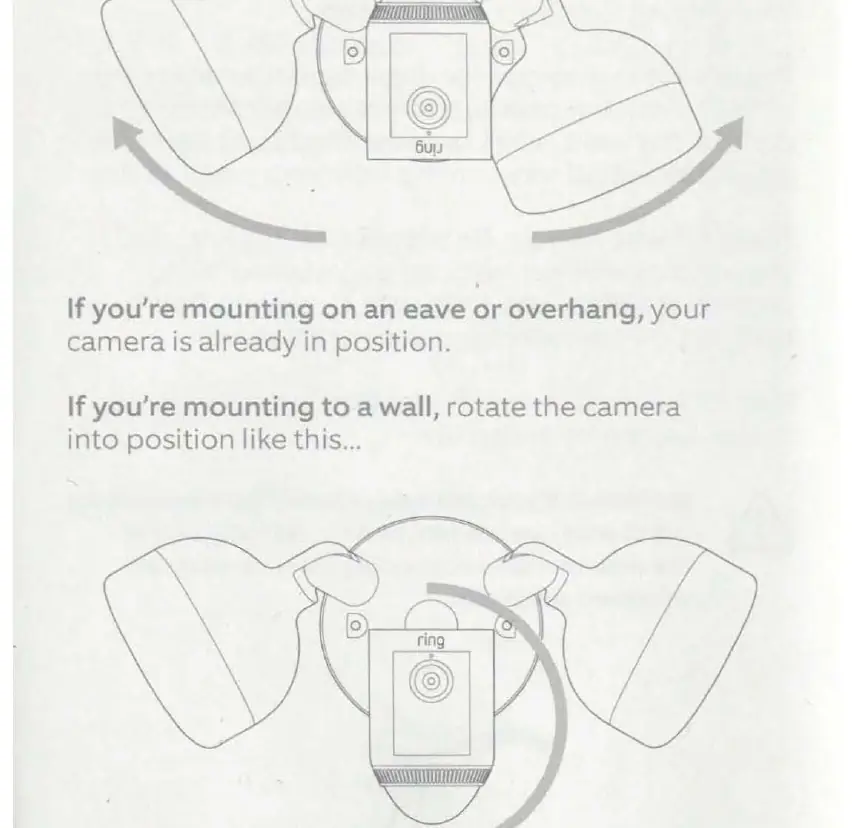
Before mounting, ensure the power is off at the breaker. Prepare the camera by rotating the lights and camera head into the desired position based on your mounting location (wall or eave). Remove your existing floodlight and any old metal brackets from the junction box.
Mounting the floodlight
Select the appropriate screws from the provided bags (A-F) to secure the metal mounting bracket to your junction box. Ensure the "FRONT" text on the bracket faces outwards. Install the plastic mounting plate over the bracket, ensuring the "UP" arrow points in the correct direction for your installation (up for walls, towards the wall for eaves). Secure it with a screw from Bag B or C. Use the provided nylon strap to hang the light fixture from the mounting plate while you connect the wires.
Wiring instructions
Connect the wires from the Floodlight Cam to the wires in your junction box using the provided wire nuts (Bag H):
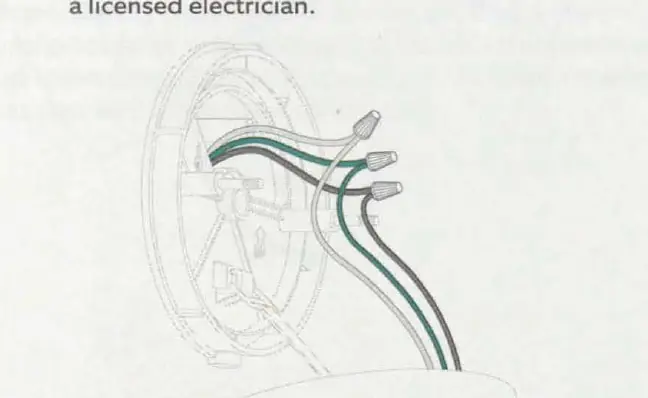
- Green wire: Connect to the green (ground) wire.
- White wire: Connect to the white (neutral) wire.
- Black wire: Connect to the black (hot) wire.
Give all connections a gentle tug to ensure they are secure. Tuck the wires into the junction box, align the fixture with the threaded posts, and secure it using the hex cap nuts from Bag G.
Final setup
Restore power at the breaker. The lamps will flash once powered on. Open the Ring app on your smartphone, select "Set Up a Device," and scan the QR code provided in the manual to complete the configuration.
Technical specifications
The device operates on a 100-240V, 50/60 Hz power source. The operating temperature range is -5°F to 118°F (-20.5°C to 48°C).
Manufacturer information
Ring
Practical help
Common problems
Cannot identify wires in the junction box
Consult a licensed electrician for assistance.
Risk of fire
Do not install near combustible or flammable surfaces.
Risk of electrical shock
Disconnect power at the fuse or circuit breaker before installing.
Before use
- Verify supply voltage is 100-240V
- Ensure a 4-inch round UL-listed weatherproof electrical box is installed
- Turn off power at the breaker
- Have a licensed electrician available if inexperienced
- Check that the mounting surface is suitable for outdoor use
Specs in practice
- Electrical Rating
- Hardwired (100 to 240V)
- Temperature Rating
- -5°F to 118°F (-20.5°C to 48°C)
Images and diagrams
- Wiring diagram shows connection of green, white, and black wires using wire nuts.
- Mounting bracket alignment instructions with 'FRONT' text facing outwards.
- Camera rotation instructions for wall or eave mounting.
- Breaker panel shut-off procedure.
Model compatibility
- Requires 4-inch round UL-listed weatherproof electrical box.
- Not for use with dimmer switches or timers.

Manual page author
Michael Turner
Technical manual editor
Reviews PDF manuals for structure, safety notes, and practical product details so readers can find the right information quickly.