Automotive / Suspension Kits
Installation Manual for Rough Country 1268BAG4 Lift Kit
Comprehensive installation guide for the Rough Country 1268BAG4 3.5" Front / 1.5" Rear Lift Kit. Includes step-by-step instructions for front and rear suspension modification, torque specifications, and post-installation requirements.
Table of contents
Manual images
Click an image to enlargeQuick guide from the manual
This document provides installation instructions for the Rough Country 1268BAG4 lift kit, designed for GM 2007-16 2WD 1500 vehicles. The kit raises the front by 3.5 inches and the rear by 1.5 inches. Installation should be performed by a certified technician. Key requirements include immediate vehicle alignment after installation and periodic retightening of hardware at 50, 500, and every 3,000 miles.
Product use information
The vehicle's center of gravity is raised, which may increase the risk of rollover. Braking performance may decrease with larger tires. Do not mix component brands or alter parts to exceed the intended lift height. This kit was developed using 32 x 11.5 tires with factory wheels; wider tires may require offset wheels and trimming of the front lower skirting.
Tools and torque specifications
Required tools include: 18mm, 17mm, 15mm, 21mm, 11mm, and 9/16 inch wrenches, a floor jack, and jack stands.
Torque specifications:
- 10mm: 32ft/lbs (Class 8.8) or 45ft/lbs (Class 10.9)
- 12mm: 55ft/lbs (Class 8.8) or 75ft/lbs (Class 10.9)
- 14mm: 85ft/lbs (Class 8.8) or 120ft/lbs (Class 10.9)
Front installation
- Park on a level surface and chock the rear wheels. Jack up the front and place jack stands under the frame rails.
- Remove tires, wheels, and factory skid plates.
- Remove the tie-rod nut and dislodge the tie-rod end from the knuckle.
- Unplug the ABS sensor wire from the frame.
- Remove the upper ball joint nut and separate the upper control arm from the knuckle.
- Remove the upper strut nuts and the bolts securing the lower strut mount to the control arm. Remove the strut.
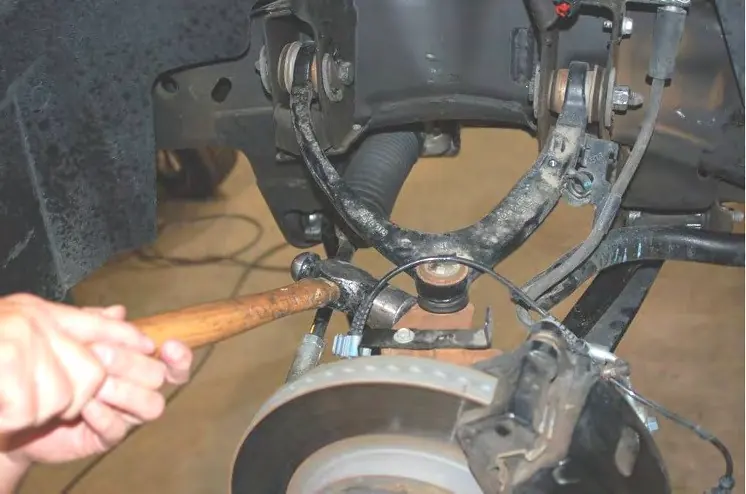
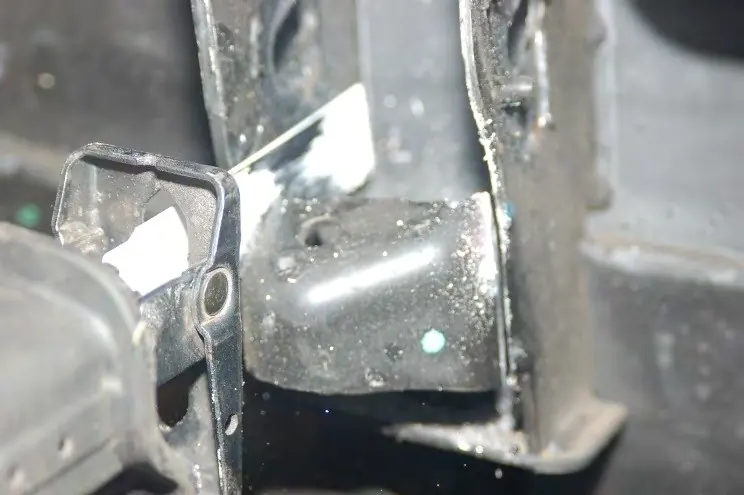
- Cut the bump stop from the upper control arm mount on both sides using a reciprocating saw. Grind and paint the cut surface to prevent rust.
- Reinstall the factory control arm using factory hardware.
- Install the supplied 10mm bolts into the strut spacer. Place the spacer on top of the strut and secure with supplied lock nuts.
- Install the strut assembly into the factory mount and secure the lower strut mount to the control arm using supplied hardware.
- Reinstall the sway bar, control arm, tie-rod end, and wheels.
Rear installation
- Chock the front wheels. Jack up the rear of the vehicle and place jack stands under the frame rails.
- Remove tires, wheels, and factory shock absorbers.
- Remove factory u-bolts and blocks. Lower the axle to allow for the new 3-inch block installation.
- Install the block on the spring pad with the flat part on the spring and the thinner end towards the front. Align the center pin.
- Install new u-bolts and tighten in a crossing pattern.
- Install new shock absorbers (part # 660738) using factory hardware.
- Reinstall tires and wheels. Lower the vehicle to the ground.
Post-installation instructions
Have a qualified alignment center align the vehicle immediately. Adjust headlights to proper settings. Retighten wheels at 50 miles. Retighten all kit components at 500 miles and every 3,000 miles thereafter. Install the provided Warning to Driver decal on the sun visor.
Practical help
Common problems
Vehicle height increase
Do not add, alter, or fabricate parts to increase vehicle height over the intended height of the Rough Country product.
Tire clearance issues
If using wider tires than 32 x 11.5, offset wheels will be required and trimming of the front lower skirting may be necessary.
Alignment
A qualified alignment center must align the vehicle immediately after installation.
Before use
- Verify all kit hardware against the parts list on the rear cover.
- Ensure you have all required tools (18mm, 17mm, 15mm, 21mm, 11mm, 9/16 wrenches, floor jack, jack stands).
- Park the vehicle on a level surface.
- Chock the wheels before lifting the vehicle.
- Ensure the vehicle is supported by jack stands, not just the floor jack.
Images and diagrams
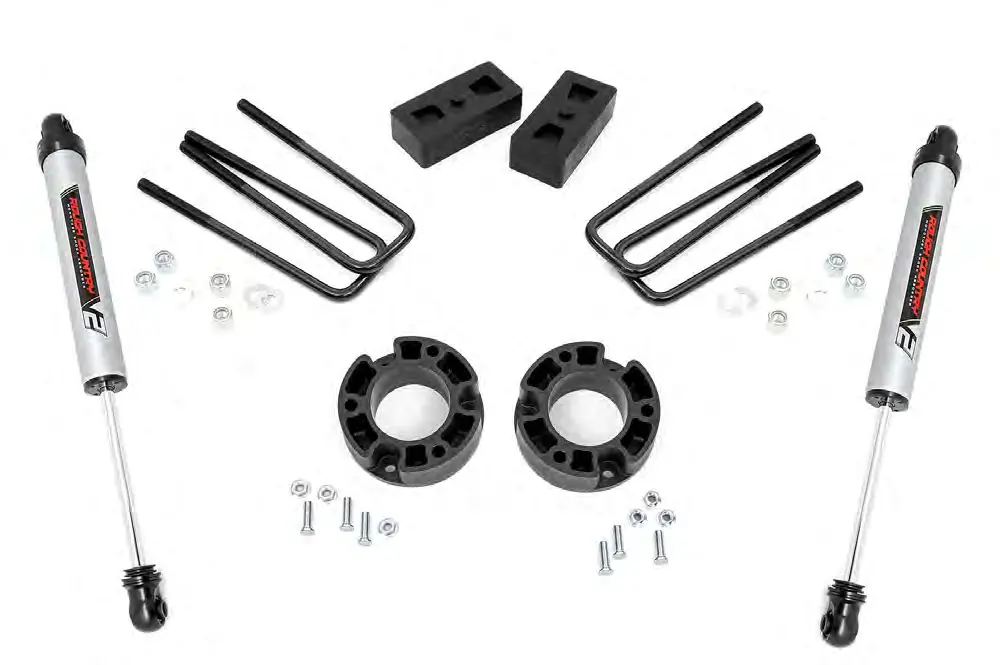
- The kit includes strut spacers, rear blocks, u-bolts, and rear shock absorbers.
- Bump stops must be cut from the upper control arm mount during front installation.
- Rear blocks must be installed with the flat part on the spring and the thinner end towards the front.
Model compatibility
- Designed for GM 2007-16 2WD 1500 vehicles.
- Developed using 32 x 11.5 tires with factory wheels.

Manual page author
Michael Turner
Technical manual editor
Reviews PDF manuals for structure, safety notes, and practical product details so readers can find the right information quickly.