Sports / Fitness
User Manual for Scosche MagicMount Pro2 Extendo
Quick guide for the Scosche MagicMount Pro2 Extendo. Learn how to install the window/dash mount, adjust the telescoping arm, and set up your smartphone with or without a MagSafe case.
Table of contents
Manual images
Click an image to enlargeQuick guide from the manual
This guide provides instructions for setting up and installing the Scosche MagicMount Pro2 Extendo. It covers device compatibility, mounting procedures for both window and dashboard surfaces, and adjustments for the telescoping arm and mount head.
Included elements
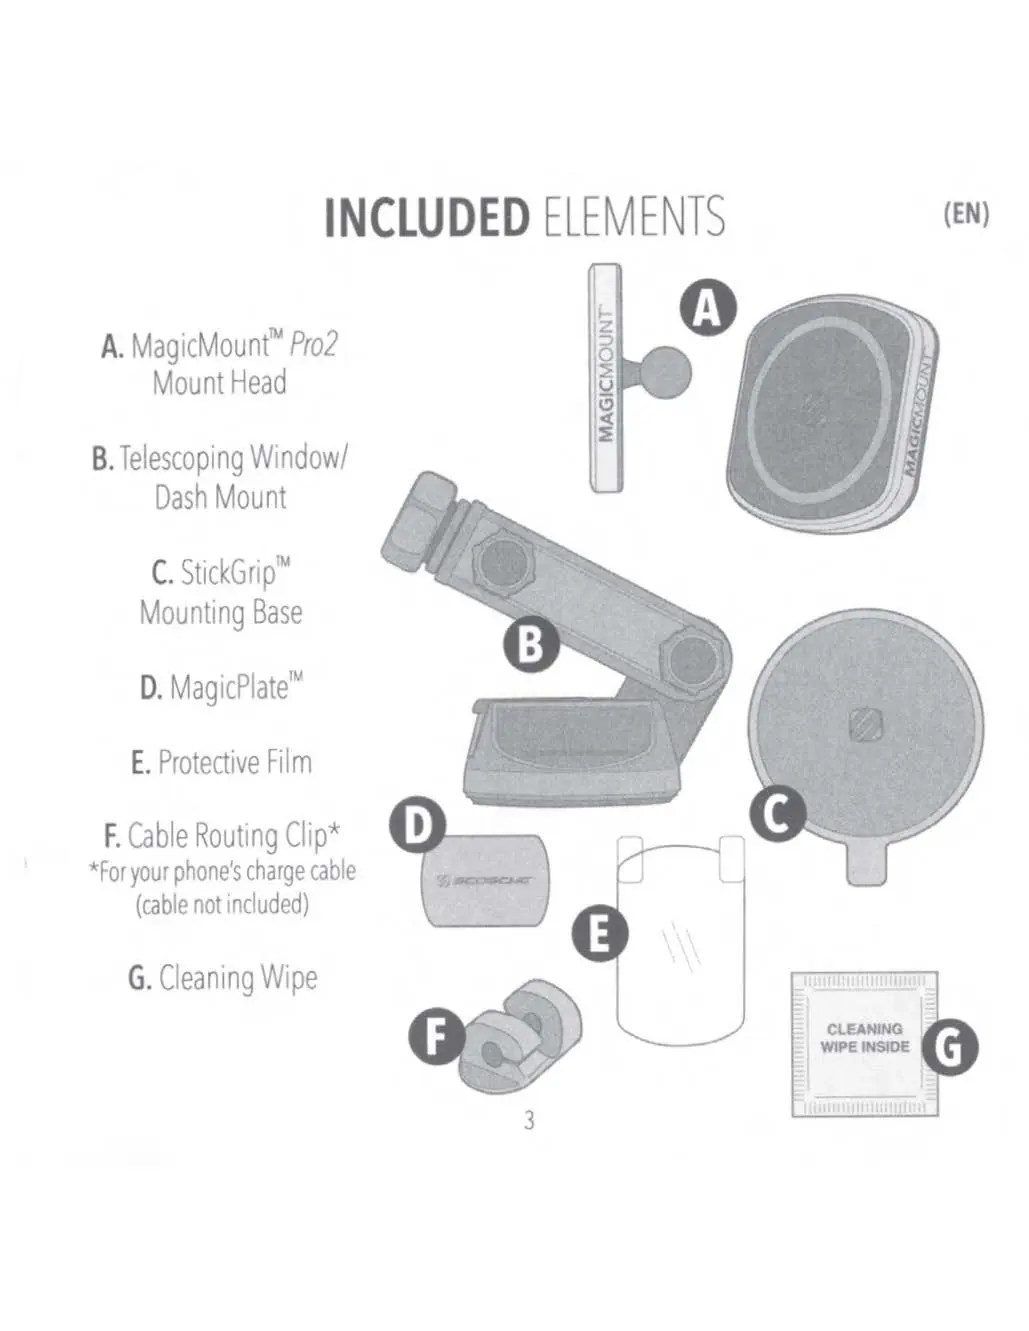
- MagicMount Pro2 Mount Head
- Telescoping Window/Dash Mount
- StickGrip Mounting Base
- MagicPlate
- Protective Film
- Cable Routing Clip
- Cleaning Wipe
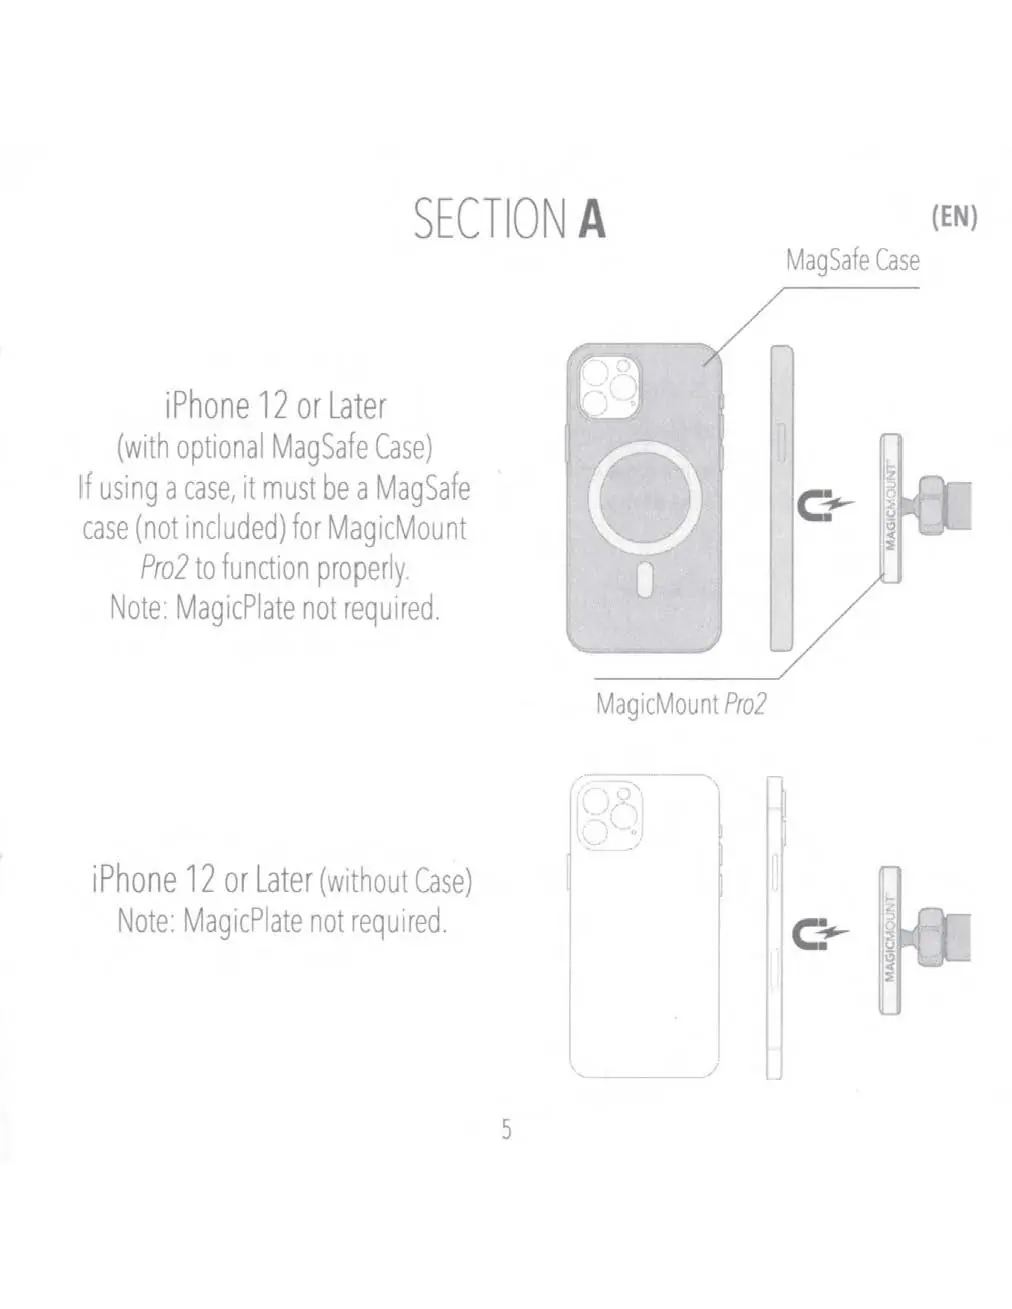
Device setup
iPhone 12 or Later (with optional MagSafe Case): If using a case, it must be a MagSafe case for the mount to function properly. The MagicPlate is not required.
Wireless Charging Smartphones: For phones with a case, the MagicPlate is required. For phones without a case, it is recommended to use the included Protective Film before applying the MagicPlate. This film simplifies the removal process if needed. Do not use sharp or hard objects to remove the MagicPlate as this may damage the device.
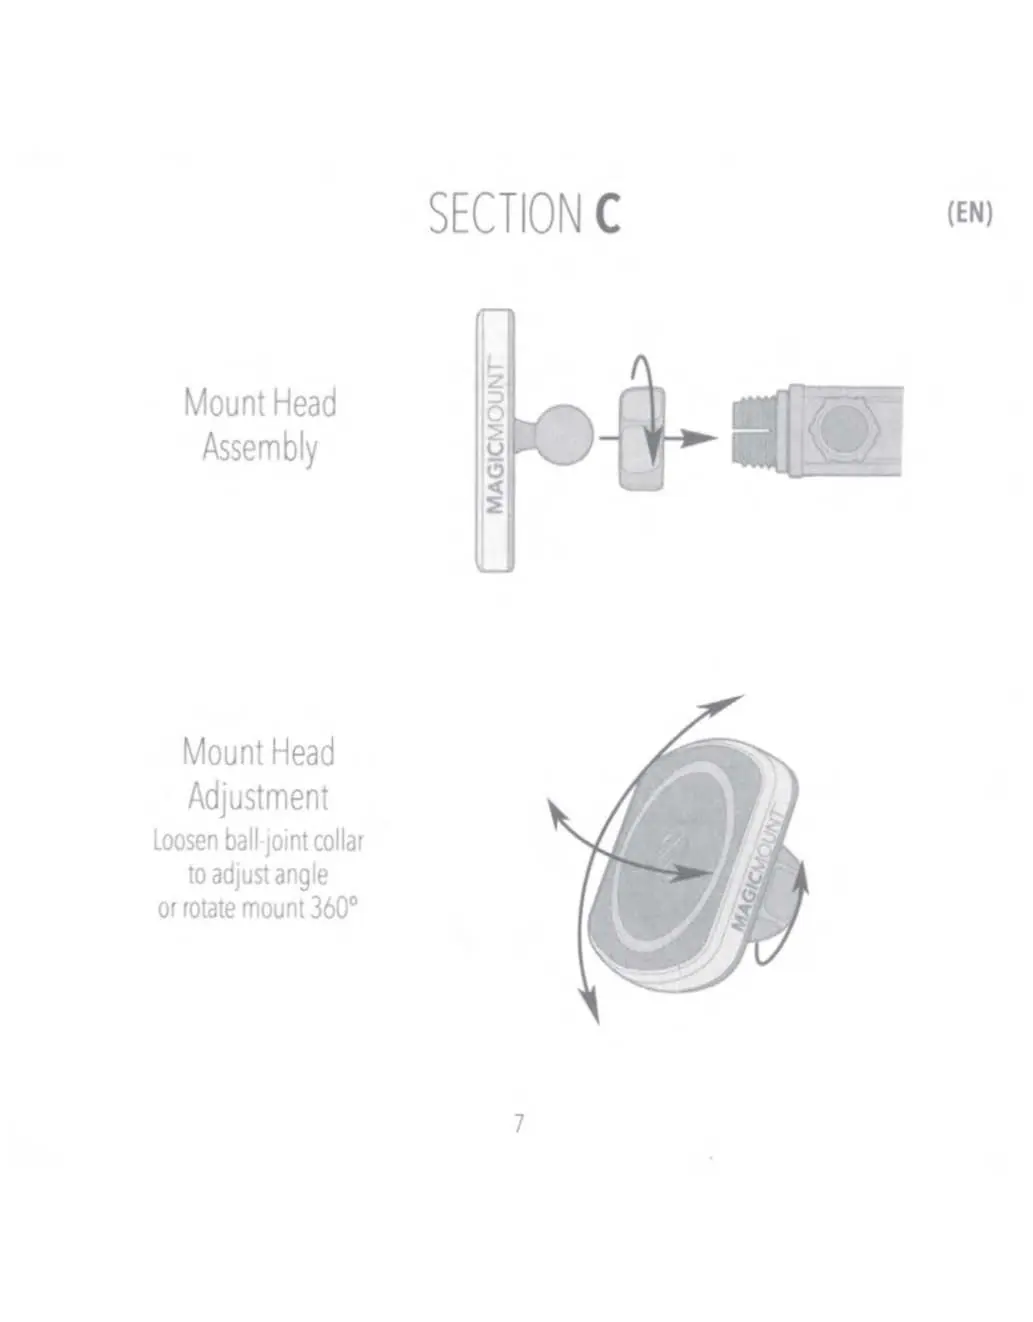
Mount head assembly and adjustment
To assemble the mount head, attach it to the ball joint. To adjust the angle or rotate the mount 360 degrees, loosen the ball-joint collar, position the mount as desired, and tighten the collar to secure it.
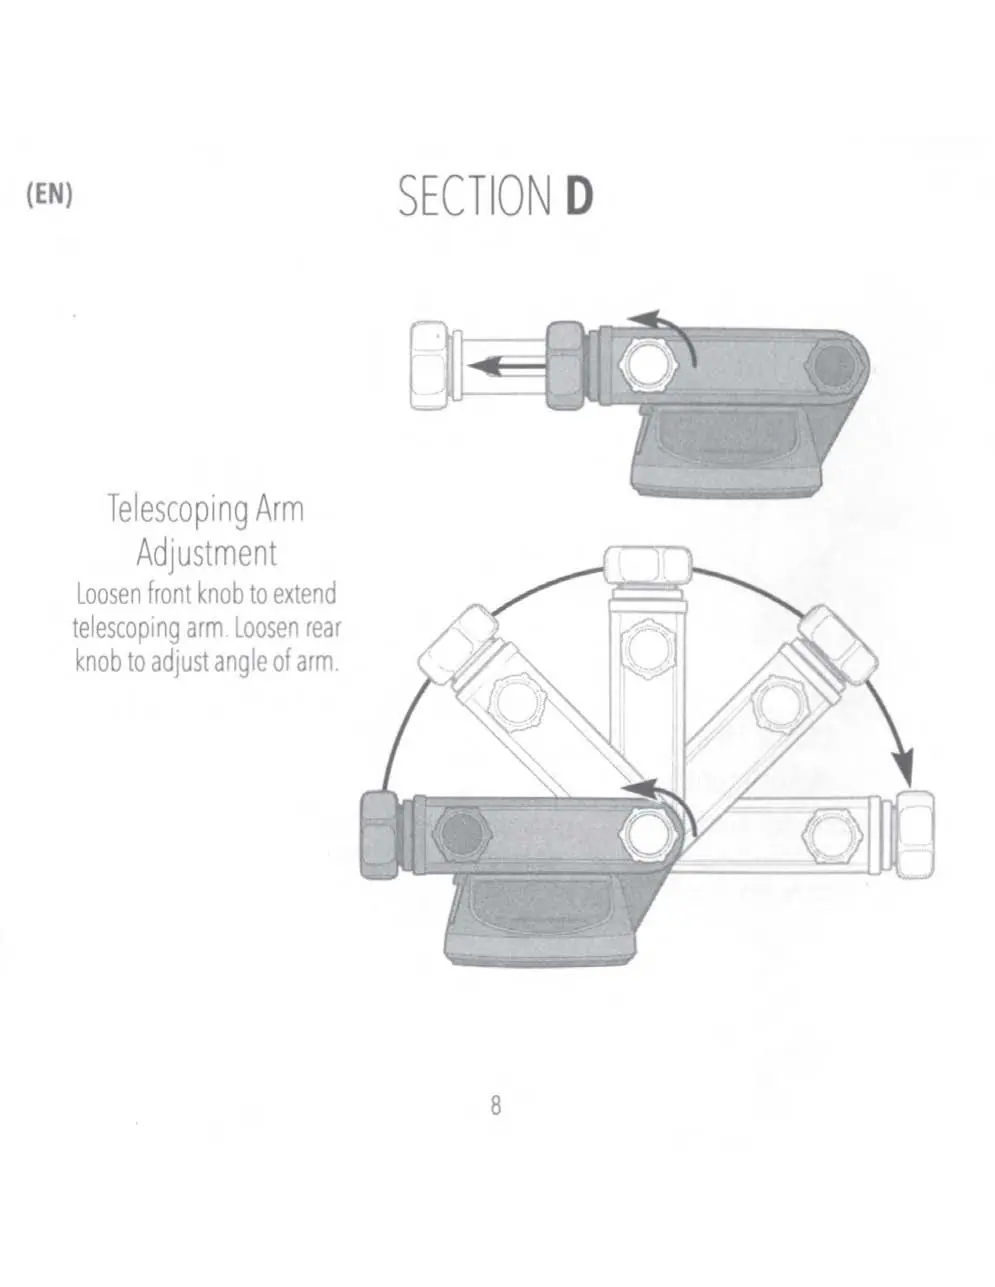
Telescoping arm adjustment
The mount features a telescoping arm for reach and angle adjustments. Loosen the front knob to extend the telescoping arm. Loosen the rear knob to adjust the angle of the arm. Tighten both knobs securely after adjustment.
Installation
Window Mount: Clean the window surface. With the lever in the UP position, place the mount on the window and press the lever down to lock it in place.
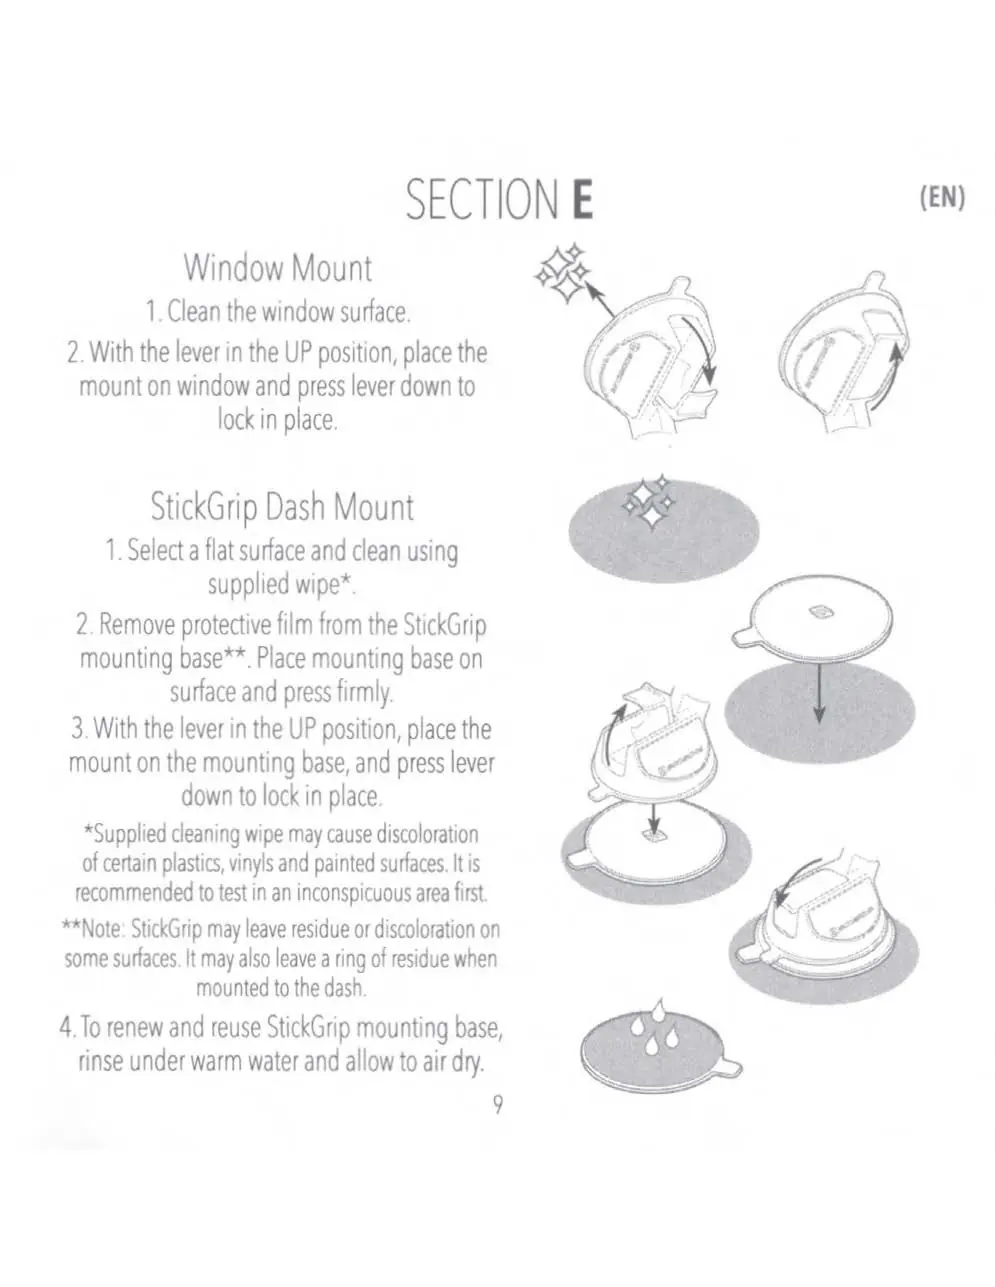
StickGrip Dash Mount: Select a flat surface and clean it using the supplied wipe. Remove the protective film from the StickGrip mounting base and press it firmly onto the surface. With the lever in the UP position, place the mount on the mounting base and press the lever down to lock it in place. To renew and reuse the StickGrip base, rinse it under warm water and allow it to air dry.
Note: The supplied cleaning wipe may cause discoloration on certain plastics, vinyls, and painted surfaces. Test in an inconspicuous area first. StickGrip may leave residue or discoloration on some surfaces.
Manufacturer information
Scosche Industries, Inc.
Practical help
Common problems
Mount will not lock in place
Ensure the lever is in the UP position before placing the mount on the surface, then press the lever down to lock.
StickGrip base loses adhesion
Rinse the StickGrip mounting base under warm water and allow it to air dry to renew its adhesive properties.
Cleaning wipe causes surface damage
The supplied cleaning wipe may discolor certain plastics, vinyls, or painted surfaces. Always test on an inconspicuous area first.
Before use
- Clean the mounting surface thoroughly using the provided wipe.
- Determine if your phone requires a MagicPlate (not required for MagSafe cases).
- Ensure the lever is in the UP position before attempting to lock the mount.
- Apply the protective film to your device before attaching the MagicPlate if not using a case.
Specs in practice
- 360-degree rotation
- Allows the mount head to be rotated fully for optimal viewing angles.
- Telescoping arm
- Adjustable length arm to bring the device closer or further away.
Images and diagrams
- Section C: Illustrates the assembly of the mount head and the ball-joint collar adjustment.
- Section D: Shows the location of the front and rear knobs for extending and angling the arm.
- Section E: Demonstrates the lever mechanism for locking the mount to the window or dash base.
Model compatibility
- iPhone 12 or later with MagSafe case: MagicPlate not required.
- Wireless charging smartphones with case: MagicPlate required.
- Wireless charging smartphones without case: Protective film recommended before applying MagicPlate.

Manual page author
Michael Turner
Technical manual editor
Reviews PDF manuals for structure, safety notes, and practical product details so readers can find the right information quickly.