Automotive / Garage Equipment
User Manual for Sealey 135KG Hydraulic Lift MC135
Comprehensive user guide for the Sealey 135KG Hydraulic Lift (MC135). Includes assembly instructions, safe operation procedures, maintenance tips, and technical specifications for off-road motorcycle maintenance.
Table of contents
Manual images
Click an image to enlargeQuick Guide from the Manual
The Sealey 135KG Hydraulic Lift is designed for off-road and trials motorcycles. Before first use, you must purge the hydraulic circuit to remove air. Always ensure the lift is placed on a solid, flat surface (preferably concrete) and that the motorcycle is properly secured using the provided anchor points or straps. Never exceed the 135kg weight capacity.
Safety Warnings
- Maximum Capacity: Do not exceed 135kg.
- Surface: Operate only on a level, solid surface. Do not use on tarmacadam.
- Securing: Ensure the bike is adequately strapped or secured to the platform before operating.
- Obstructions: Check for overhead obstructions before lifting.
- Safety Rod: Always engage the platform safety rod when the lift is raised to a working height to prevent accidental lowering.
- Prohibitions: Do not use if the lift fouls on the exhaust or vulnerable parts. Do not operate if damaged. Do not allow untrained persons to operate.
Specifications
- Model: MC135
- Capacity: 135kg
- Minimum Height: 335mm
- Maximum Height: 895mm
- Table Width: 350mm
- Table Length: 410mm
- Locking Heights: 490, 660, 780, 895mm
Assembly
Pedal Installation: Insert the lift pedal into the jack socket and secure it using the provided bolt. Note: The pedal should be fitted while the lift is in the lowered position.

Anchor Brackets: Fit the two anchor point brackets to the platform. Use four nuts per bracket, placing one on either side of the platform. Choose the position that best aligns with the foot pegs of your motorcycle.
Before First Use
To eliminate air from the hydraulic system, fully press the release valve pedal and pump the lift pedal 15 to 20 times. Test the lift unladen by raising it to full height and lowering it. Depress the release valve pedal slowly to control the descent rate.
Operation
- Position the lift on a solid, flat area.
- Wheel the bike over the lift so the center of gravity is over the platform.
- Depress the lift pedal to raise the platform to the underside of the bike.
- Secure the bike using the adjustable 'J hooks' into the footpegs and anchor points. If 'J hooks' are not suitable, use appropriate straps.
- Pump the lift pedal to raise the load.
- Insert the locking bar into the frame holes at the desired height (490, 660, 780, or 895mm) to prevent accidental lowering.
- To lower, remove the safety bar and slowly press the release valve pedal. The speed of descent is controlled by how far the pedal is depressed.
Maintenance
- Storage: Store in the lowest position to minimize ram and piston corrosion.
- Cleaning: Keep the lift clean and free of oil/grease. Lubricate moving parts with acid-free oil.
- Hydraulic Oil: Check the oil level by positioning the lift on a level surface and removing the filler plug. Add hydraulic oil as necessary. Use only good quality hydraulic oil (e.g., Sealey Hydraulic Oil); do not use brake fluid.
- Inspection: Check all parts before each use. If damaged, remove from service and repair.
Manufacturer information
Sealey Group
Practical help
Common problems
Lift will not lower or descends too quickly
The lowering speed is controlled by the release valve pedal. Press the pedal slowly to control the rate of descent. Ensure the descent is slow and controlled.
Air in the hydraulic system
Purge the system by fully pressing the release valve pedal and pumping the lift pedal 15 to 20 times.
Lift feels unstable
Ensure the lift is on a solid, flat surface (preferably concrete). Do not operate on tarmacadam. Verify the bike's center of gravity is over the platform.
Before use
- Check that the surface is solid, flat, and level.
- Purge the hydraulic circuit (pump pedal 15-20 times with release valve open).
- Ensure the motorcycle is properly secured to the platform using J-hooks or straps.
- Check for overhead obstructions.
- Verify the lift is not damaged.
Specs in practice
- 135kg Capacity
- The maximum weight of the motorcycle the lift can support.
- Locking Heights
- The four fixed positions (490, 660, 780, 895mm) where the locking bar can be inserted for safety.
- Hydraulic Oil
- Use only high-quality hydraulic oil. Never use brake fluid.
Images and diagrams
- Fig 1: Shows the insertion of the lift pedal into the jack socket.
- Fig 2: Shows the installation of anchor point brackets on the platform.
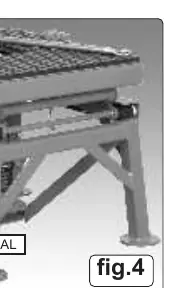
- Fig 4: Shows the location of the release valve pedal used for lowering.
Model compatibility
- Designed specifically for off-road and trials bikes.
- Requires a solid, flat surface (preferably concrete).

Manual page author
David Miller
Documentation analyst
Organizes user manual content into clear summaries, with attention to model details, product context, and everyday usability.