Electronics / Remote Controls
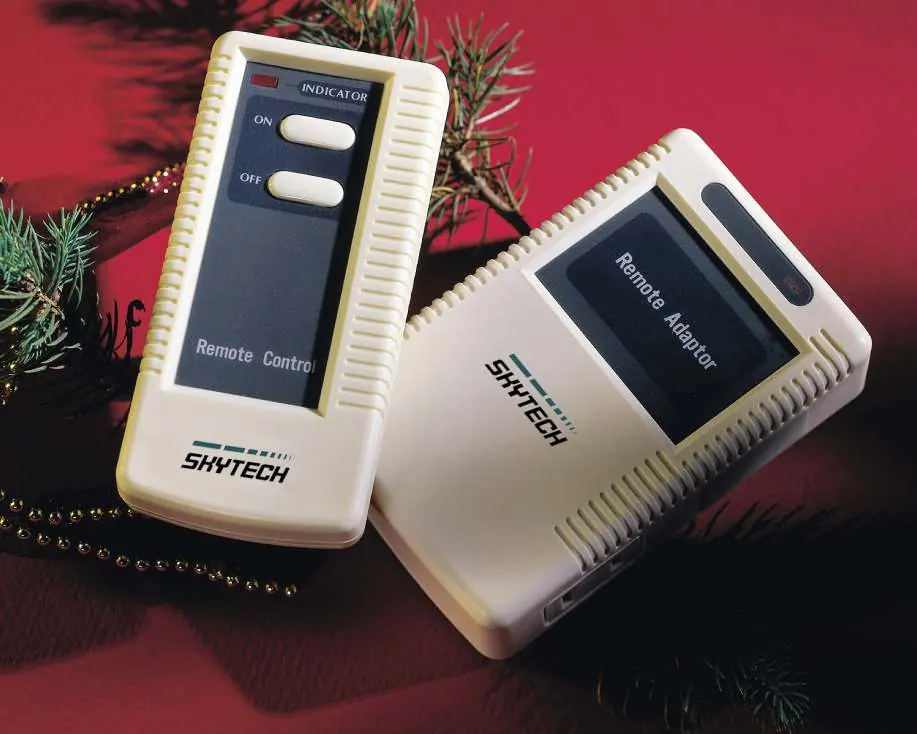
User Manual for Skytech 1420-A Remote Control
Quick guide for the Skytech 1420-A remote control system. Includes installation, wiring diagrams for millivolt and electronic spark ignition systems, pairing instructions, and troubleshooting.
Table of contents
Manual images
Click an image to enlargeQuick guide from the manual
The Skytech 1420-A is a remote control system designed for gas heating appliances. Safety Warning: This product is for use with attended hearth appliances. Adults must be present when the system is operating. Do not leave the appliance burning unattended.
Receiver Switch Positions:
- ON: Manually turns the appliance on.
- REMOTE: Enables the handheld transmitter.
- OFF: Disables the receiver. Use this position if you will be away for an extended period.
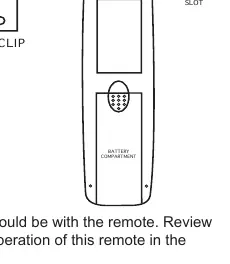
The transmitter uses a 12V (A23) battery. Ensure the battery is installed with the correct (+) and (-) orientation.
Installation and wiring
A qualified electrician should install the remote control system. Keep the receiver away from temperatures exceeding 130°F.
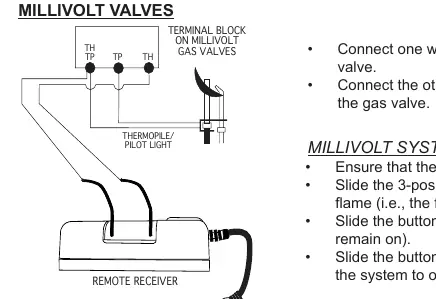
Millivolt Valves: Connect one wire from the receiver to the TH terminal on the gas valve and the other wire to the TH/TP terminal.
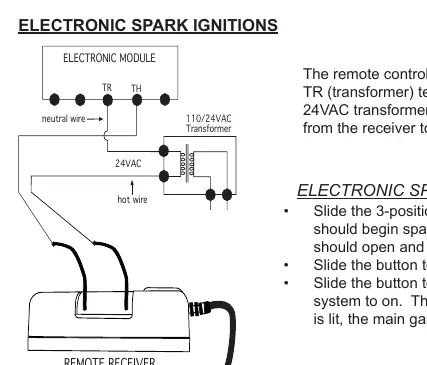
Electronic Spark Ignitions: Connect the receiver in series to a 24VAC transformer. Connect the hot wire from the transformer to one receiver wire, and the other receiver wire to the TH (thermostat) terminal on the electronic module.
Learning transmitter to receiver
The transmitter and receiver must be paired using the LEARN button:
- Ensure the receiver slide switch is in the REMOTE position.
- Locate the LEARN button on the front of the receiver (inside the small hole).
- Use a small screwdriver or paperclip to press and release the black LEARN button.
- The receiver will emit an audible beep.
- Press any button on the transmitter. The receiver will emit several beeps to confirm the code is accepted.
To clear all codes, press and hold the LEARN button for 10 seconds until you hear a series of beeps.
Troubleshooting
If the system does not respond:
- Ensure there is 110-volt power to the receiver.
- Check that the transmitter battery is fully charged and installed correctly.
- Ensure the transmitter and receiver are within the 20 to 25-foot operating range.
- If the receiver is in a tight enclosed metal area, the range will be reduced.
- Verify the receiver slide switch is in the REMOTE position.
- Re-pair the transmitter using the learning procedure.
Practical help
Common problems
System does not respond to transmitter
Check battery orientation and charge in the transmitter. Ensure the receiver switch is in the REMOTE position. Perform the learning procedure again.
Short operating range
Ensure the receiver is not installed in a tight enclosed metal surrounding, which blocks signals.
Appliance turns on unexpectedly
Ensure receiver wires are not touching each other or bare metal surfaces. Wrap connectors with electrical tape if necessary.
Before use
- Install 12V (A23) battery in the transmitter with correct polarity.
- Ensure the receiver is plugged into a 110-120 VAC receptacle.
- Set the receiver slide switch to the REMOTE position.
- Verify the pilot flame is lit (for millivolt systems).
- Ensure the receiver is placed away from extreme heat (above 130°F).
Specs in practice
- 12V (A23) Battery
- Required power source for the handheld transmitter.
- Dry Contact Relay
- The receiver acts as a switch; no power passes from the input side to the output wires.
Images and diagrams
- Millivolt wiring: Connects receiver to TH and TH/TP terminals on the gas valve.
- Electronic Spark wiring: Connects receiver in series with a 24VAC transformer and the TH terminal on the electronic module.
Model compatibility
- Designed for use with attended hearth appliances or fire features.
- Not for use when adults are not physically present.

Manual page author
Emily Carter
User documentation editor
Prepares concise manual descriptions and highlights the most useful setup, operation, and maintenance information for readers.